A small kitchen doesn’t mean you have to compromise on style or functionality. With thoughtful planning and creative design solutions, even the most compact culinary spaces can become efficient, beautiful, and enjoyable to work in. The key lies in understanding how to maximize every square inch while maintaining a sense of openness and aesthetic appeal.
Smart interior design transforms cramped kitchens into organized havens where cooking becomes a pleasure rather than a challenge. Whether you’re dealing with a tiny apartment galley kitchen or a modest suburban cooking space, the right strategies can make your kitchen feel significantly larger and more capable. From clever storage solutions to strategic color choices, each design decision plays a crucial role in optimizing your space.
This comprehensive guide explores proven techniques that interior designers use to create functional small kitchens that don’t sacrifice beauty for practicality. You’ll discover how vertical space, lighting, and multi-functional elements can revolutionize your compact kitchen, along with material choices and layout strategies that enhance both form and function.
1. Maximize Vertical Storage with Floor-to-Ceiling Cabinetry
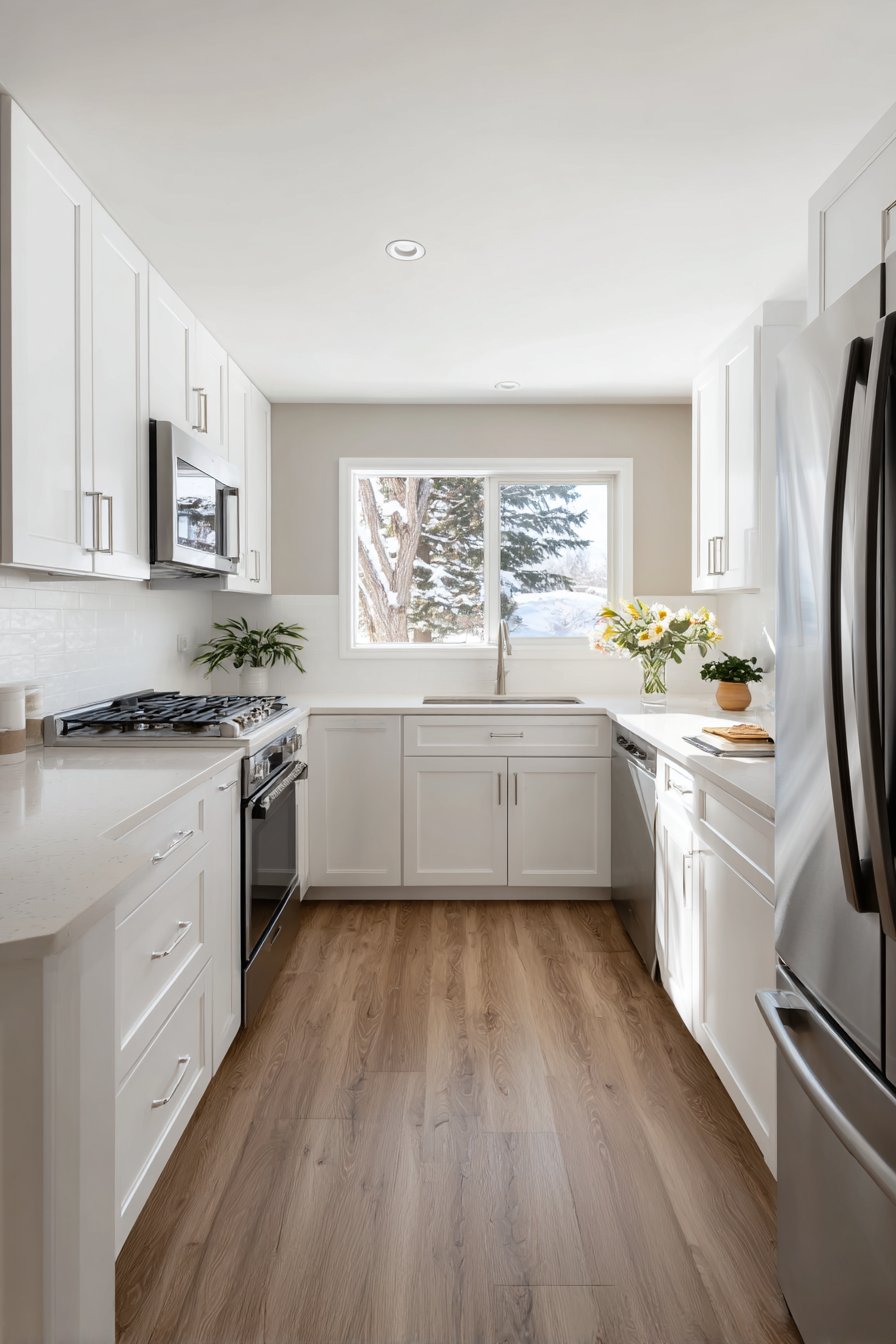
Vertical space represents the most underutilized area in small kitchens. Installing floor-to-ceiling cabinets immediately doubles your storage capacity while drawing the eye upward, creating an illusion of height. This design strategy eliminates wasted space above standard cabinets where dust typically accumulates.
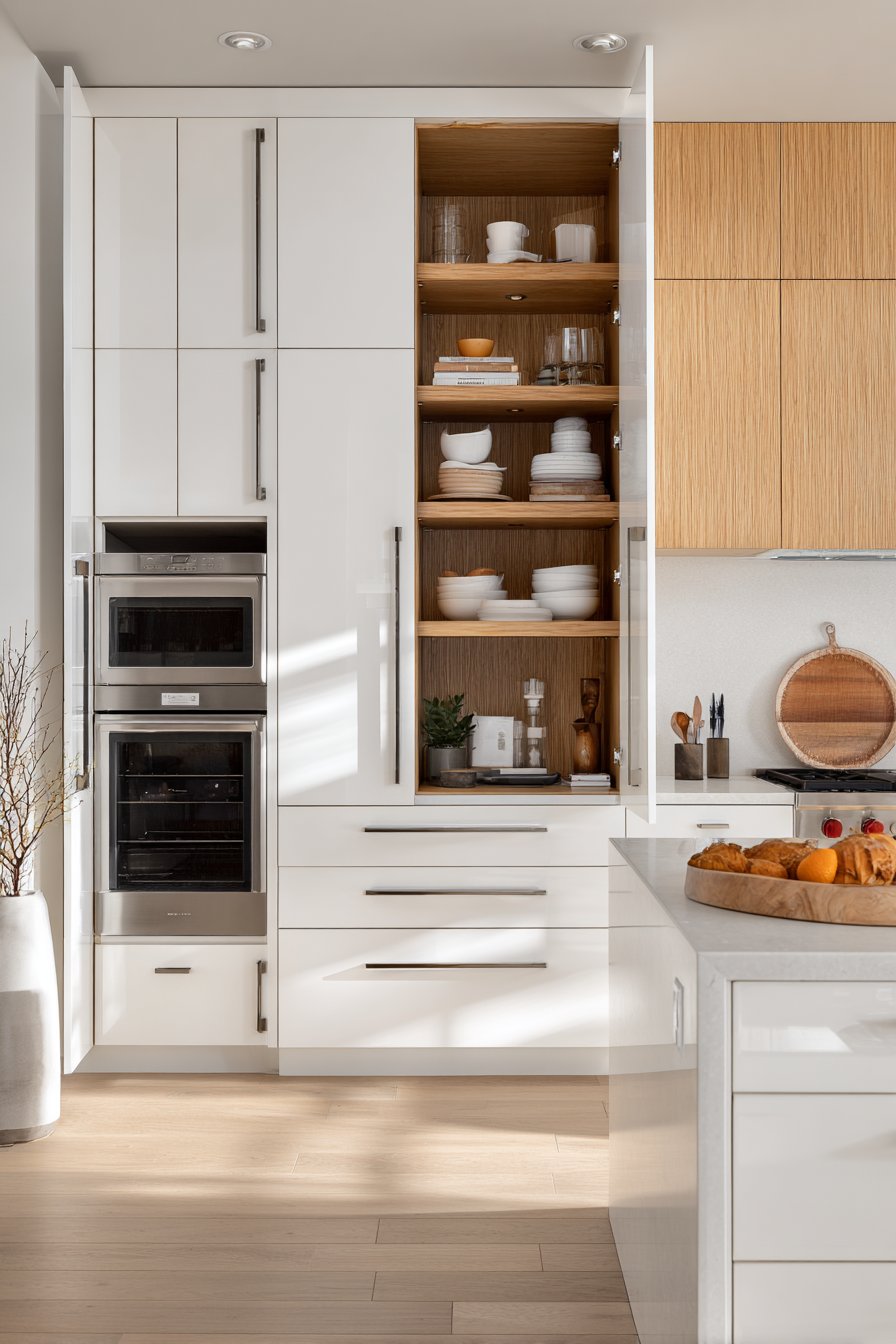
Custom cabinetry that reaches the ceiling provides dedicated zones for items you use less frequently on upper shelves, while keeping everyday essentials at arm’s reach. The continuous cabinet line also creates a streamlined, built-in appearance that makes kitchens feel more cohesive and professionally designed. Choose light-colored cabinet finishes to prevent the tall units from overwhelming the space.
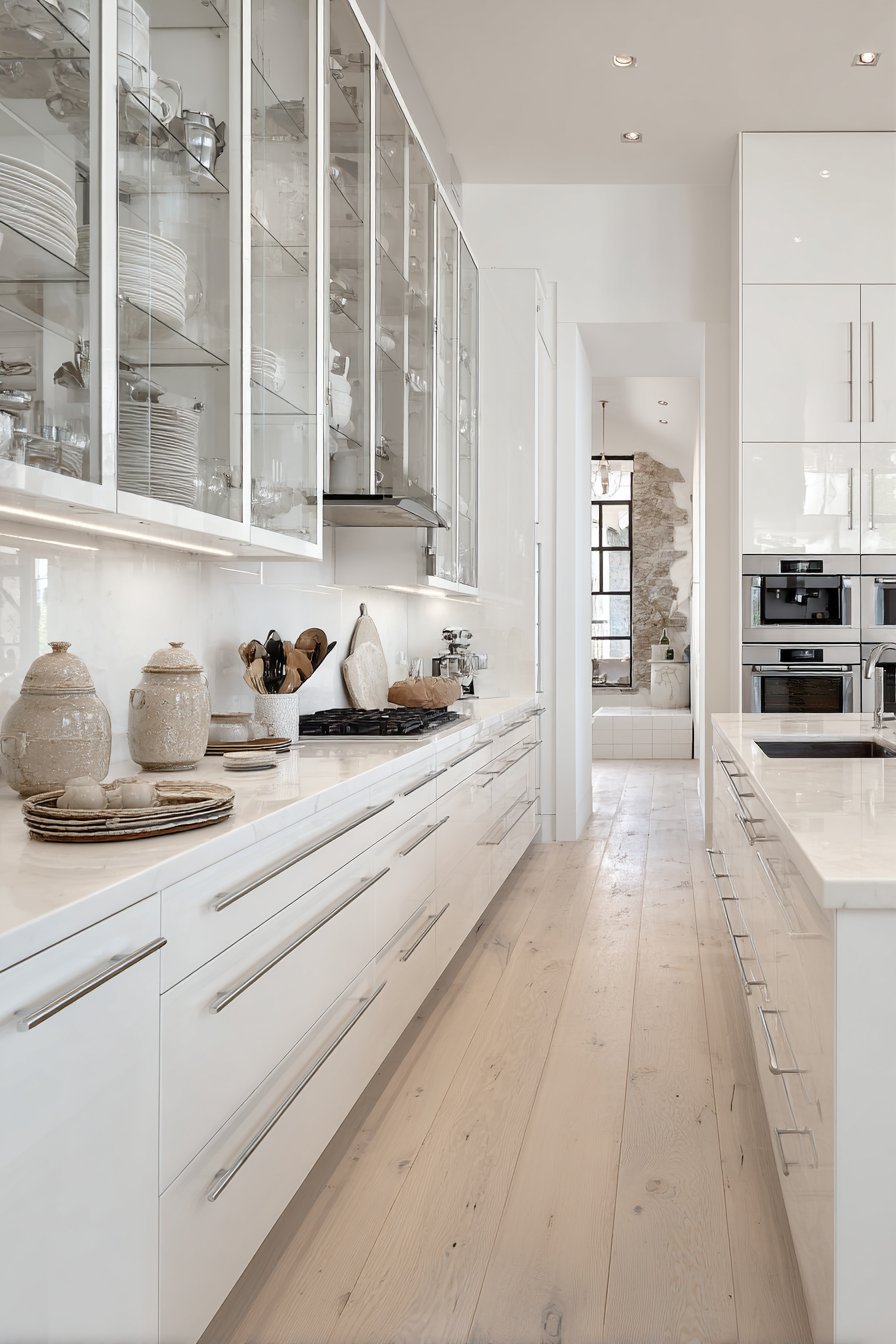
Consider installing open shelving on upper sections if floor-to-ceiling closed cabinets feel too heavy. This approach maintains storage capacity while introducing visual breathing room. Mix closed lower cabinets with open upper shelves for a balanced aesthetic that serves both practical and decorative purposes.
- Install cabinets that extend to within 3-6 inches of the ceiling for maximum storage
- Use the top shelves for seasonal items, specialty cookware, or decorative pieces
- Add interior lighting to upper cabinets to enhance visibility and ambiance
- Choose handle-less cabinet designs or slim hardware to maintain clean lines
- Incorporate pull-down shelving systems for easy access to high storage areas
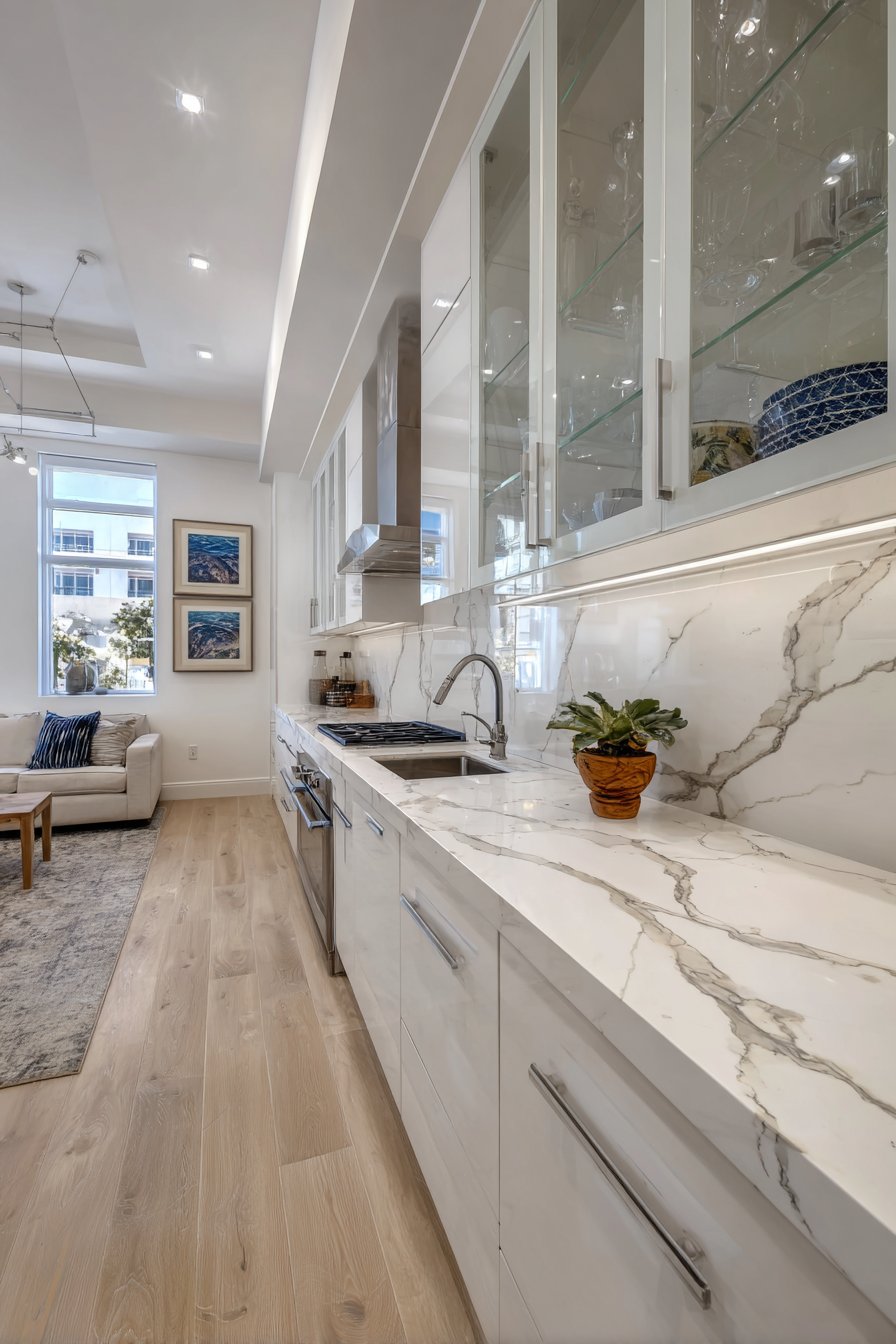
- Select glass-front upper cabinets to create depth while displaying beautiful dishware
2. Implement Strategic Lighting Layers for Visual Expansion
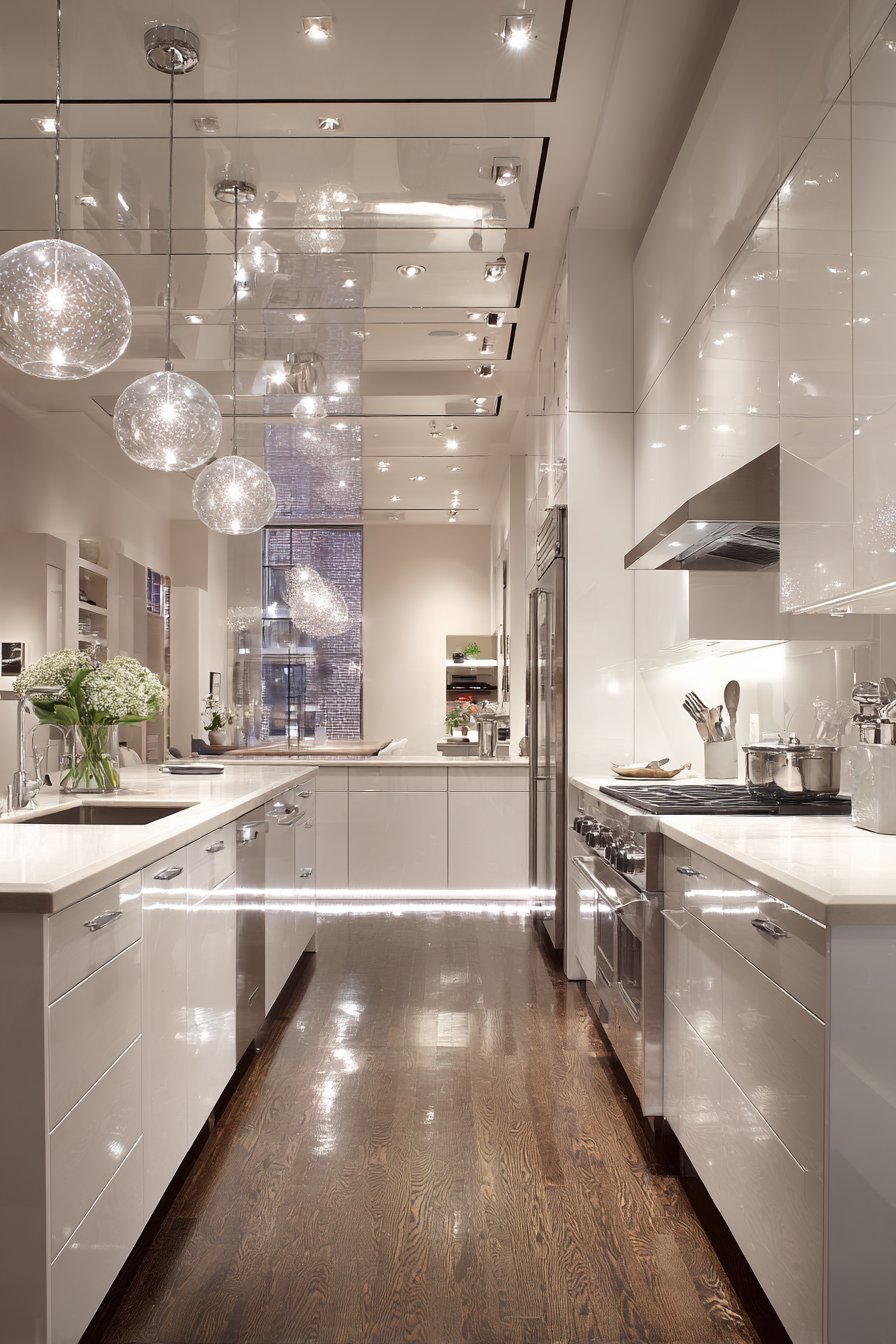
Lighting dramatically affects how spacious a kitchen feels. Multi-layered lighting design includes ambient, task, and accent lighting that work together to eliminate shadows and create depth. Poor lighting makes small kitchens feel cave-like and even more cramped than they actually are.
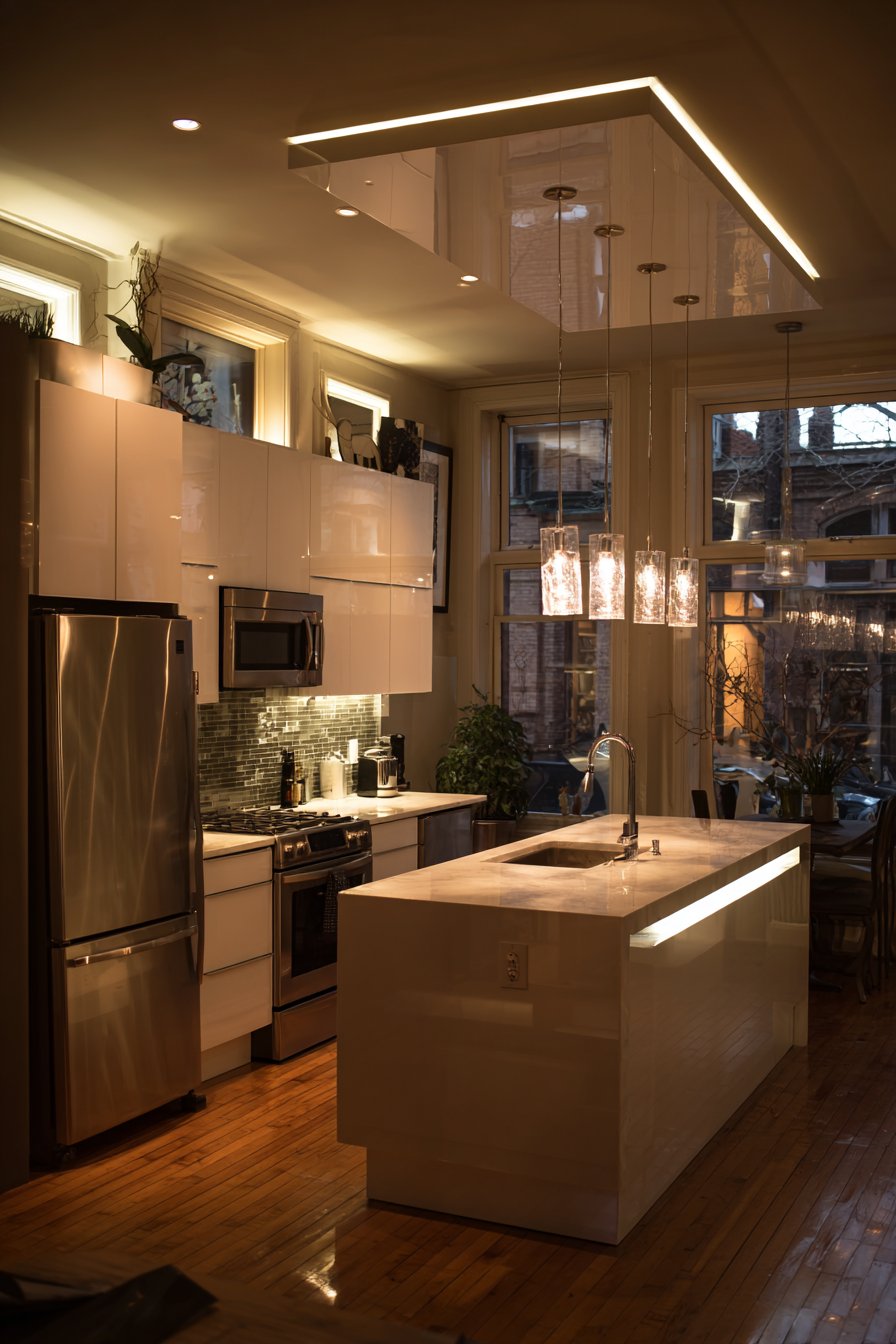
Under-cabinet LED strips provide essential task lighting for food preparation while adding a floating effect that makes countertops appear to extend beyond their actual boundaries. This subtle illumination creates dimension and makes workspaces feel more expansive. Pair these with recessed ceiling lights for even ambient illumination throughout the space.
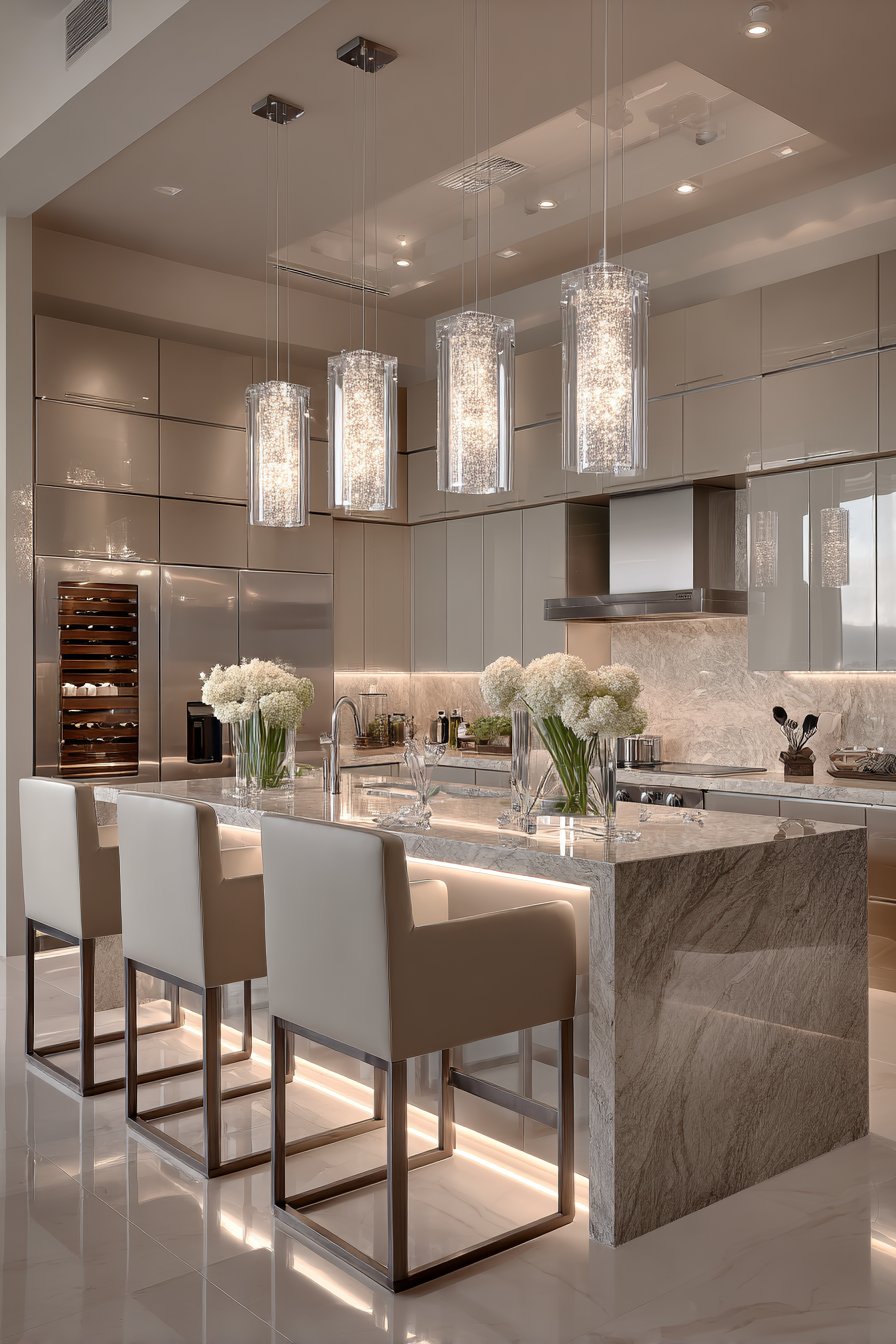
Pendant lights over an island or dining area serve as focal points that draw attention strategically. Instead of feeling cluttered, well-placed statement lighting creates interest at eye level, which psychologically makes ceilings feel higher. Choose fixtures with transparent or reflective elements to maintain openness.
- Install dimmable LED lights on all circuits for mood and functional flexibility
- Place under-cabinet lighting 2-3 inches from the front edge for optimal task illumination
- Use warm white bulbs (2700-3000K) to create inviting, restaurant-quality ambiance
- Add interior cabinet lighting with motion sensors for convenience and style
- Position recessed lights 24-30 inches apart for even coverage without harsh shadows
- Consider strip lighting along toe kicks for subtle architectural enhancement
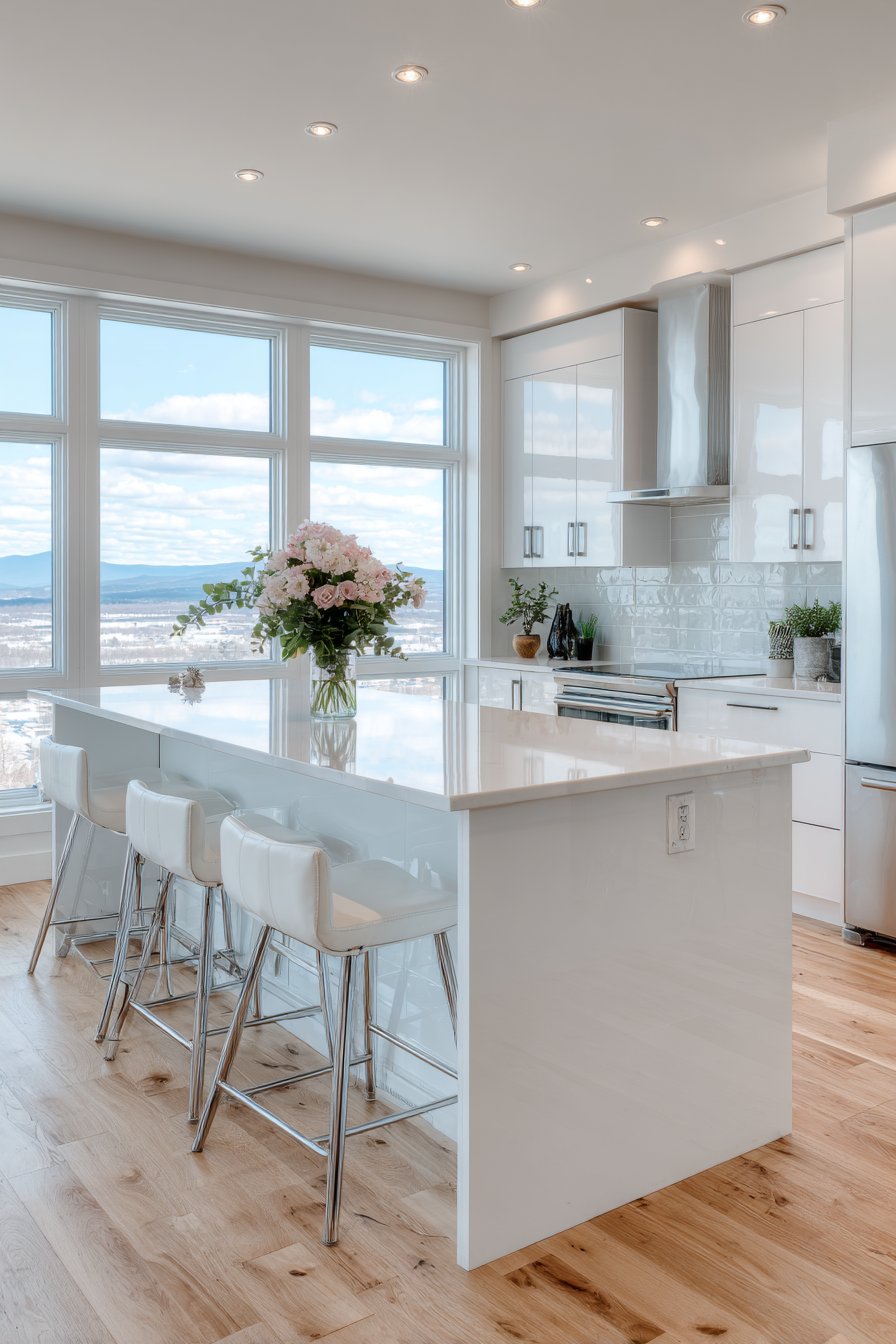
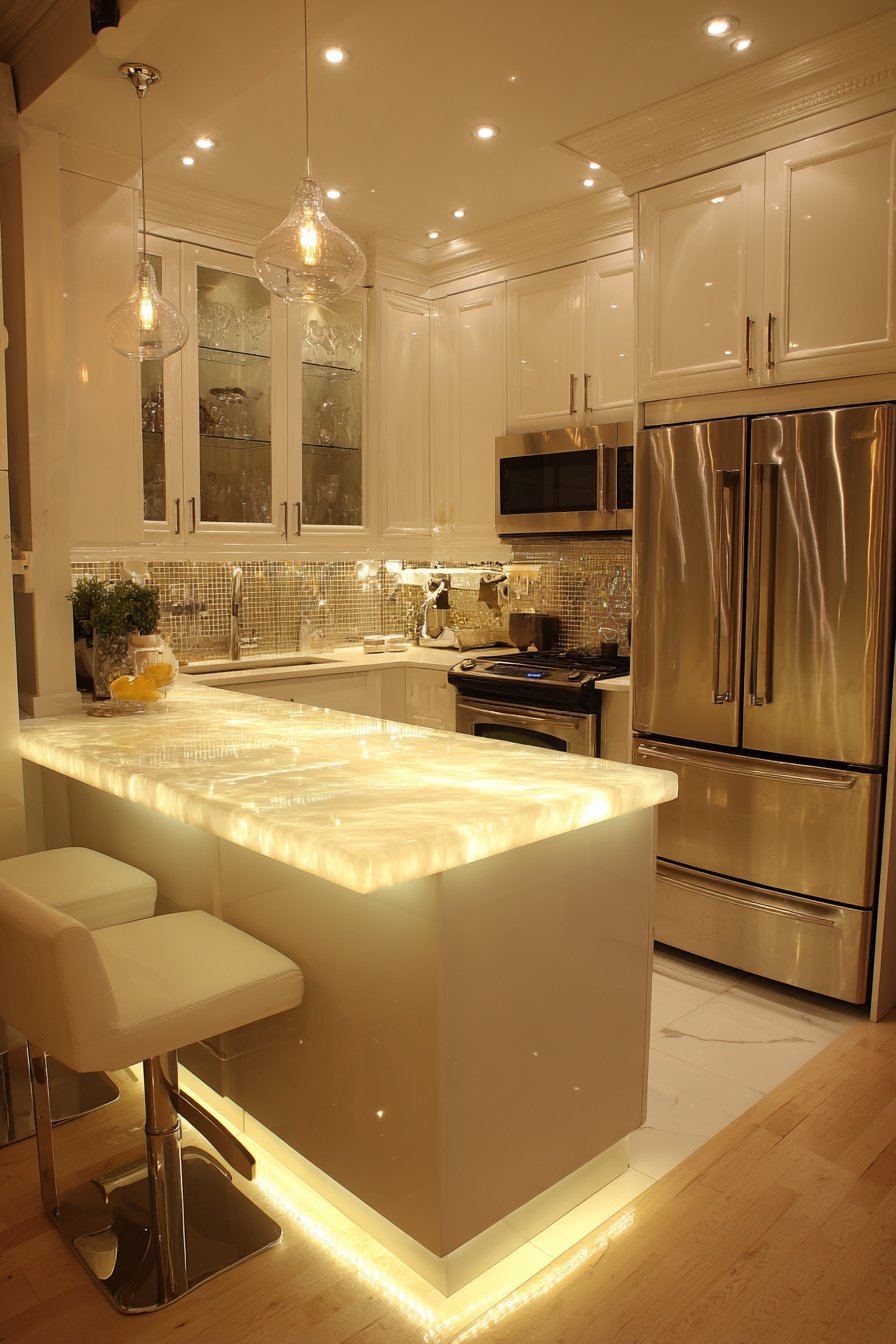
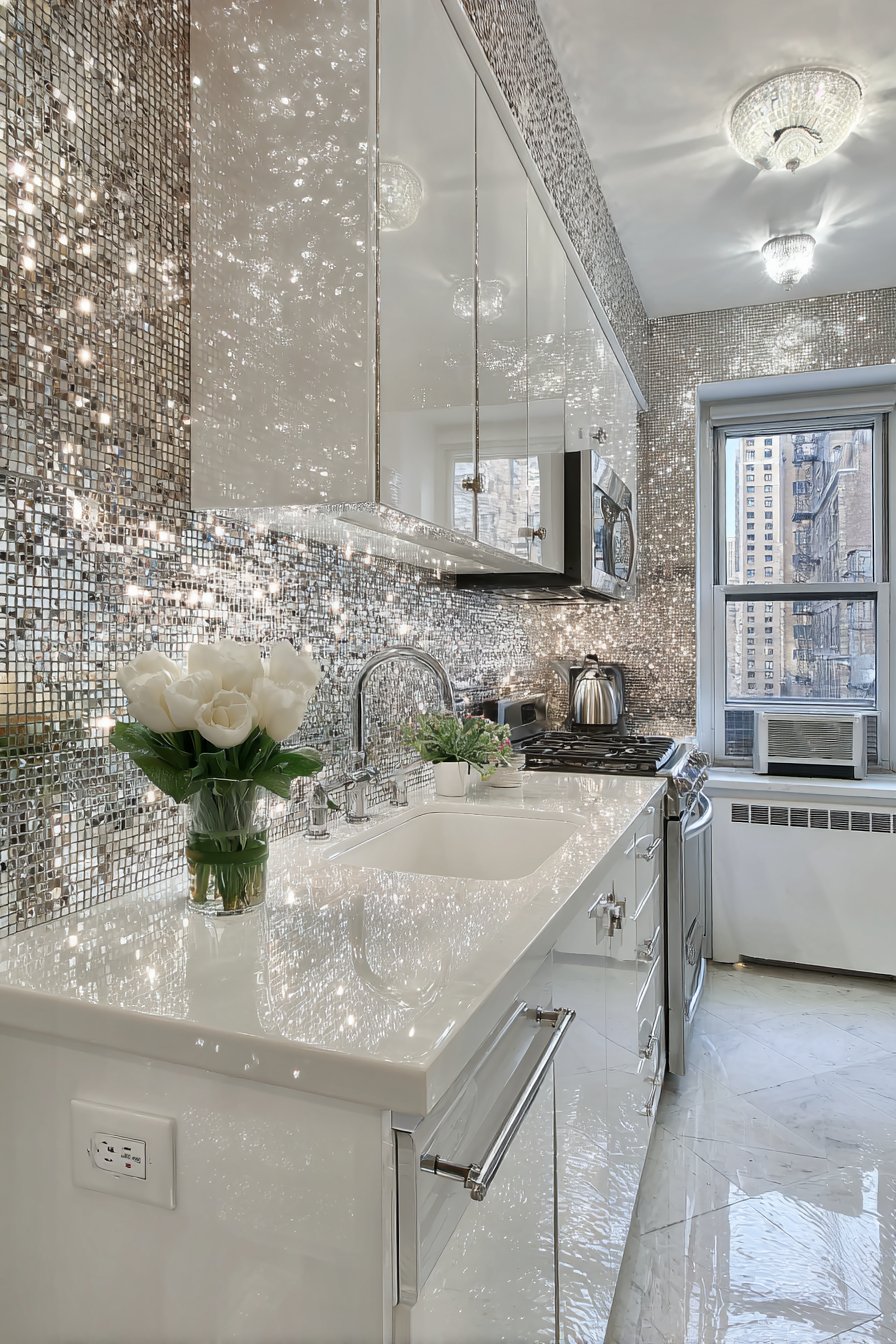
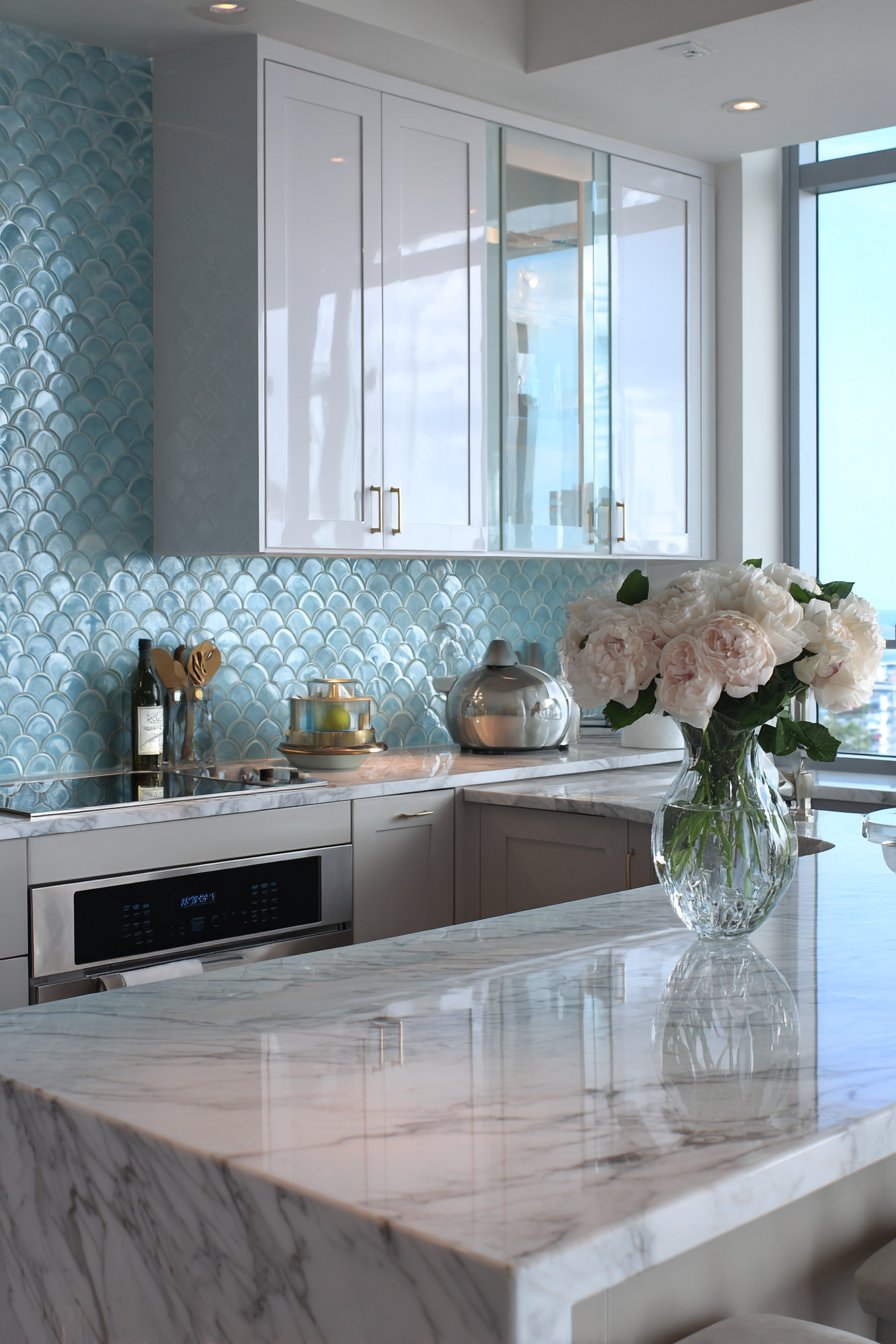
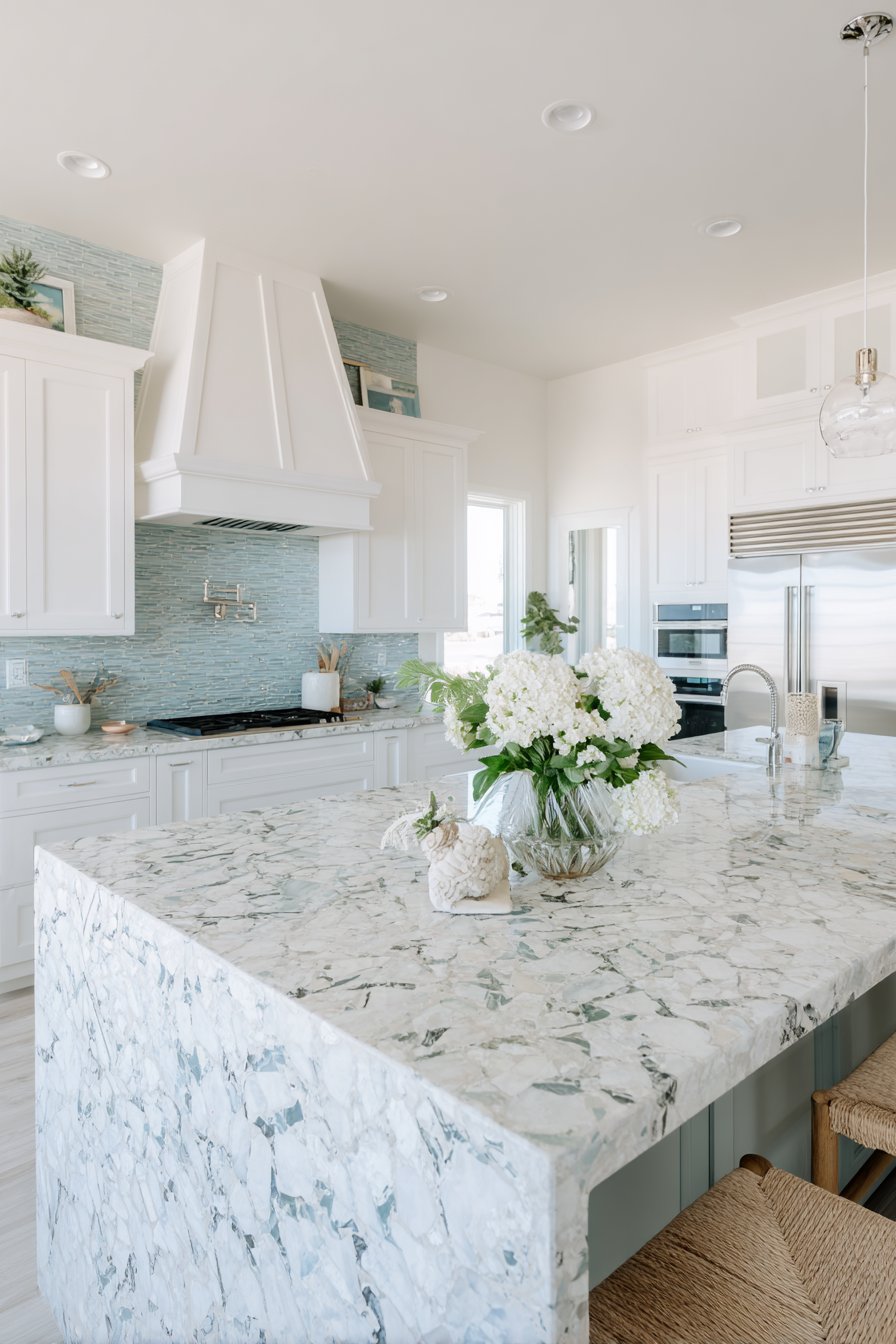
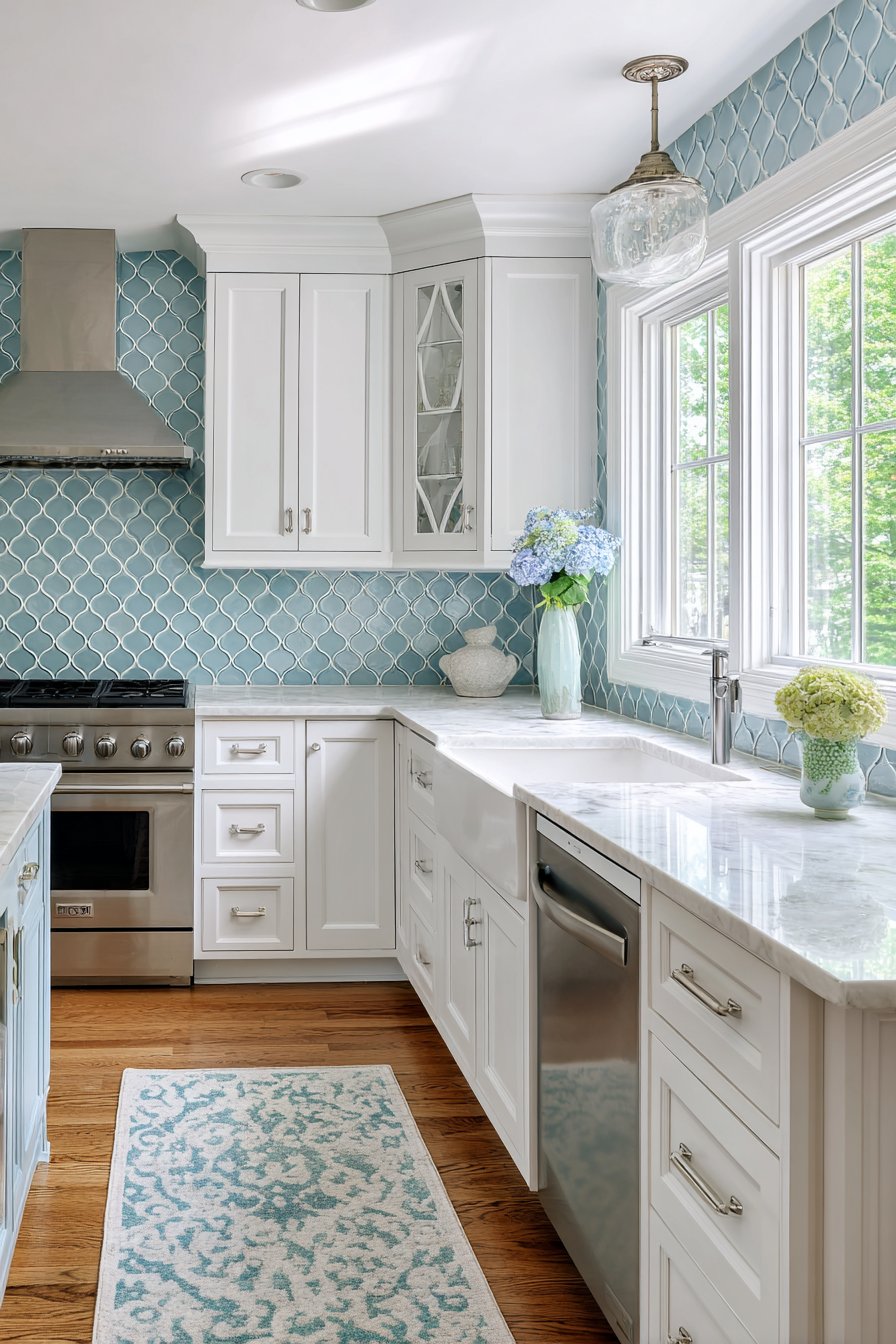
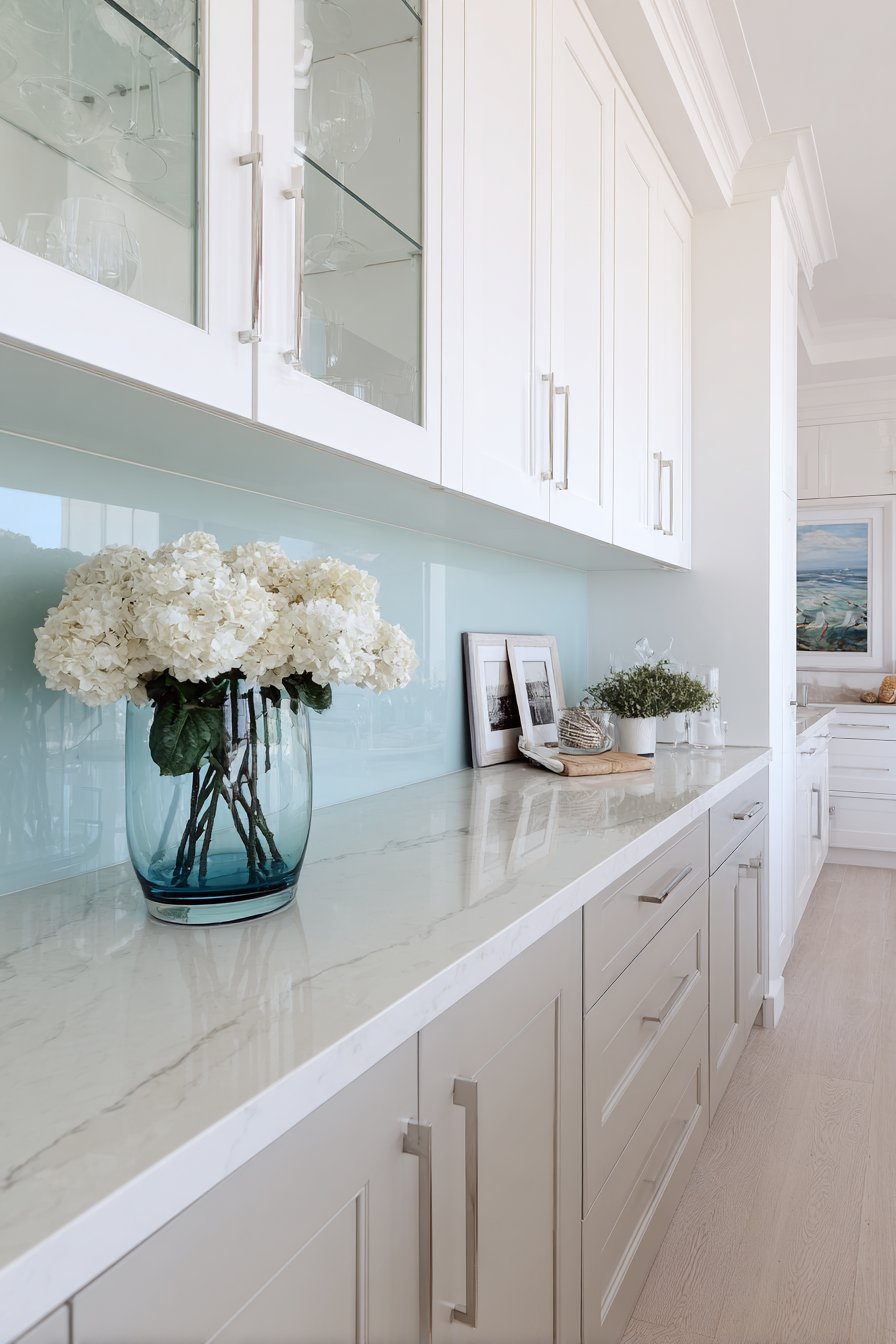
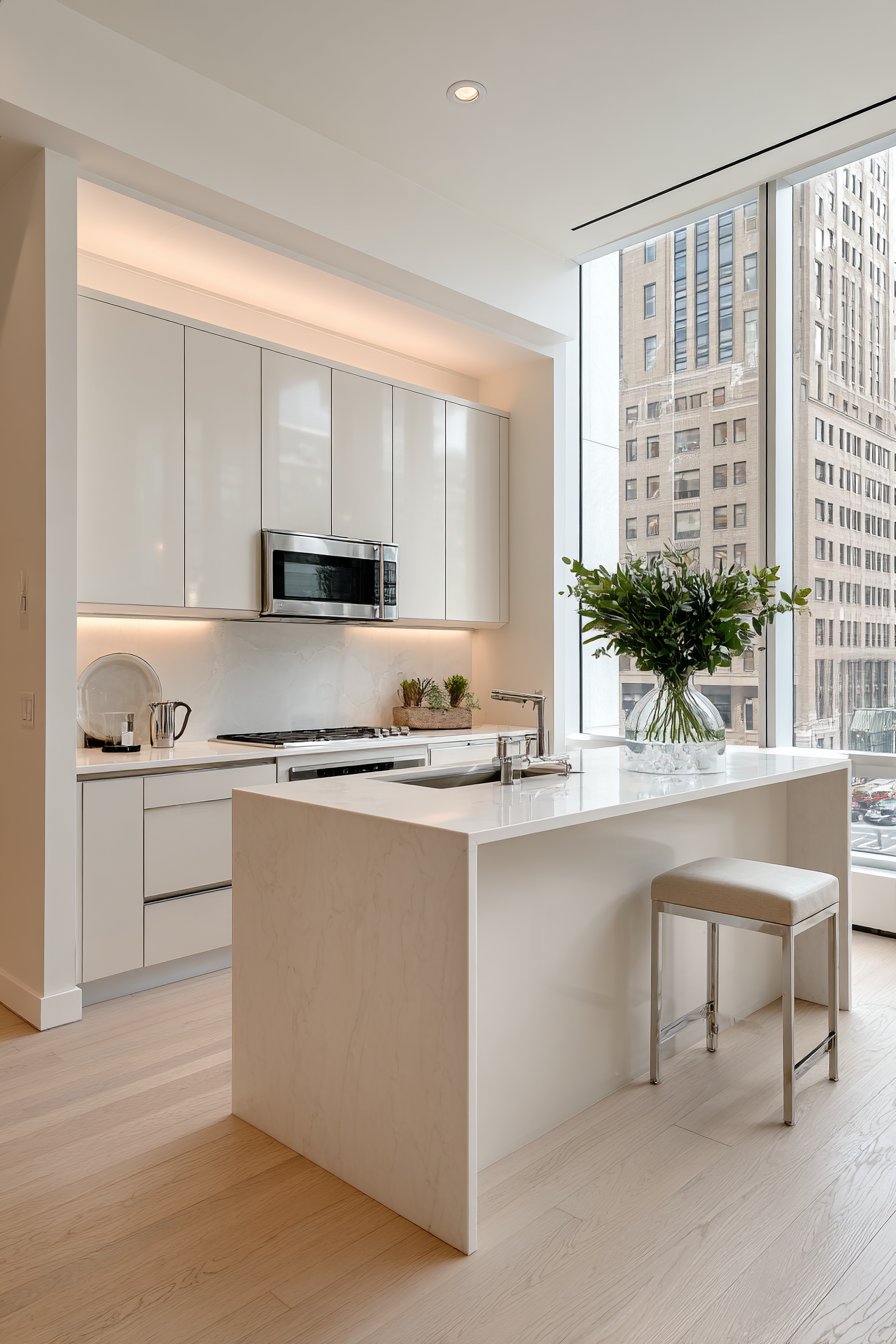
3. Choose Light-Reflective Materials and Finishes
Material selection profoundly impacts spatial perception. Glossy and reflective surfaces bounce light around the room, making small kitchens feel brighter and more open. High-gloss cabinet finishes, polished countertops, and glass tile backsplashes all contribute to this light-multiplying effect.
White quartz countertops or light marble alternatives offer practical durability with visual lightness that opens up workspaces. These materials reflect both natural and artificial light, creating an airy atmosphere even in windowless kitchens. The seamless appearance of integrated sinks in these materials further enhances the uncluttered aesthetic.
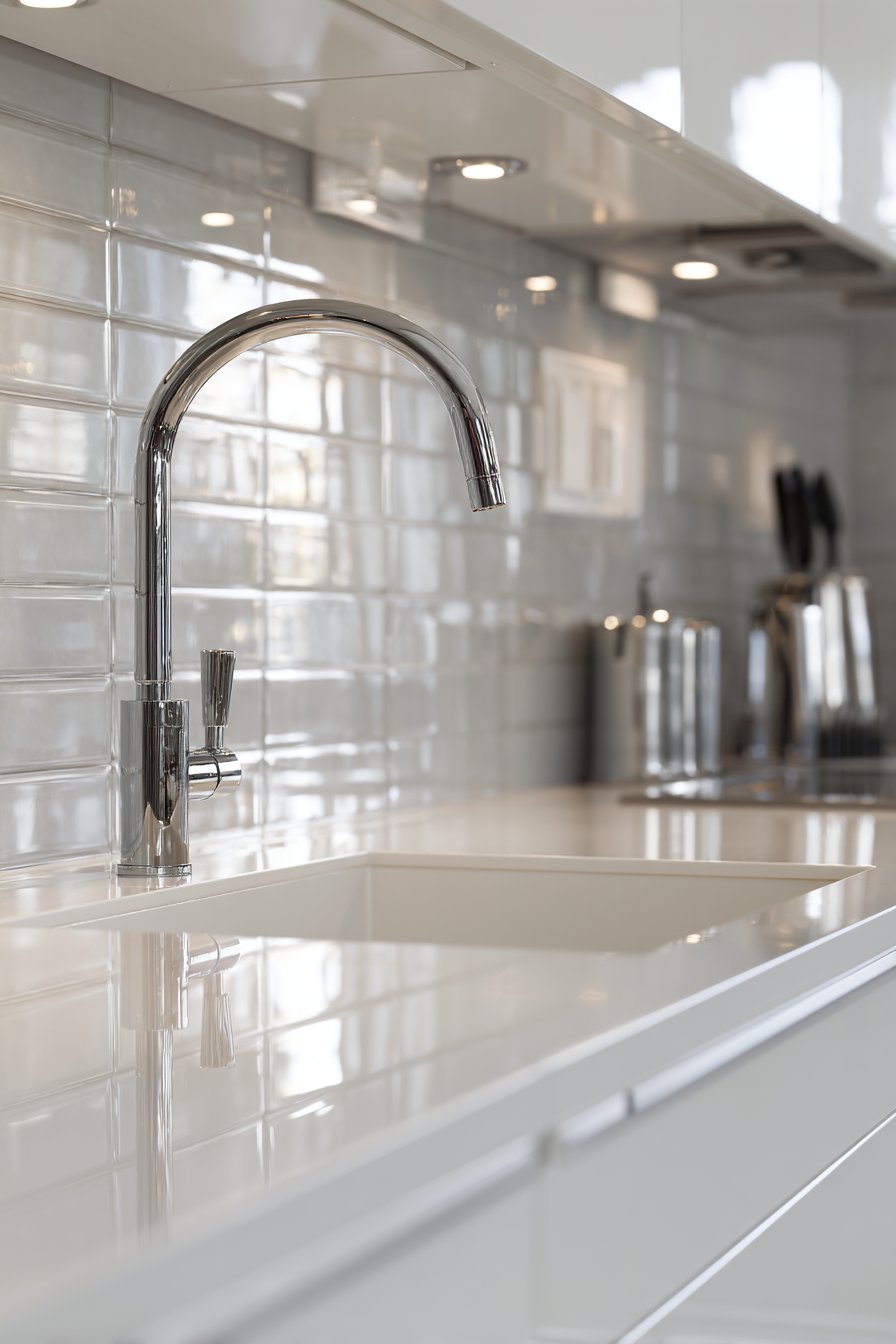
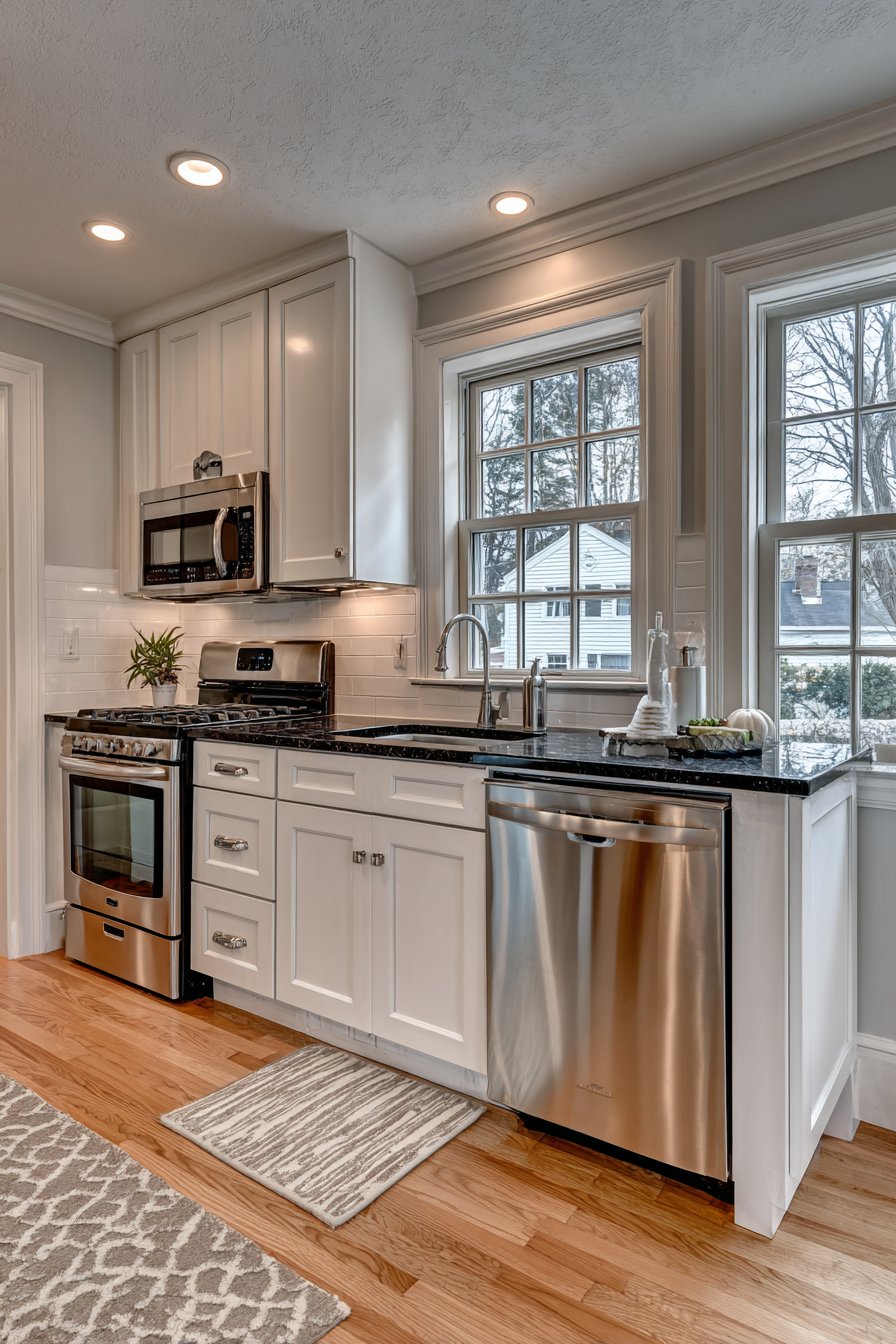
Stainless steel appliances and fixtures introduce metallic reflectivity that adds dimension without adding visual weight. Chrome or brushed nickel hardware catches light beautifully while maintaining a clean, modern aesthetic. Mirror-finish backsplash tiles or metallic glass tiles create dramatic light play that expands perceived space.
- Select high-gloss white or light-colored cabinets for maximum light reflection
- Choose quartz or solid surface countertops in whites, light grays, or soft creams
- Install glass tile or mirrored backsplashes behind sinks and stoves
- Use chrome or polished nickel for faucets, handles, and lighting fixtures
- Consider lacquered cabinet finishes for a sophisticated, space-expanding shine
- Avoid dark grout lines; use matching or light grout for seamless visual flow
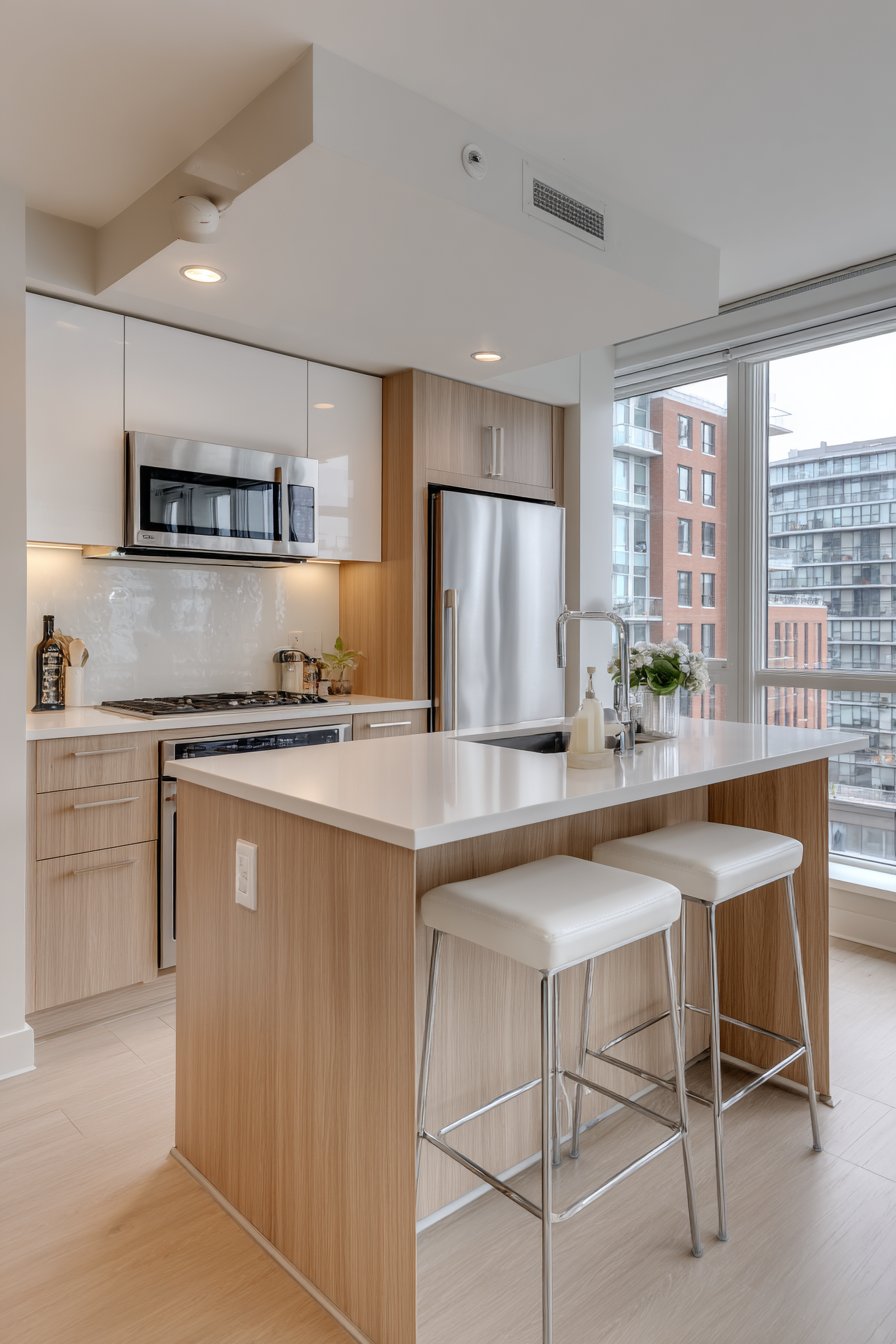
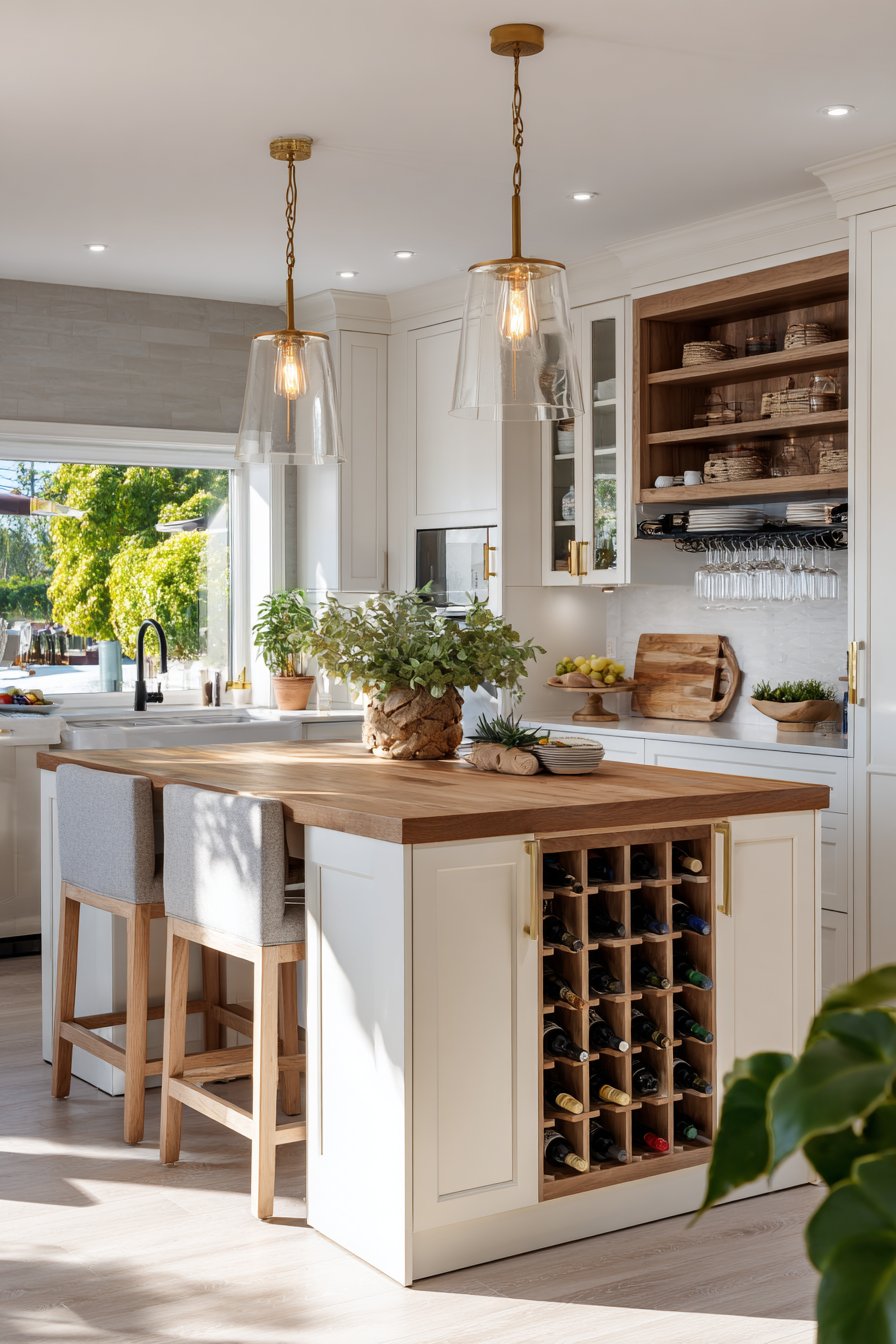
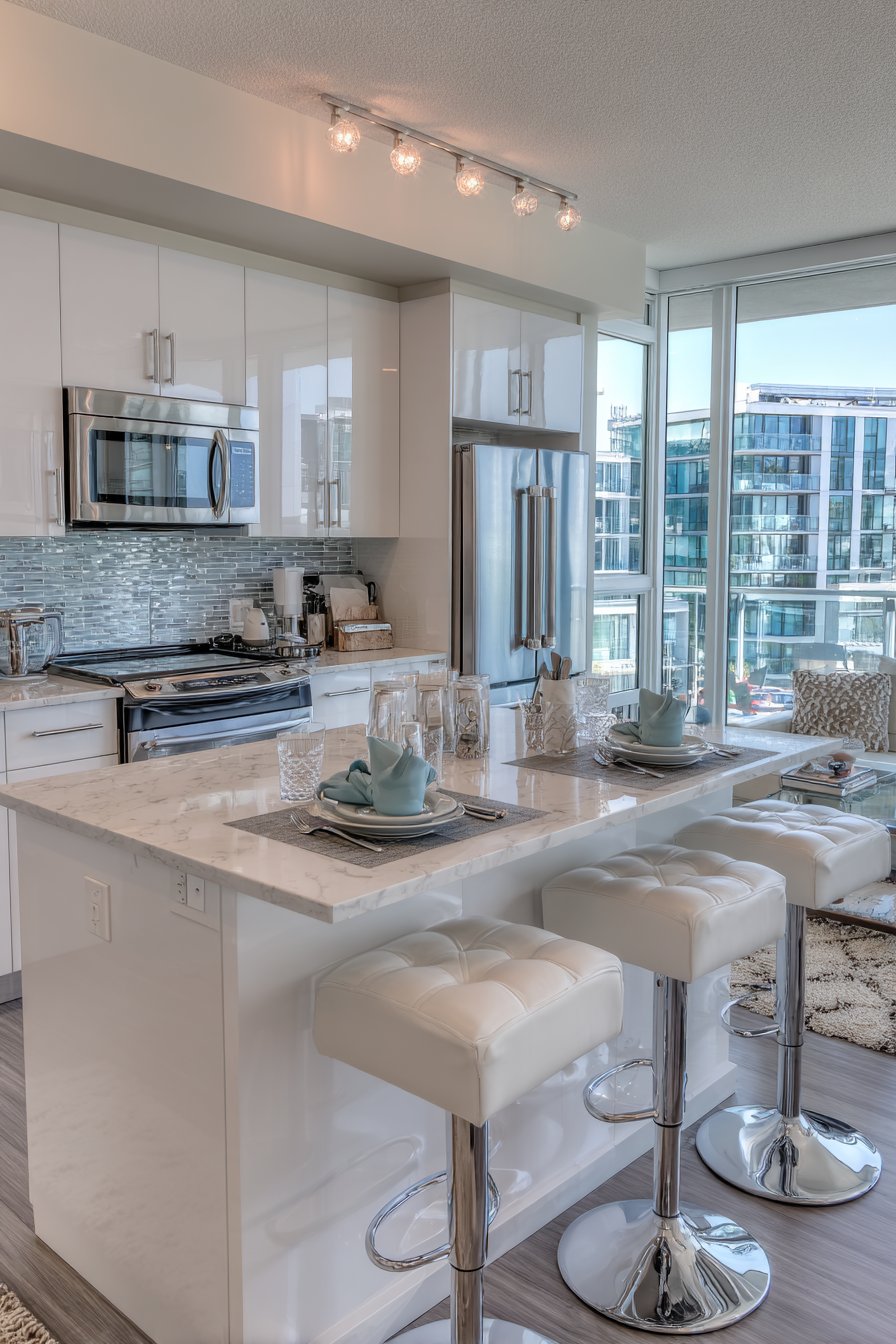
4. Incorporate Multi-Functional Furniture and Features
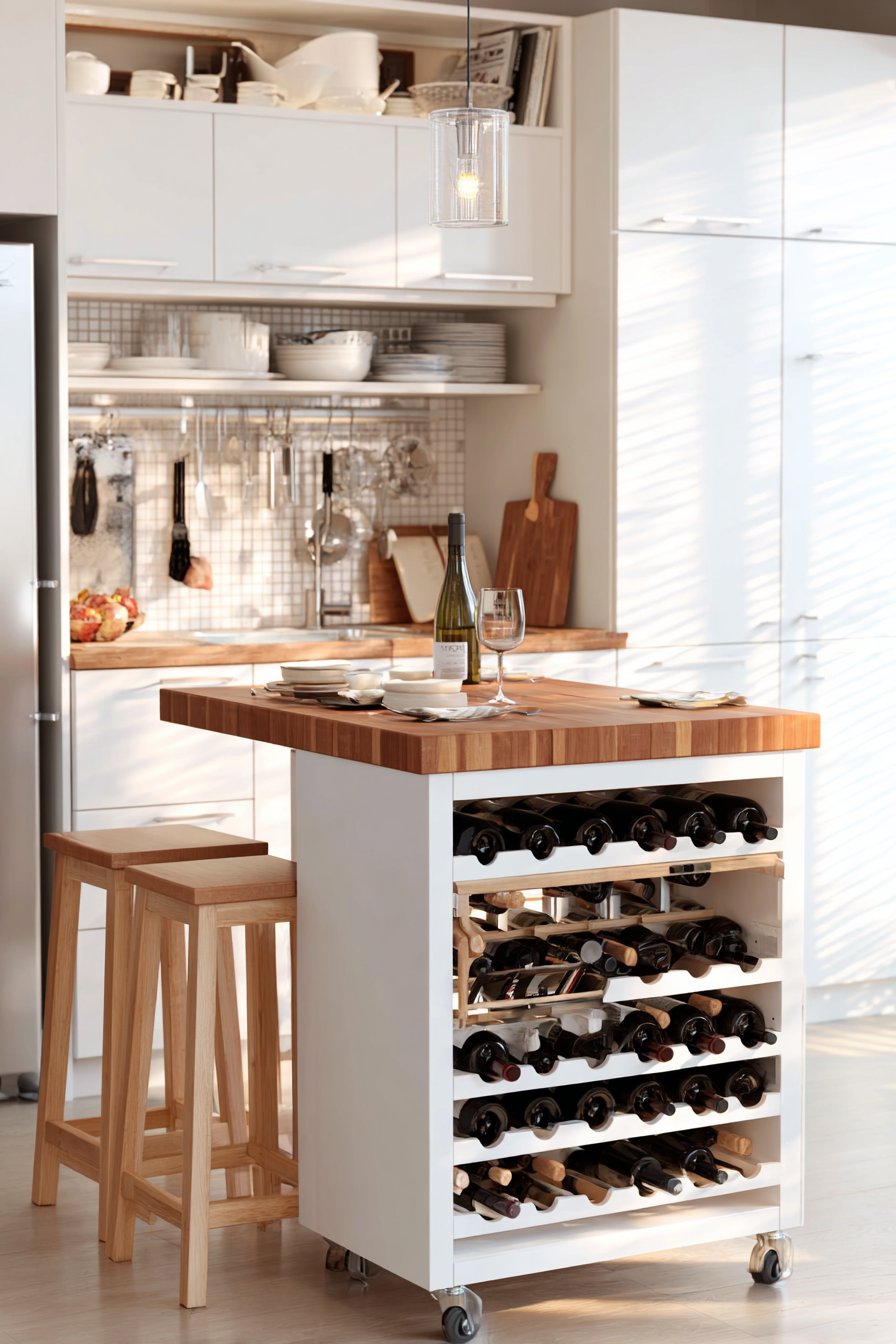
Every element in a small kitchen must earn its place. Multi-functional design pieces serve double or triple duty, maximizing utility without cluttering the space. Kitchen islands with built-in storage, seating, and prep surfaces exemplify this efficiency-focused approach.
Rolling carts provide flexible workspace that moves when needed and tucks away when not in use. These versatile pieces offer additional prep surfaces, storage shelves, and can even serve as mobile serving stations during gatherings. Choose designs with locking wheels and durable surfaces suitable for food preparation.
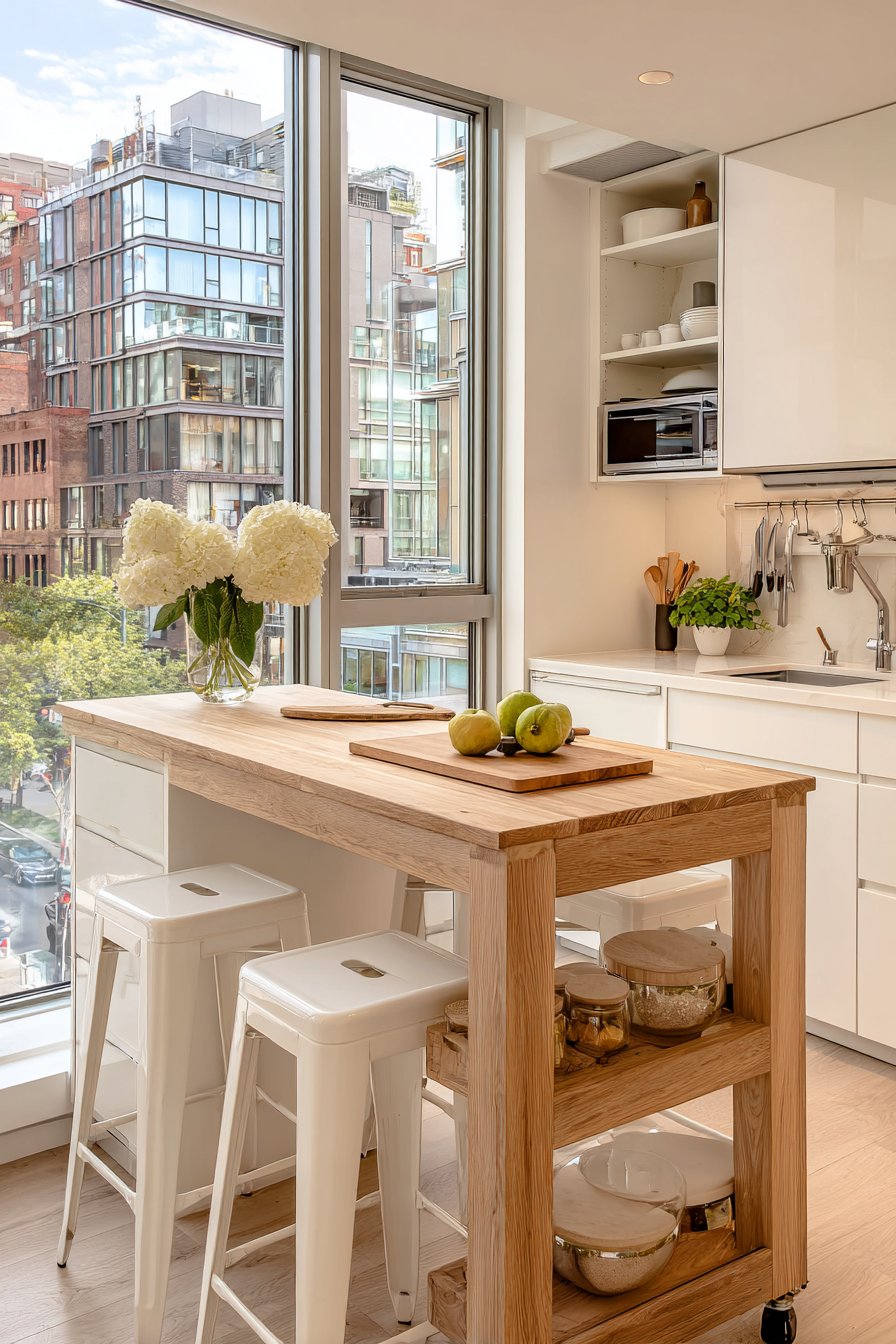
Fold-down tables and collapsible breakfast bars create dining areas without permanent footprint. Wall-mounted drop-leaf tables offer eating space that disappears completely when folded, while built-in breakfast bars with hinged supports provide similar functionality. These solutions prove essential in kitchens where every square foot counts.
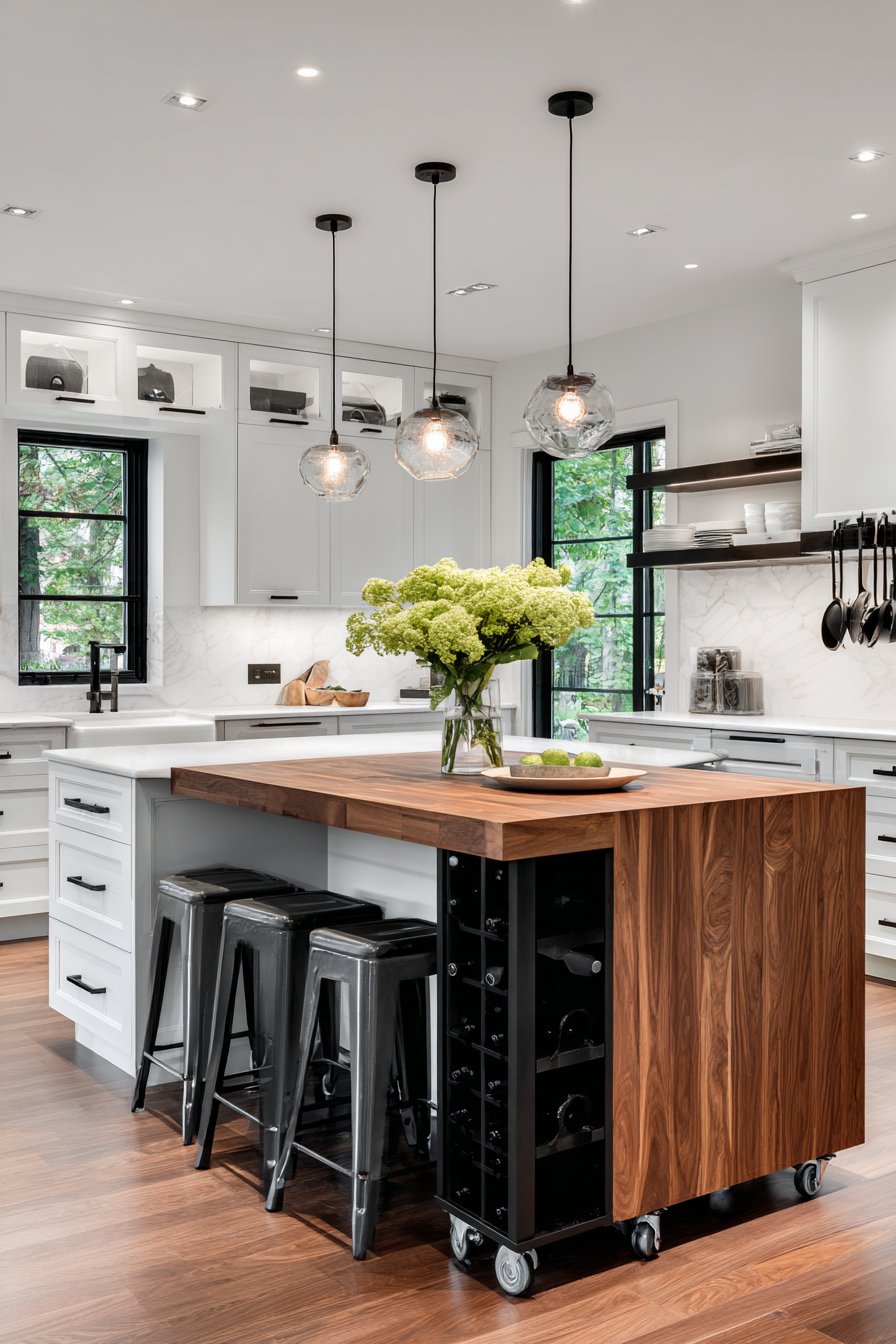
- Install a kitchen island with internal shelving, wine racks, or appliance garages
- Choose bar stools that tuck completely under counters or stack for storage
- Add a rolling cart with butcher block top for extra prep surface and mobility
- Incorporate toe-kick drawers beneath base cabinets for flat storage items
- Select extending work surfaces that pull out from base cabinets when needed
- Use magnetic knife strips and hanging pot racks to free drawer and cabinet space
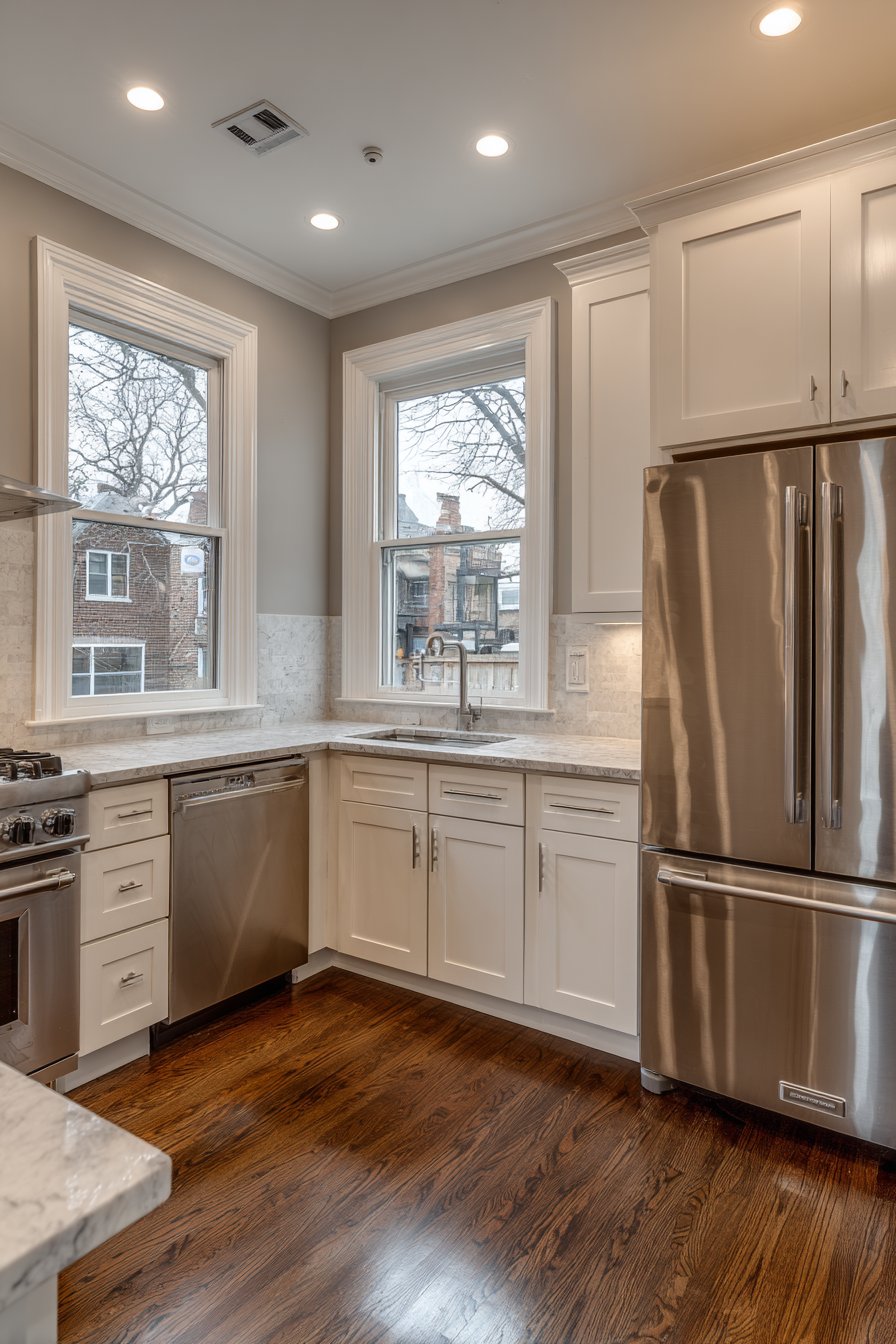
5. Optimize Layout with the Work Triangle Principle
Proper spatial planning determines kitchen efficiency. The work triangle concept positions your sink, stove, and refrigerator in a triangular arrangement with 4-9 feet between each point. This configuration minimizes unnecessary steps while preparing meals and creates natural workflow patterns.
In narrow galley kitchens, arrange appliances along two parallel walls to maintain the triangle principle while adapting to space constraints. Place the refrigerator at one end, the sink in the middle of one wall, and the stove offset on the opposite wall. This layout provides efficient movement without requiring excessive walking.
L-shaped configurations work beautifully in square or slightly rectangular kitchens, positioning two legs of the work triangle along perpendicular walls. This arrangement naturally creates defined zones for different tasks while leaving the center of the kitchen open. Consider placing the sink in the corner to maximize continuous counter space.
- Measure your work triangle to ensure no single leg exceeds 9 feet
- Keep the total perimeter of your work triangle between 13-26 feet
- Avoid positioning the refrigerator where its door blocks traffic flow
- Place the sink near windows when possible for natural light and views
- Position the dishwasher within 36 inches of the sink for efficient cleanup
- Ensure at least 15 inches of counter space on the latch side of the refrigerator
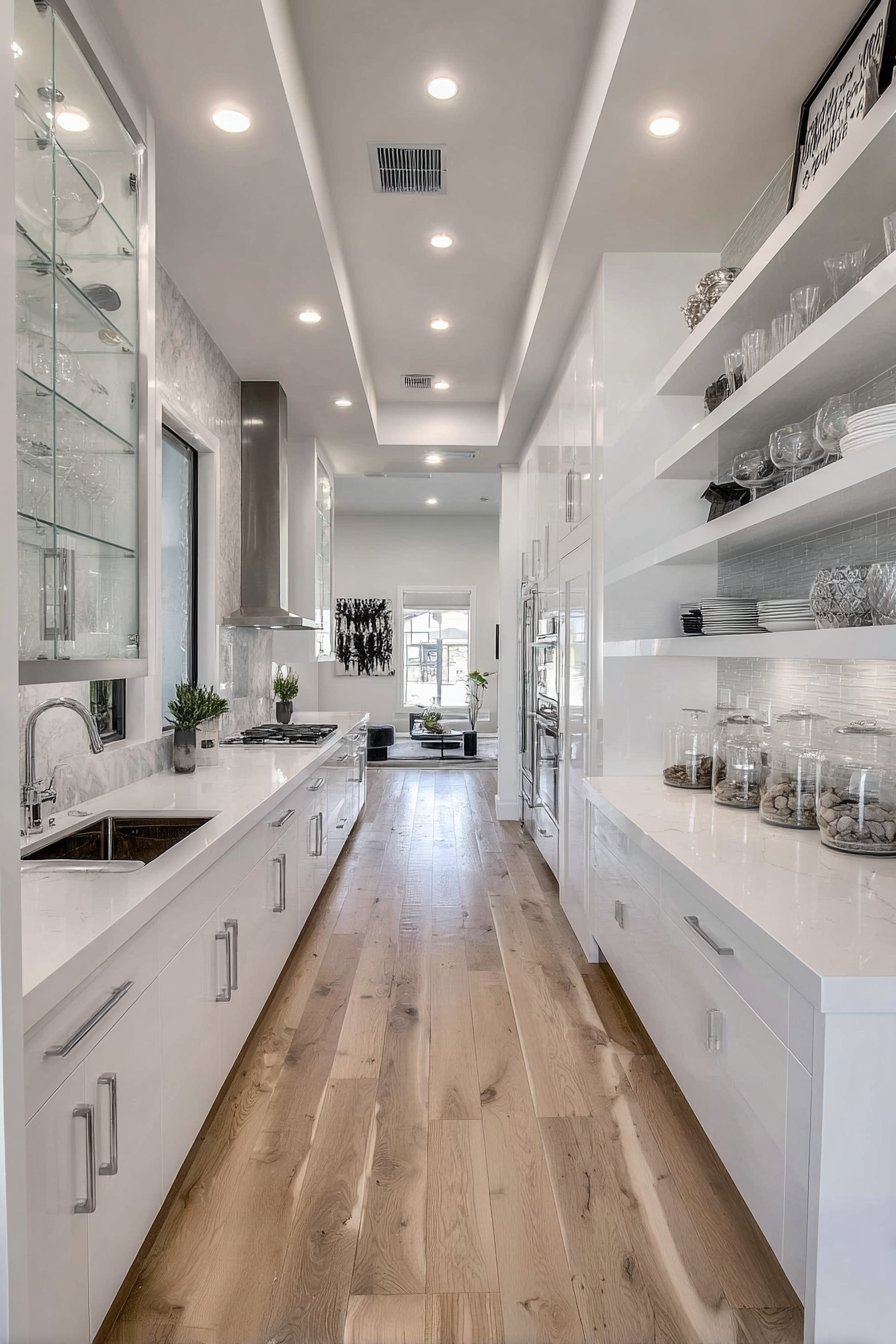
6. Utilize Smart Storage Solutions and Organizational Systems
Clever storage systems transform chaotic small kitchens into organized, efficient spaces where everything has a designated home. Pull-out pantry systems, corner carousel units, and drawer dividers maximize storage capacity while maintaining easy access to all items. These solutions prevent the frustration of items getting lost in deep cabinets.
Vertical dividers inside cabinets create organized zones for baking sheets, cutting boards, and serving platters that would otherwise pile horizontally and become difficult to access. This simple modification makes items visible and retrievable without removing everything in front. Custom drawer inserts keep utensils, spices, and tools neatly arranged.
Wall-mounted magnetic strips, pegboards, and rail systems provide accessible storage for frequently used items while keeping counters clear. These visible storage solutions put tools at your fingertips while adding decorative interest. Choose cohesive finishes that complement your overall design aesthetic.
- Install pull-out pantry units in narrow spaces between appliances or cabinets
- Use corner Lazy Susan cabinets to maximize awkward corner storage areas
- Add drawer organizers custom-fitted to your specific utensil and tool collection
- Mount a pegboard system for pots, pans, and cooking utensils
- Incorporate slim pull-out spice racks beside the stove for easy seasoning access
- Utilize door-mounted organizers on cabinet interiors for cleaning supplies and wraps
7. Create Visual Continuity with Cohesive Color Schemes
Color psychology significantly impacts spatial perception and mood in small kitchens. Light, neutral color palettes create an expansive feel by reflecting light and avoiding visual fragmentation. Whites, soft grays, pale blues, and warm beiges form excellent foundation colors that make compact spaces feel more open.
Monochromatic schemes using varying shades of a single color create depth without the choppy appearance of multiple contrasting hues. This approach allows textural variety while maintaining visual calm. Consider white upper cabinets, light gray lowers, and pale marble-look countertops for sophisticated dimension.
Strategic accent colors add personality without overwhelming limited square footage. A single colorful backsplash, one painted accent wall, or colorful accessories provide interest while maintaining the overall light aesthetic. Limit bold colors to 10-15% of the total visual field.
- Paint walls, ceilings, and trim in coordinating light neutrals for seamless flow
- Use one shade darker on lower cabinets than uppers to ground the space
- Select countertops that complement rather than contrast dramatically with cabinetry
- Add color through easily changeable elements like bar stools or window treatments
- Keep appliances in stainless steel or panel-ready for visual consistency
- Choose hardware in a single finish throughout for cohesive elegance
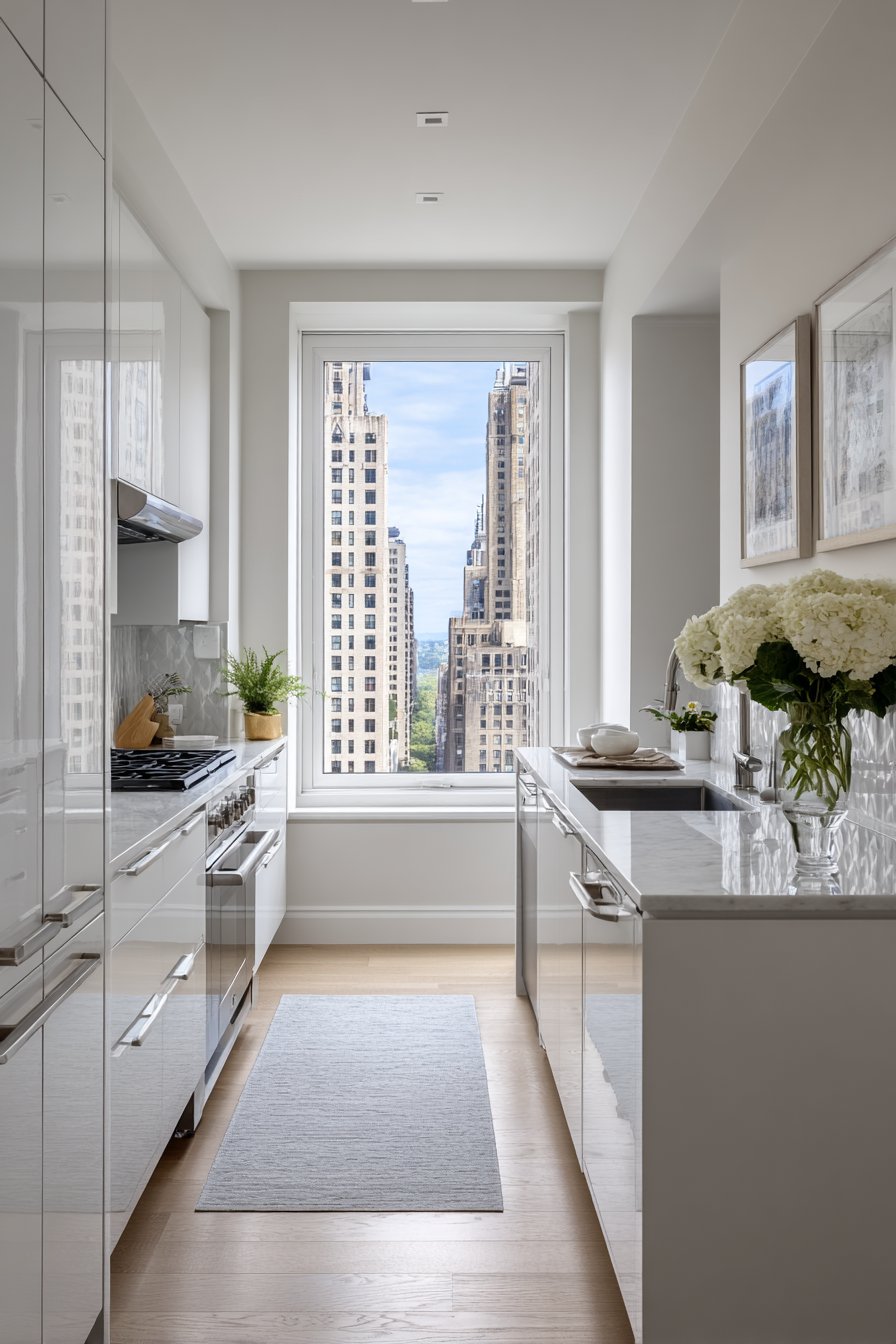
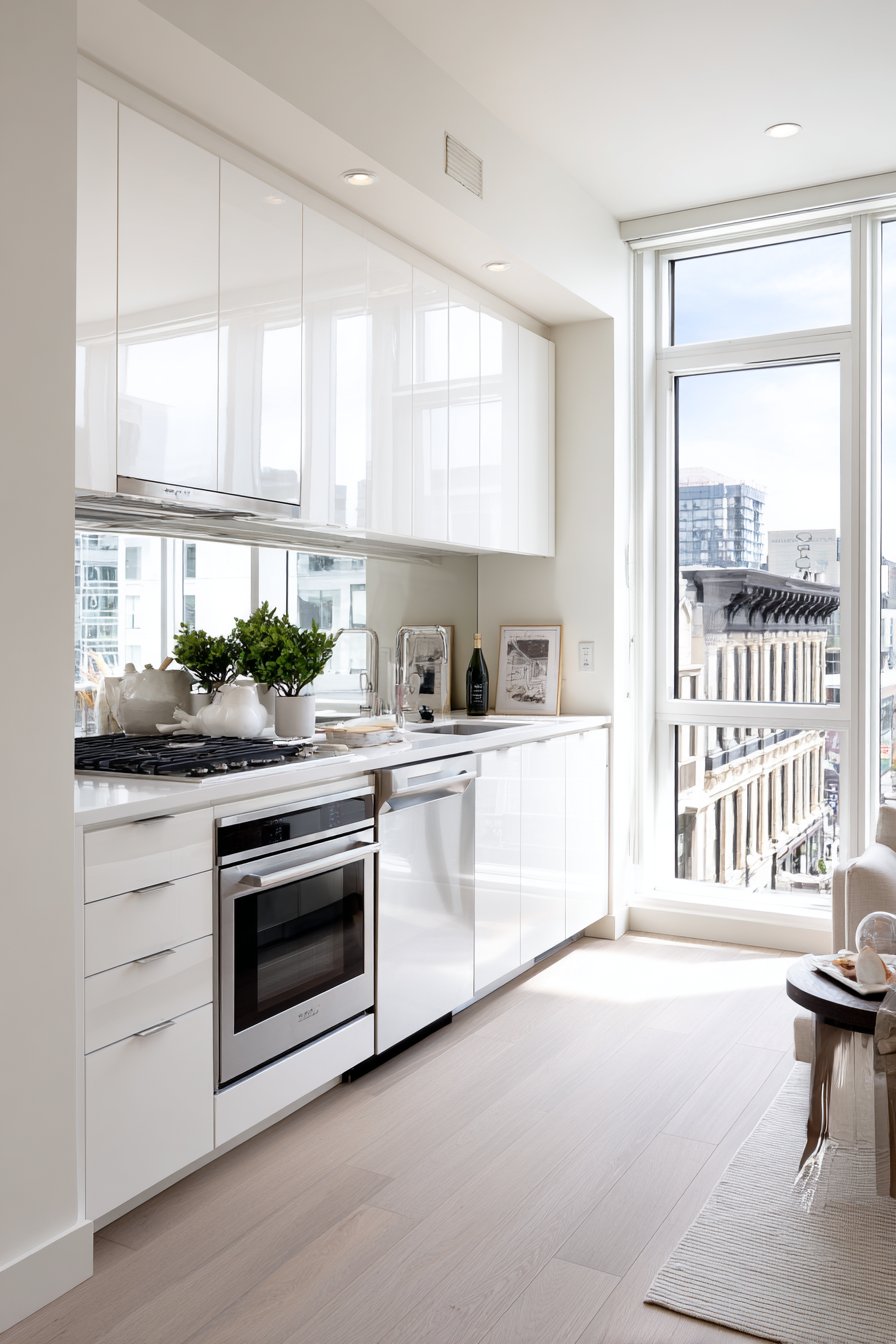
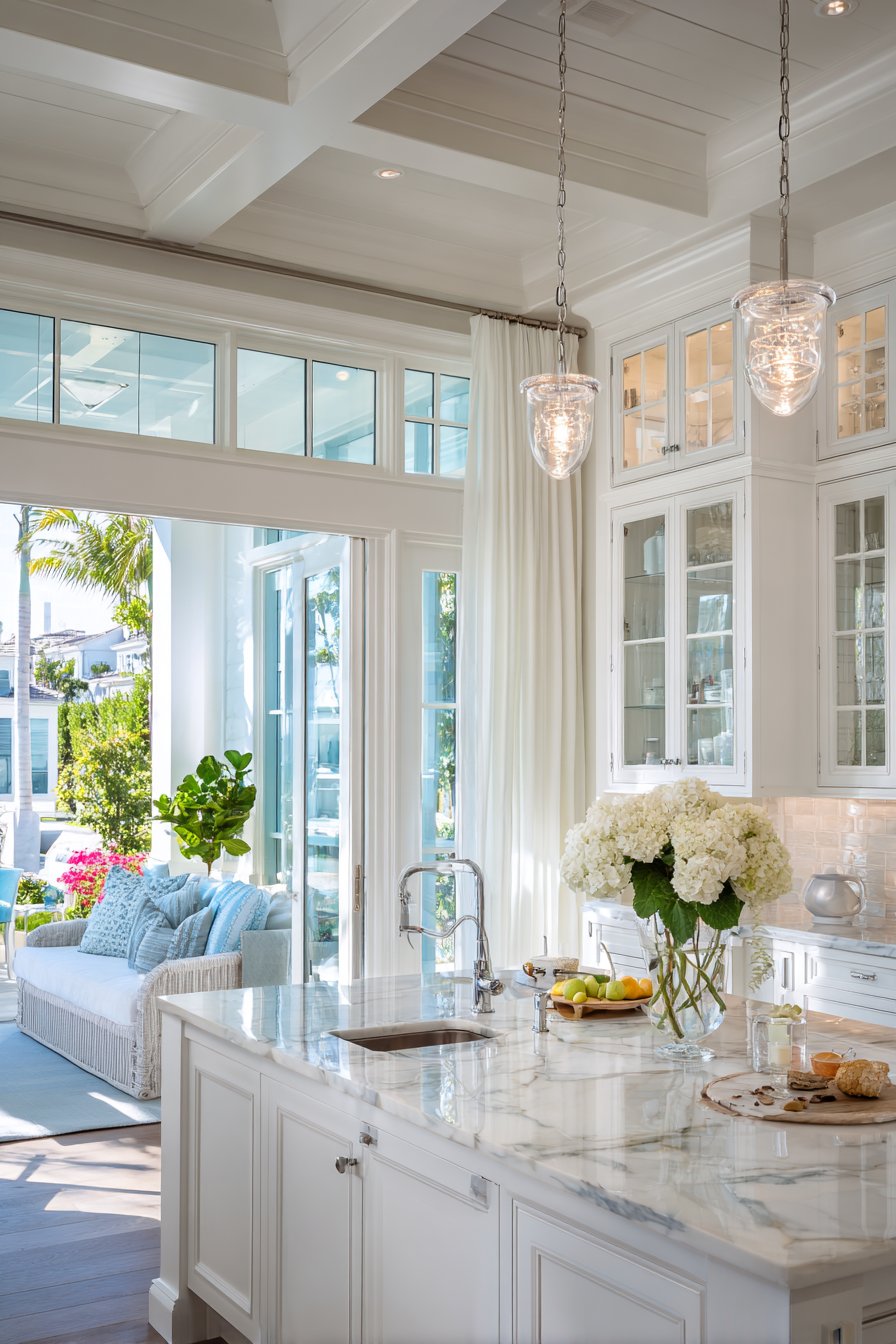
8. Maximize Natural Light and Create Sightlines
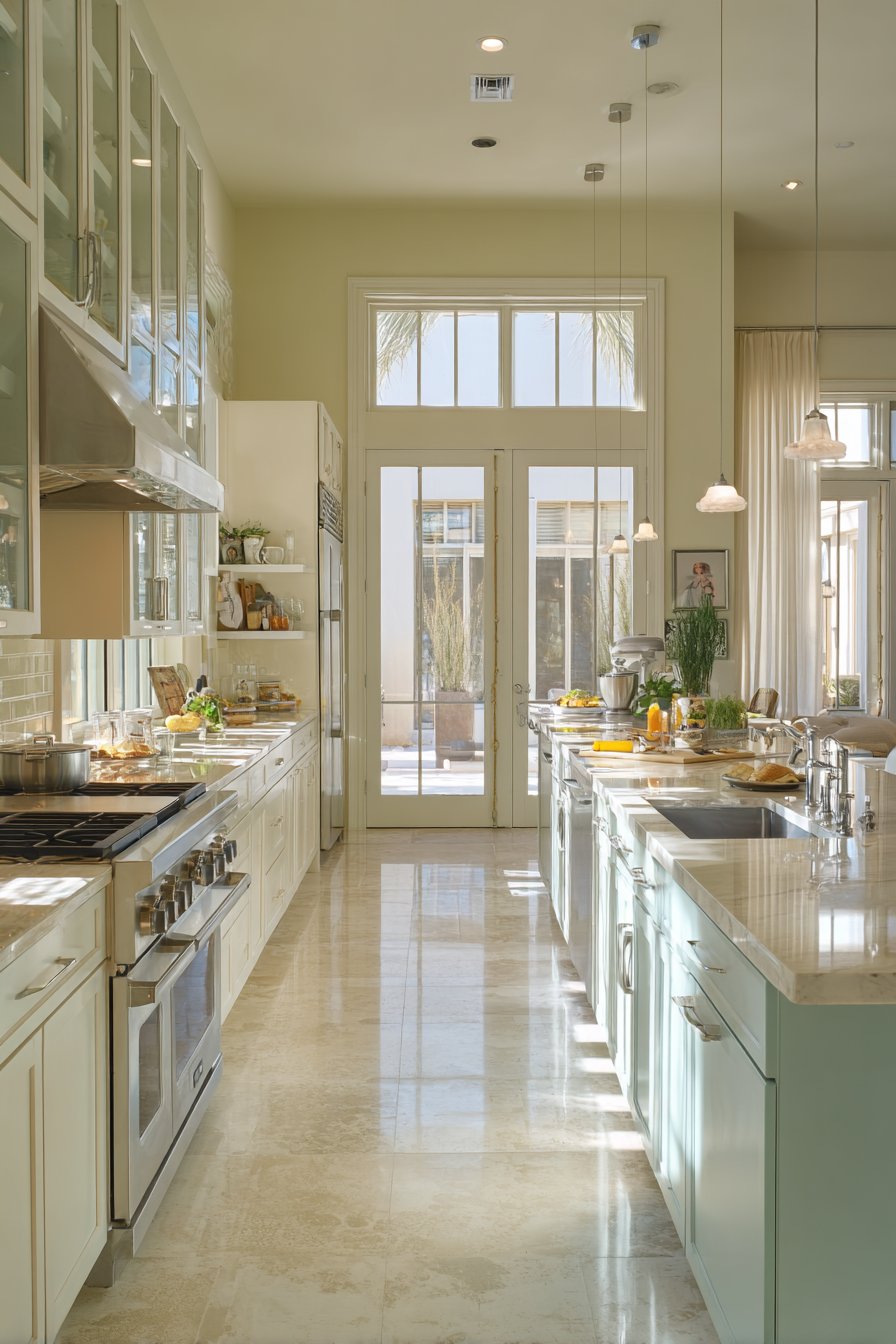
Natural light expands perceived space exponentially compared to artificial lighting alone. Maximize window exposure by keeping treatments minimal or eliminating them entirely where privacy permits. Unobstructed windows flood kitchens with daylight that makes even the smallest spaces feel airy and connected to the outdoors.

Sheer curtains or top-down bottom-up shades provide privacy when needed while still allowing filtered light to enter. These window treatments maintain the bright, open feel essential to small kitchen design. Avoid heavy drapes or dark blinds that block precious natural illumination.

Creating clear sightlines through doorways and passes connects your kitchen visually to adjacent spaces, borrowing visual square footage from surrounding rooms. Remove unnecessary doors or replace solid doors with glass-paned versions. This connection makes the kitchen feel like part of a larger, flowing space.
- Clean windows regularly to maximize light transmission into the space
- Position reflective surfaces near windows to amplify natural light distribution
- Consider adding a skylight if structurally feasible for dramatic overhead illumination
- Use glass cabinet doors on perimeter walls to create see-through visual depth
- Remove upper cabinets on one wall if windows exist to maximize daylight
- Install French doors or wider doorways to better connect the kitchen to adjacent rooms
Conclusion
Optimizing a small kitchen requires strategic design thinking that balances aesthetics with functionality. By implementing vertical storage, sophisticated lighting, reflective materials, and multi-functional elements, even the most compact kitchens transform into efficient, beautiful spaces. The work triangle principle ensures smooth workflow, while smart storage solutions keep everything organized and accessible.
Remember that successful small kitchen design prioritizes quality over quantity—fewer, well-chosen elements create more impact than overcrowded spaces filled with unnecessary items. Start with one or two strategies that resonate most with your needs and lifestyle, then gradually incorporate additional techniques. Your small kitchen holds tremendous potential; with thoughtful design choices, it can become the functional, inspiring heart of your home that you’ve always wanted.
"As an Amazon Associate, I earn from qualifying purchases."