A well-organized kitchen transforms cooking from a frustrating chore into an efficient, enjoyable experience. When every ingredient and tool has its designated place, meal preparation becomes significantly faster and more intuitive. The difference between a chaotic cabinet system and a thoughtfully organized one can save you 15-20 minutes per meal while reducing stress and decision fatigue.
Strategic kitchen organization goes beyond simple tidiness—it’s about creating a functional workflow that supports your cooking habits. Professional chefs understand that restaurant kitchens succeed through precise organization systems, and these same principles can revolutionize your home cooking experience. Whether you’re preparing weeknight dinners or elaborate weekend meals, proper cabinet organization eliminates wasted time searching for ingredients and tools.
This article presents seven expert-approved strategies for organizing your kitchen cabinets to maximize cooking efficiency. From zone-based storage systems to visibility optimization techniques, these tips address common organizational challenges while respecting different kitchen sizes and cooking styles. Each recommendation provides actionable guidance that delivers immediate improvements to your cooking workflow and cabinet functionality.
1. Implement Zone-Based Storage Systems
Zone-based organization creates dedicated activity centers within your kitchen, grouping related items by their function and usage frequency. This restaurant-inspired approach places everything you need for specific tasks within arm’s reach, eliminating unnecessary movement between cabinets. The concept divides your kitchen into distinct zones: cooking, prep, baking, storage, and cleaning areas.
Your cooking zone should contain pots, pans, cooking utensils, oils, and frequently used spices near the stove. The prep zone houses cutting boards, knives, mixing bowls, and food processors close to your primary counter workspace. Position your baking zone with measuring cups, mixing bowls, baking sheets, and baking ingredients in lower cabinets where heavy stand mixers won’t require lifting. This strategic placement reduces the physical distance traveled during meal preparation by approximately 40-50%.

The storage zone focuses on bulk ingredients and backstock items in less accessible upper cabinets or pantry spaces. Your cleaning zone keeps dishwashing supplies, trash bags, and cleaning products under the sink or in nearby lower cabinets. This zoning system mirrors your natural cooking movements, creating an intuitive flow that becomes second nature within days of implementation.
- Audit your current cooking process to identify your most frequent movements and tasks
- Group items by the specific tasks they support rather than by item category alone
- Place your most-used items in the primary work triangle between sink, stove, and refrigerator
- Keep backup supplies and rarely-used items in harder-to-reach spaces
- Consider your dominant hand when positioning frequently-grabbed items
- Reassess zone boundaries quarterly as your cooking habits evolve
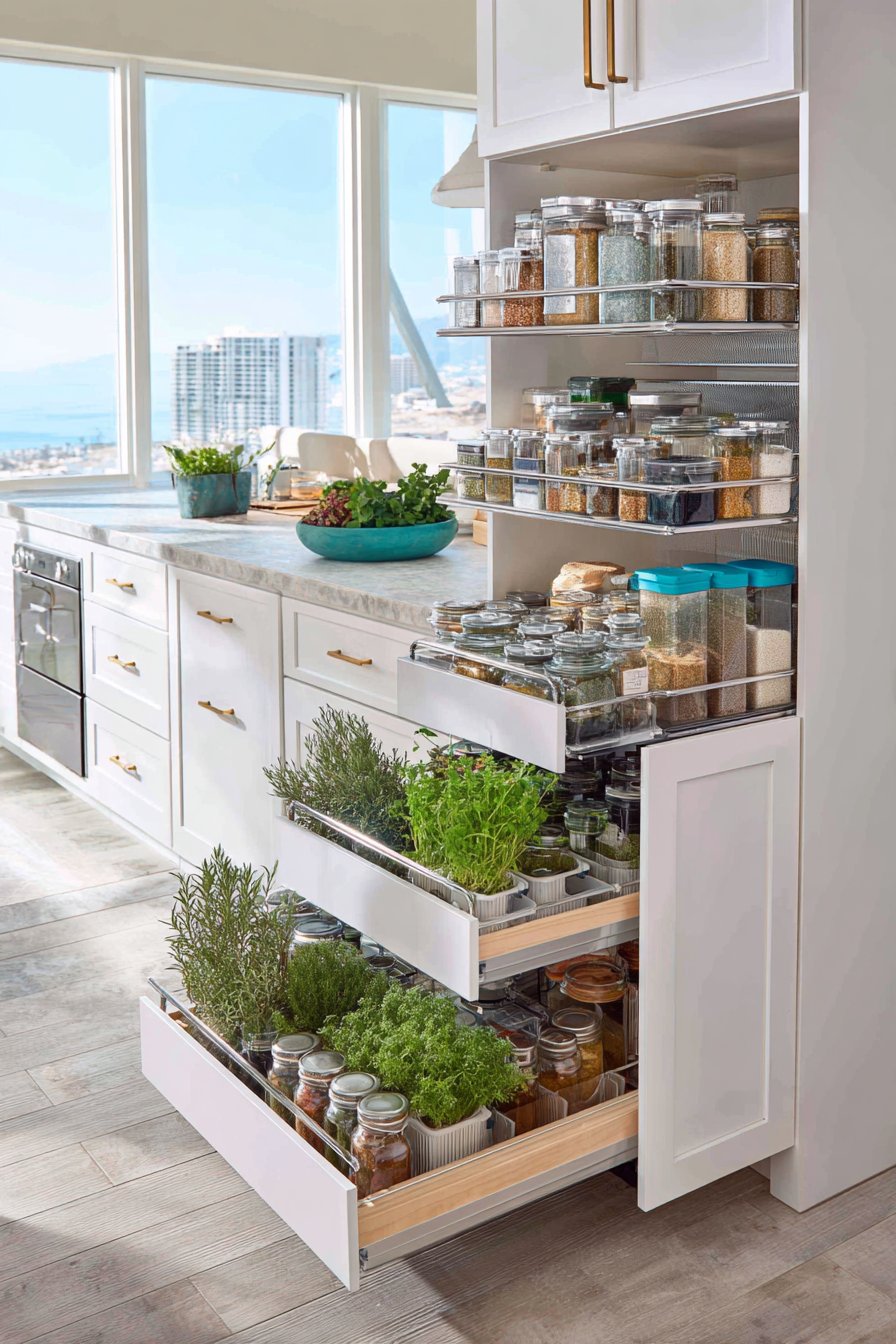
2. Prioritize Visibility with Tiered and Risered Systems
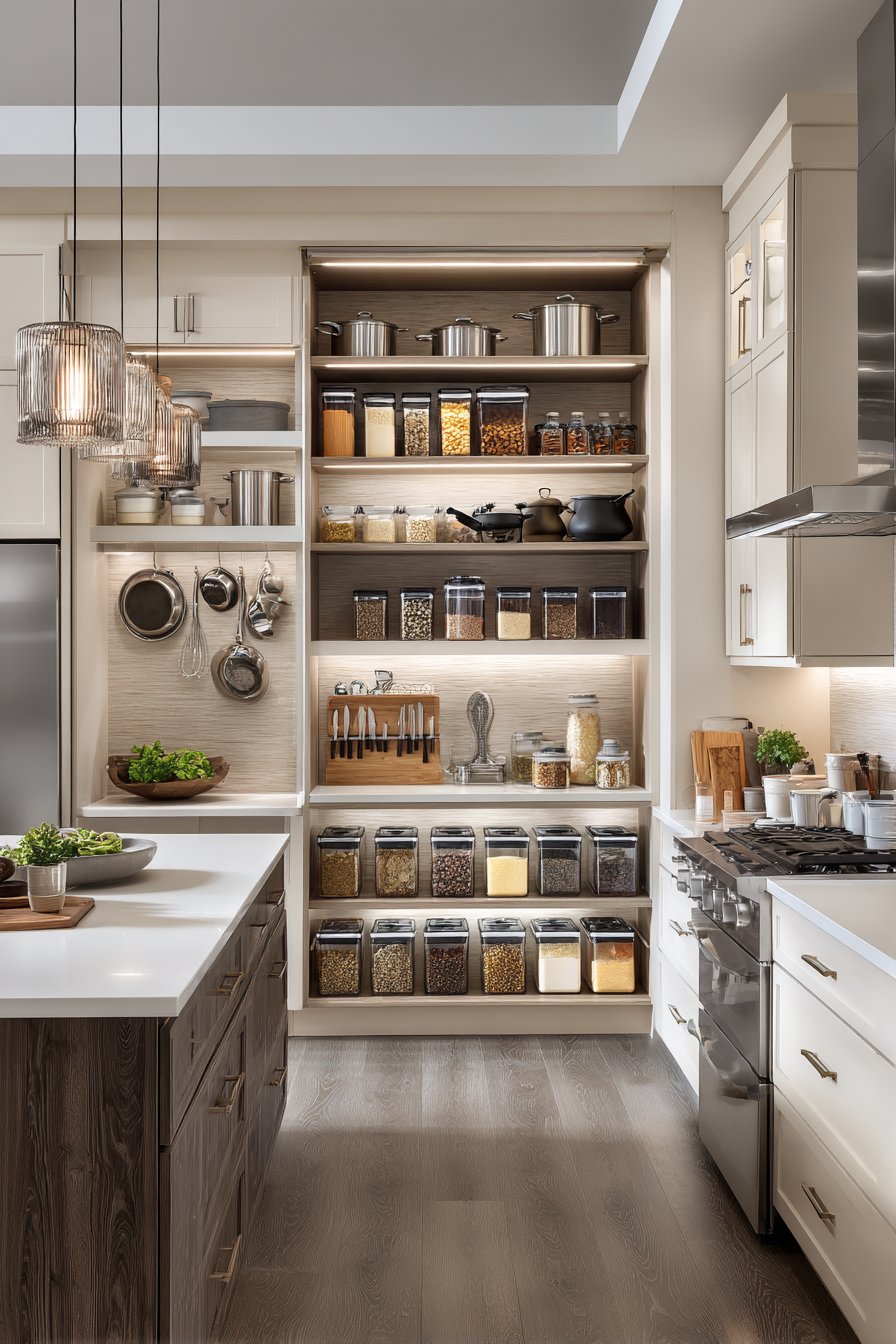
Cabinet visibility directly impacts cooking speed and ingredient usage. When you can see every item at a glance, you eliminate time wasted searching through stacked containers and avoid purchasing duplicate ingredients you didn’t realize you owned. Tiered shelving systems and cabinet risers create multiple visible levels within a single shelf space, effectively doubling or tripling your usable cabinet real estate.
Install expandable shelf risers that create stadium-style seating for spices, canned goods, and condiments. These simple tools transform deep cabinets where items hide behind each other into organized displays where every product remains visible. For upper cabinets, consider pull-down shelving systems that bring items within reach without requiring step stools. The investment in these organizational tools typically costs $50-150 but delivers ongoing time savings on every cooking session.
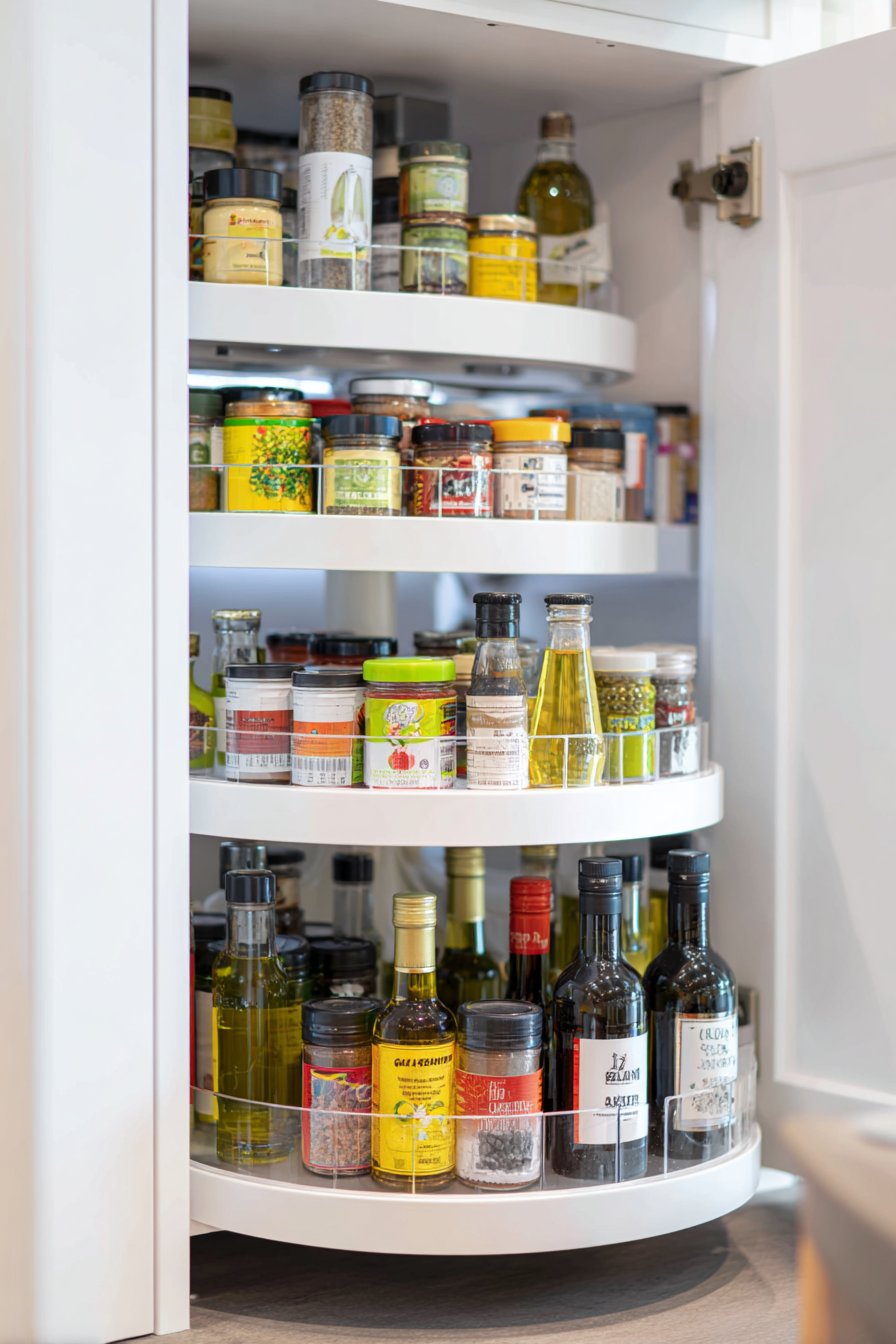
Lazy Susans provide 360-degree access to corner cabinet contents, solving one of the most frustrating kitchen storage challenges. Place turntables in corner cabinets for oils, vinegars, and cooking sprays, or use larger versions in pantry cabinets for snacks and breakfast items. The rotation mechanism ensures nothing gets forgotten in the back reaches of deep cabinets, reducing food waste from expired products you forgot you owned.
- Measure cabinet dimensions before purchasing risers to ensure proper fit
- Use clear acrylic risers for a streamlined look that blends with any decor
- Position taller items toward the back and shorter items forward on each riser level
- Install LED strip lighting under upper cabinets to illuminate lower cabinet contents when doors open
- Label turntable sections with categories to maintain organization as family members access items
- Replace cardboard packaging with clear containers for complete visibility of dry goods
3. Establish a Logical Shelving Hierarchy
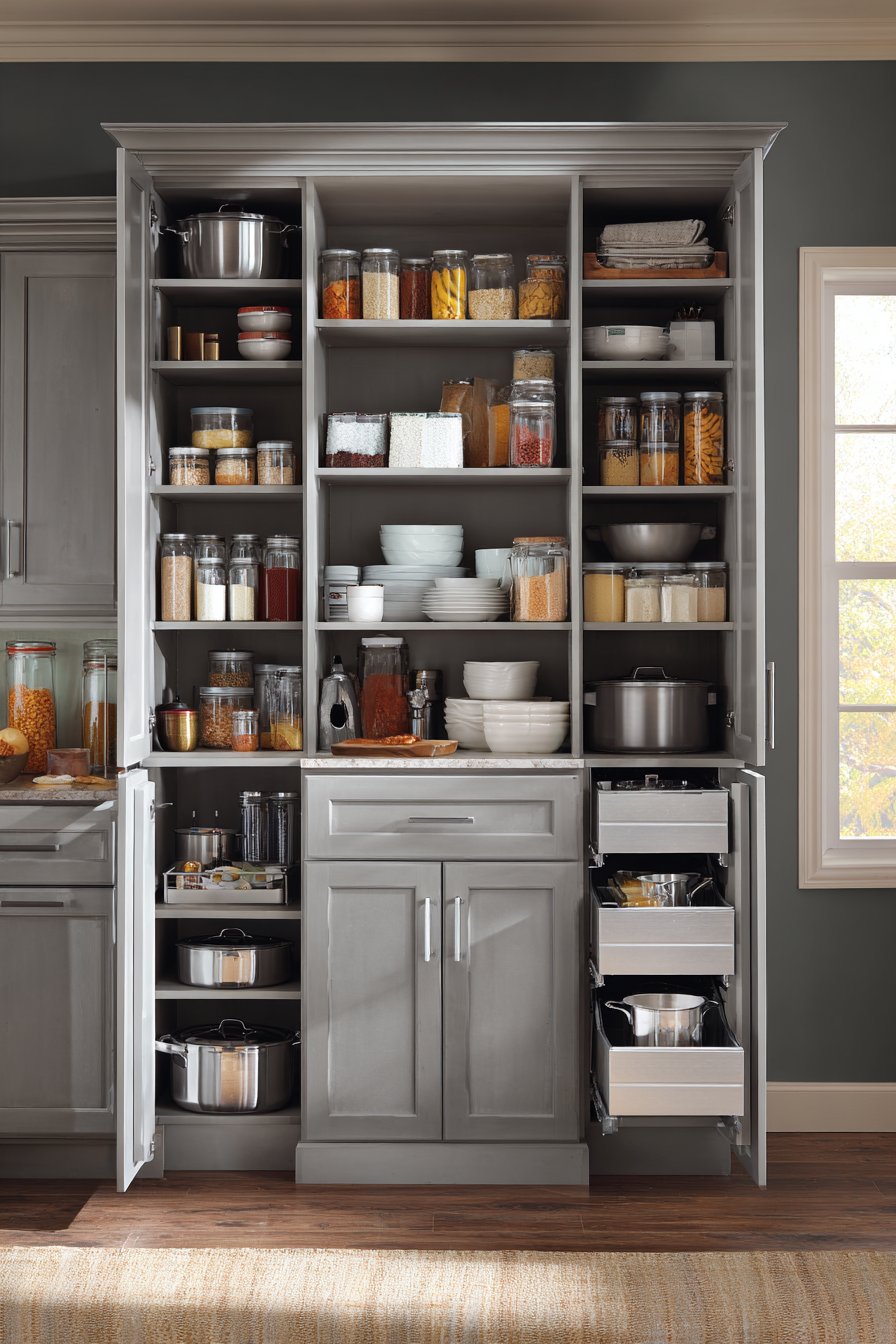
The vertical arrangement of items within your cabinets significantly impacts accessibility and cooking efficiency. Proper shelving hierarchy places daily-use items at eye level and arm’s reach while relegating occasional-use pieces to less convenient locations. This system respects ergonomic principles that reduce bending, stretching, and unnecessary physical strain during cooking preparation.
Your middle shelves (roughly 24-60 inches from the floor) should house everyday dishes, glasses, and frequently used ingredients. These prime real estate zones deserve your most-accessed items because they require minimal effort to reach. Lower cabinets work best for heavy appliances, pots, pans, and bulk items where weight won’t require lifting overhead. Upper cabinet tops suit special occasion serveware, seasonal items, and backup supplies you access monthly rather than daily.

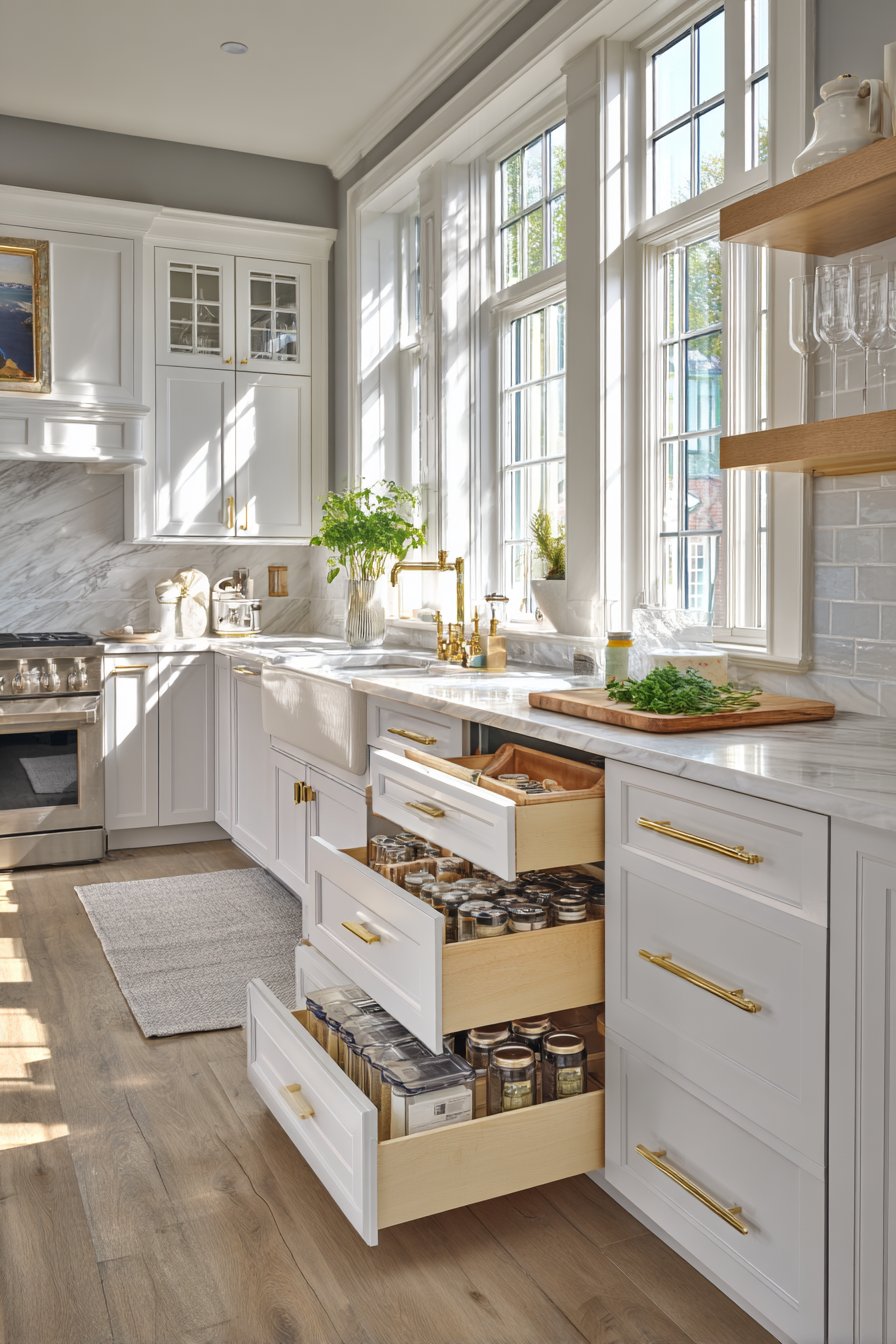
Within each shelf, implement front-to-back priority placement where frequently-used items sit at the front edge while occasional-use items retreat toward the back. This micro-organization prevents shifting through multiple items to access what you need most often. For deep cabinets, consider pull-out drawer systems that bring contents forward with a single motion, eliminating the reach-and-fumble experience that wastes time during meal preparation.
- Place lightweight items in upper cabinets to avoid lifting heavy objects overhead
- Store children’s dishes and snacks in lower cabinets they can access independently
- Keep your most-used three pots and two pans in the most accessible cooking zone location
- Reserve eye-level shelves for ingredients you use multiple times per week
- Position rarely-used appliances in garage cabinets or basement storage rather than valuable kitchen space
- Rotate seasonal items from storage to accessible shelves as needed throughout the year
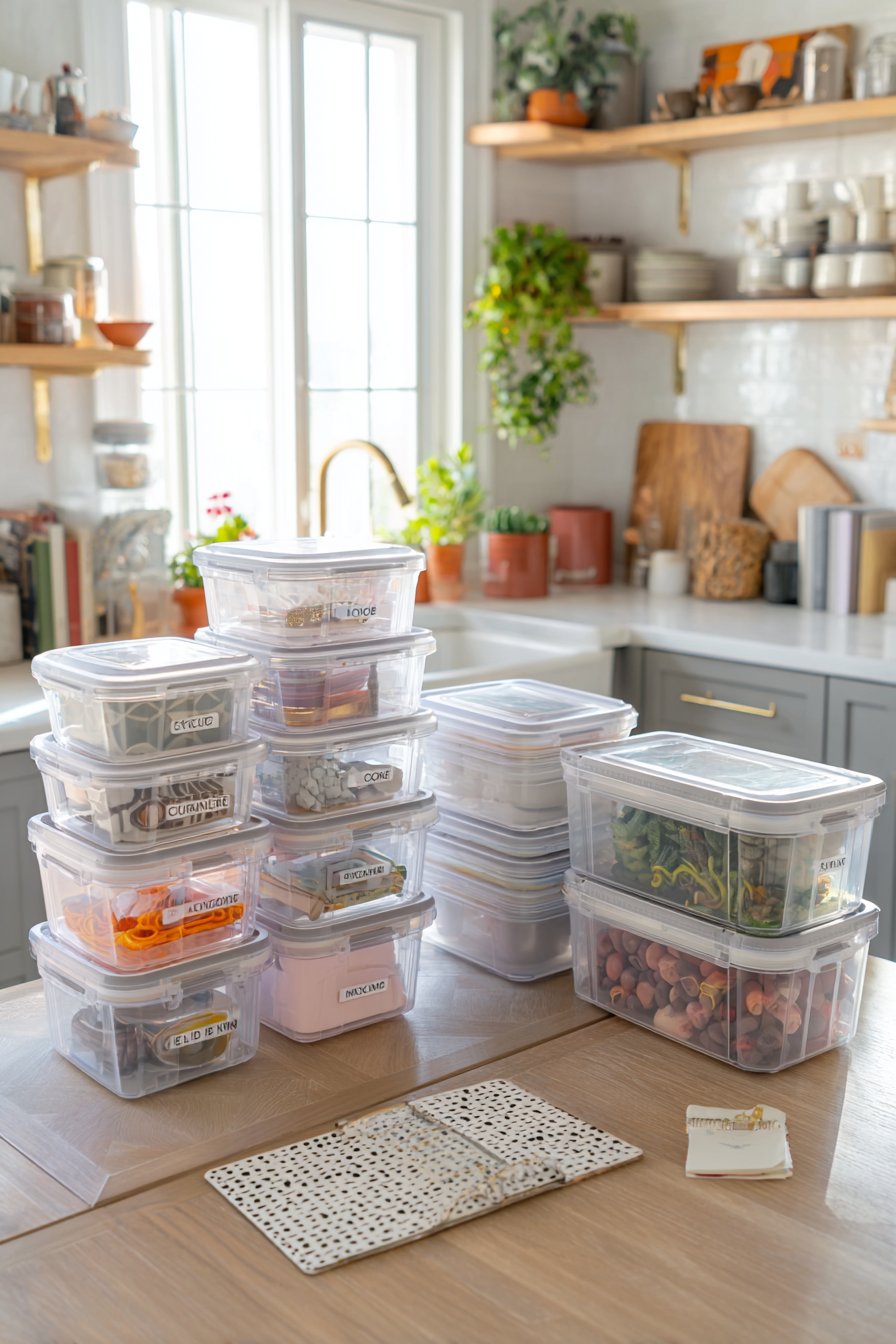
4. Standardize Container Systems for Dry Goods
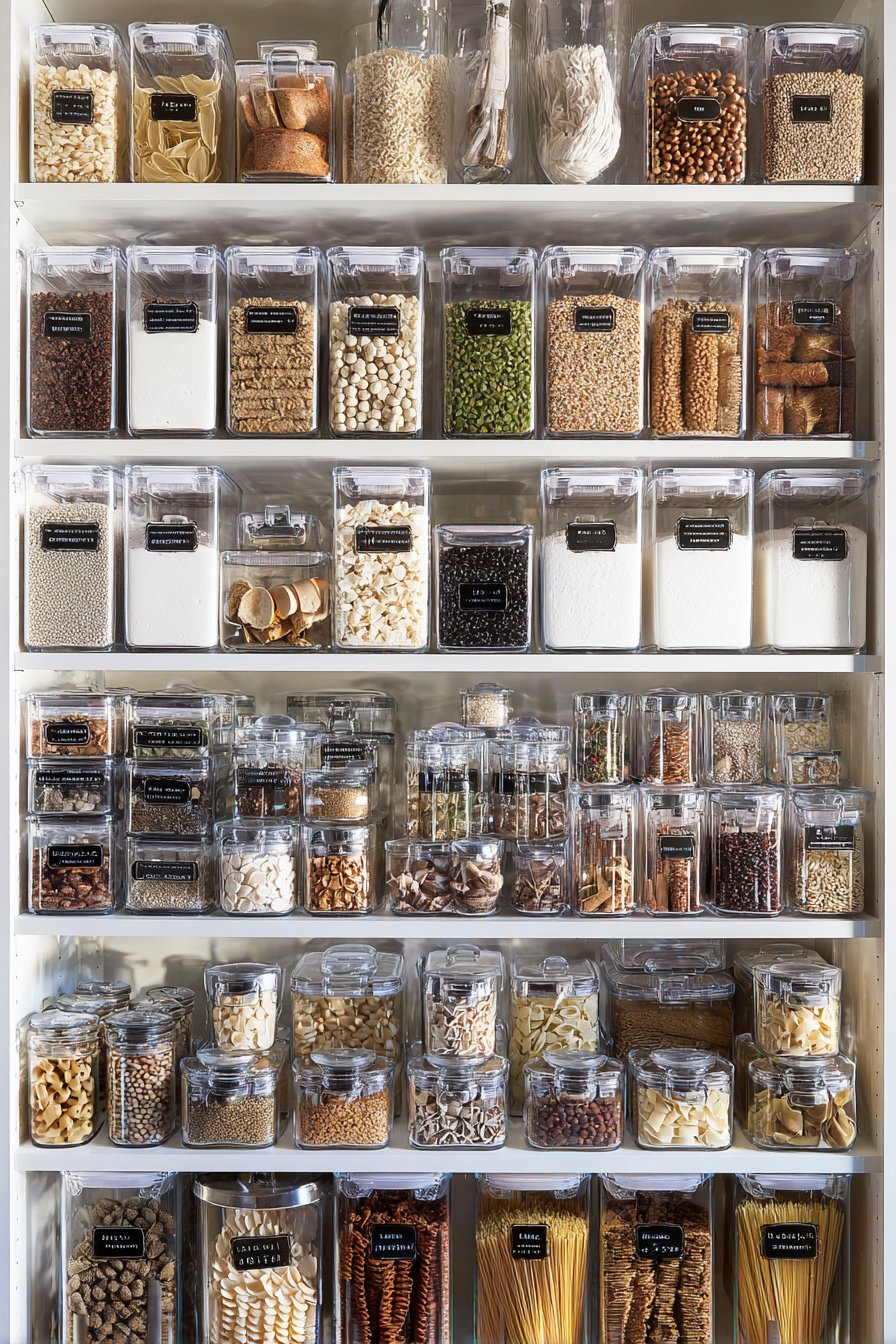
Transferring dry goods from original packaging into standardized containers creates visual cohesion while improving space efficiency and ingredient freshness. Matching containers stack neatly, eliminating wasted space between oddly-shaped boxes and bags. This system also provides airtight storage that extends shelf life for flour, sugar, rice, pasta, and other pantry staples by protecting them from moisture and pests.
Select square or rectangular containers rather than round ones, as they maximize cabinet space by fitting together without gaps. Choose clear containers that allow instant inventory assessment without opening lids or reading labels. Invest in a quality container set with consistent sizing—a typical household needs 4-6 large containers (for flour, sugar, rice), 6-8 medium containers (for pasta, beans, oats), and 8-12 small containers (for spices, baking additives, nuts).
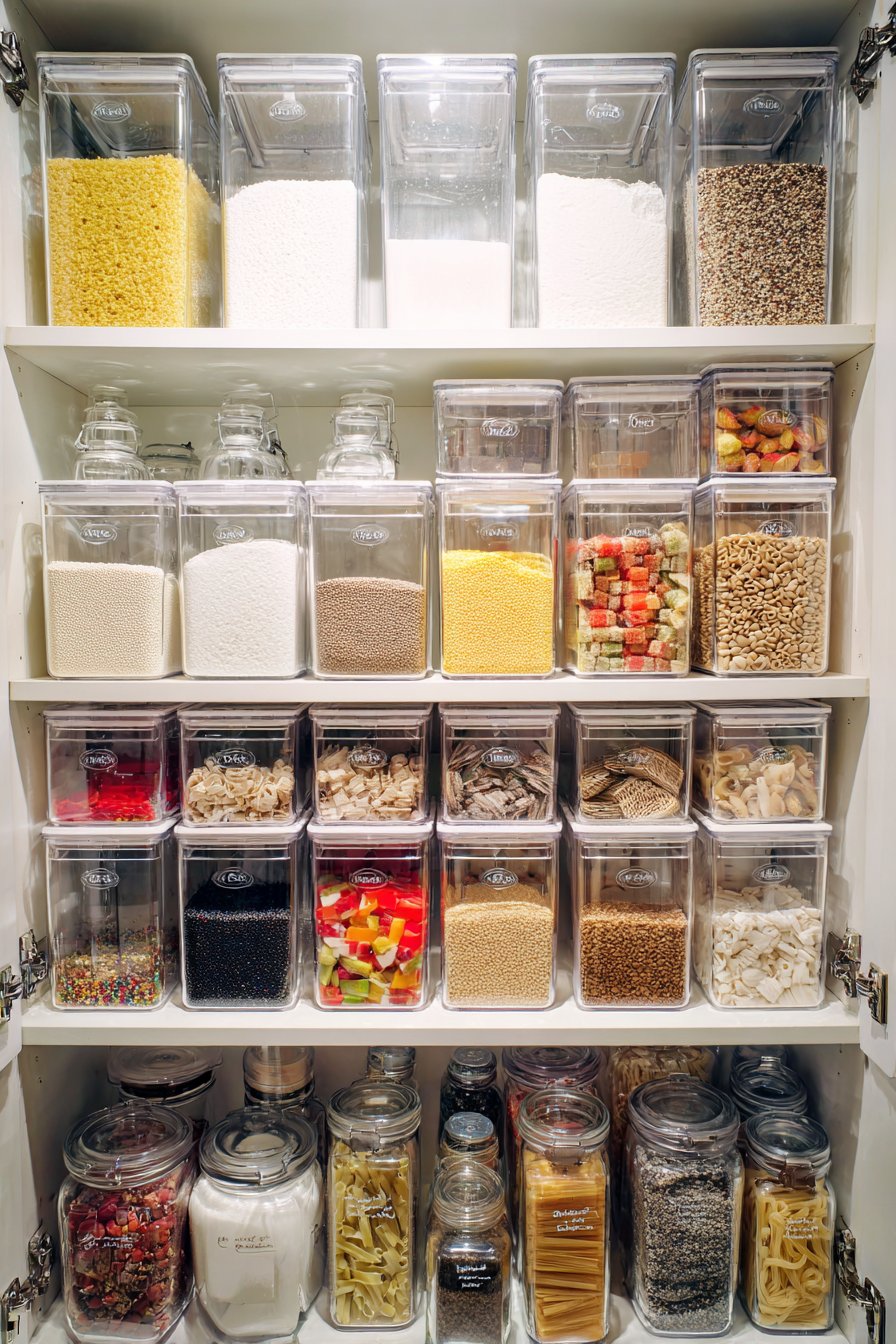
Label containers clearly with both contents and expiration dates using a label maker or waterproof markers. This practice prevents confusion when multiple similar-looking white powders share shelf space. For maximum efficiency, create a master inventory list noting when containers need refilling, streamlining your grocery shopping by eliminating guesswork about which ingredients require restocking. The upfront investment of $100-200 for quality containers delivers years of improved organization and reduced food waste.
- Choose containers with wide openings for easy scooping and measuring
- Stack same-size containers vertically to maximize vertical cabinet space
- Position most-used dry goods at eye level within arm’s reach
- Keep original product packaging with cooking instructions in a recipe binder
- Wash and completely dry containers before refilling to prevent moisture contamination
- Create a refill station area where empty containers await grocery shopping trips
5. Optimize Drawer Dividers and Utensil Organization
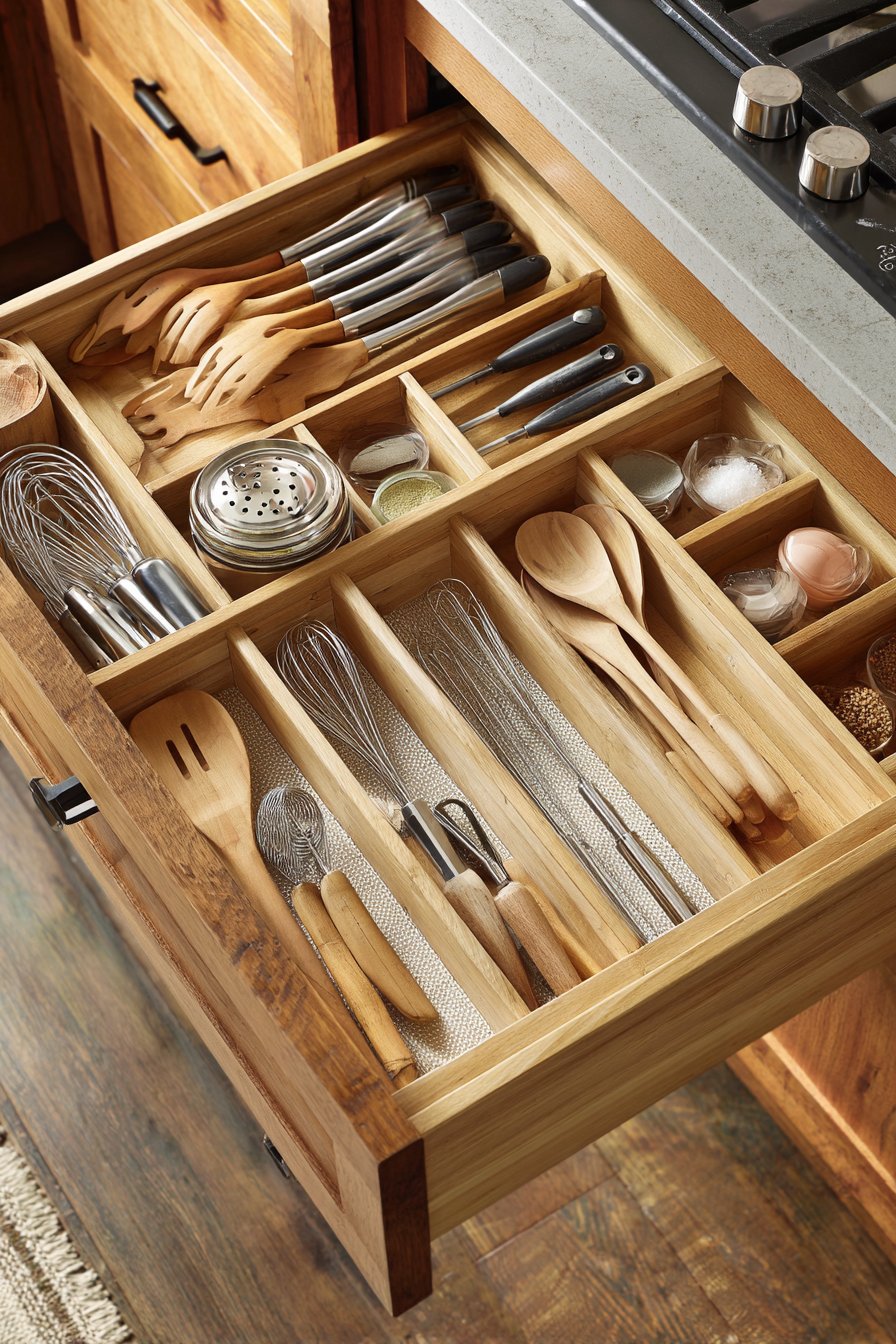
Kitchen drawers without dividers become chaotic jumbles where locating specific utensils wastes valuable cooking time. Custom drawer organization systems create designated spaces for every tool, ensuring you can grab what you need in seconds rather than sorting through tangled implements. This systematic approach applies to both utensil drawers and cooking tool drawers near your primary prep and cooking zones.
Install expandable drawer dividers that adjust to your drawer dimensions while creating separate compartments for different tool categories. Group similar items together—whisks with other mixing tools, measuring spoons with measuring cups, serving utensils separate from cooking utensils. For deep drawers, consider two-tiered systems with frequently-used items in the upper tray and backup or occasional-use tools below. This layered approach doubles drawer capacity without sacrificing accessibility.
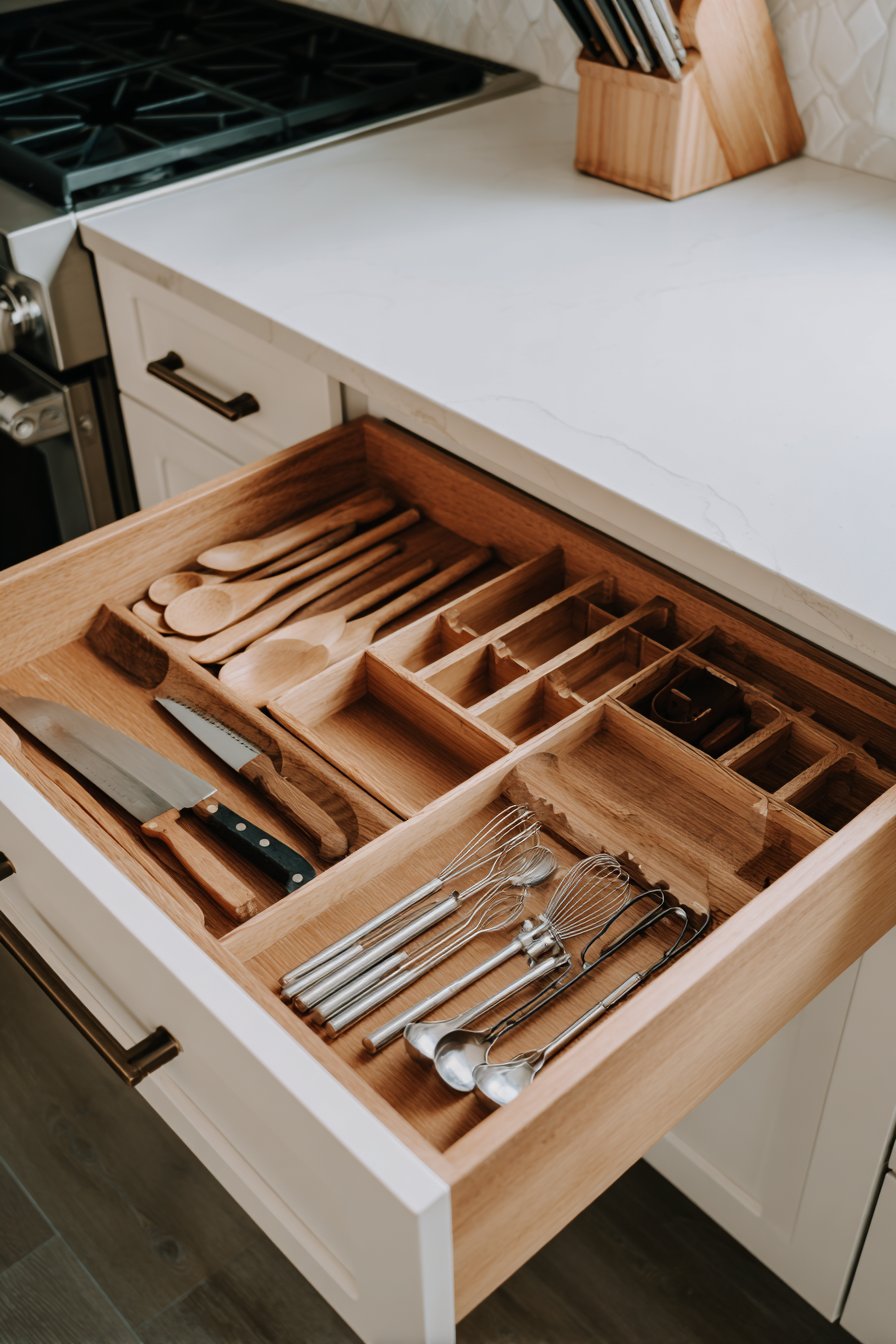
Your most-used cooking tools deserve prime drawer real estate directly beside your stove or primary prep counter. This drawer should contain your everyday spatula, wooden spoons, tongs, ladle, and cooking fork—the tools you reach for multiple times during typical meal preparation. Less frequently-used specialty tools like zesters, meat thermometers, or pastry brushes can occupy secondary drawer space further from your main cooking zone. This priority-based placement eliminates unnecessary steps during active cooking when every second matters.
- Measure drawer dimensions before purchasing dividers to ensure proper fit
- Group sharp knives in a separate in-drawer knife block for safety and blade protection
- Position your utensil drawer on the dominant-hand side of your stove
- Keep only one of each tool in prime drawer space, storing duplicates elsewhere
- Remove broken or rarely-used tools quarterly to prevent drawer overcrowding
- Use drawer liners to prevent tools from sliding during drawer opening and closing
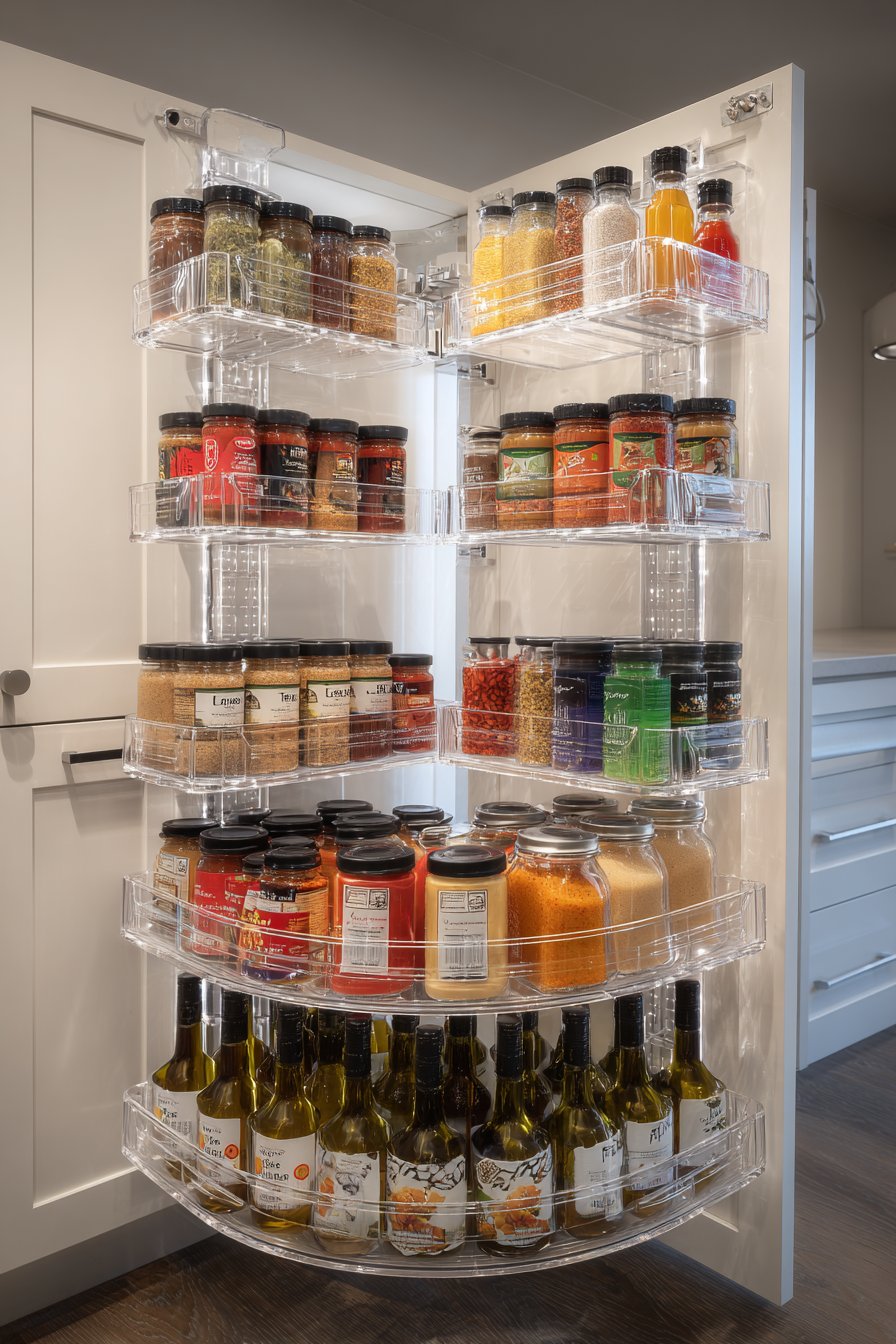
6. Create a Spice Organization System

Spice chaos represents one of the most common kitchen frustrations, with jumbled jars making it difficult to locate specific seasonings during time-sensitive cooking moments. An effective spice system provides instant visibility and accessibility while keeping seasonings fresh and flavorful. The ideal location places spices within arm’s reach of your cooking zone but away from direct heat and light that degrade flavor compounds.
Alphabetical organization creates the most universally accessible system that works for all household members and guests. Transfer spices into matching jars with clear labels, positioning them in a drawer with labels facing up or on tiered cabinet shelves with labels facing forward. For drawer storage, consider expandable spice drawer inserts that angle jars for complete visibility. Cabinet-based systems benefit from three-tiered step shelves that prevent small jars from hiding behind larger containers.
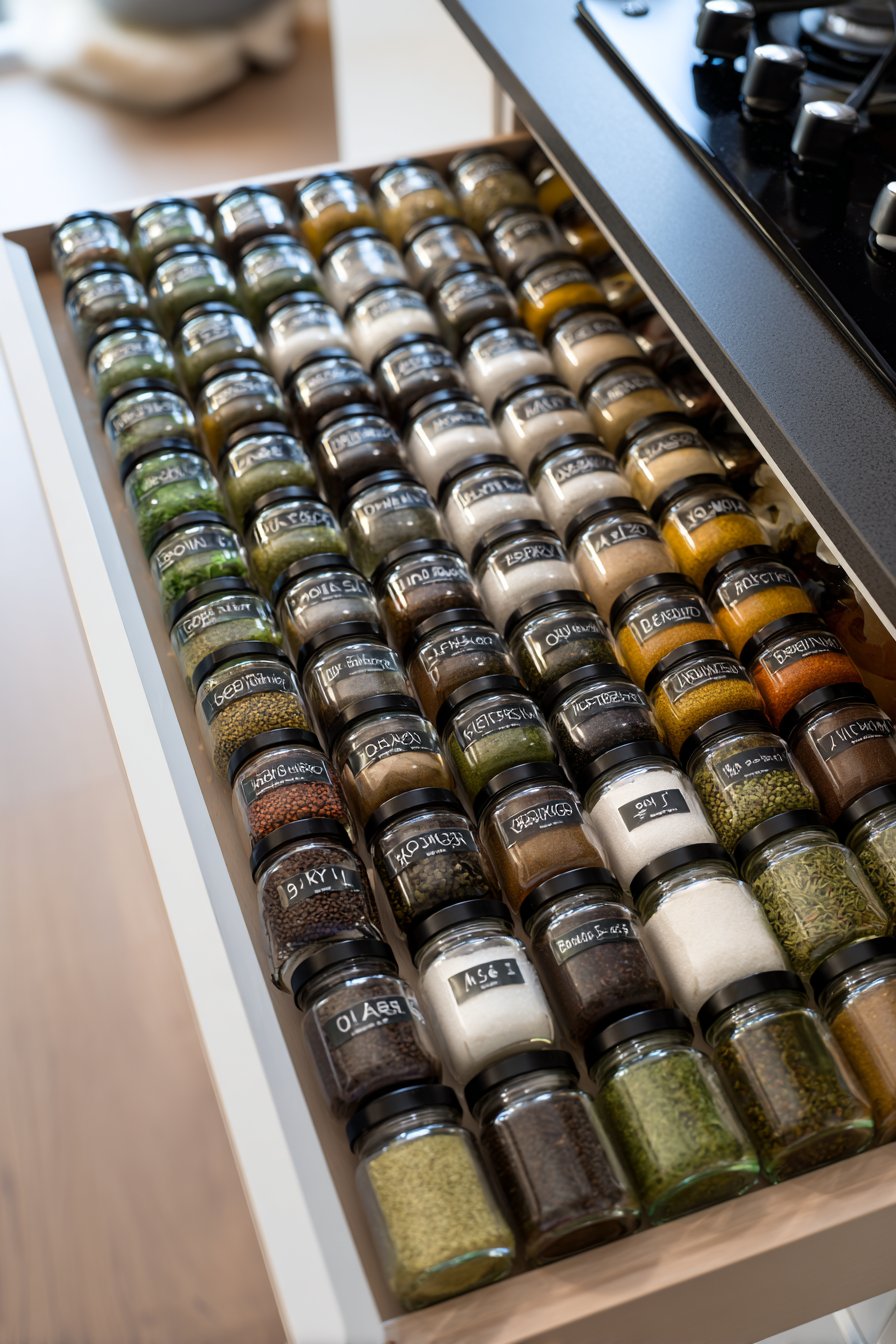
Frequency-based organization offers an alternative approach that prioritizes your most-used seasonings in the most accessible positions. Position salt, pepper, garlic powder, and your top five seasonings in a countertop carousel or front row of your spice drawer. Less frequently-used specialty spices can occupy back rows or secondary storage areas. This system requires understanding your personal cooking patterns but can save time for cooks who repeatedly reach for the same core seasonings.
- Purchase matching spice jars in two sizes to accommodate different quantities
- Label jar tops and fronts for visibility in both drawer and shelf storage
- Date spice containers to track freshness—most ground spices last 2-3 years
- Store whole spices separately from ground spices as they maintain freshness longer
- Keep a small notepad in your spice area to track which seasonings need replacement
- Position frequently-used spice blends in prime locations while single-use specialty spices retreat to secondary storage
7. Implement the One-Touch Rule for Cabinet Maintenance

The one-touch rule prevents organizational systems from degrading over time by requiring that every item returns to its designated location after each use. This simple principle maintains the efficiency you’ve created through thoughtful cabinet organization. When everyone in your household follows this rule, your organized system remains functional indefinitely without requiring periodic reorganization sessions.
Communicate the system clearly by labeling shelves and containers so all family members understand where items belong. Use a label maker or printed labels for permanent identification of zones, shelves, and storage areas. Visual systems work better than verbal explanations, especially for children and guests who contribute to household cooking. When everyone can see where items belong, the one-touch rule becomes natural rather than burdensome.
Schedule quarterly maintenance reviews where you reassess your organizational system, remove expired items, and adjust arrangements based on changed cooking patterns. These 30-minute sessions prevent small organizational drift from becoming major chaos. During reviews, identify problem areas where items consistently end up out of place—these spots indicate your system needs adjustment rather than better compliance. Effective organization adapts to actual behavior patterns rather than forcing behavior to match an inflexible system.
- Take before photos of your organized system to reference during maintenance reviews
- Create a simple diagram showing zone locations and major category placements
- Involve all household members in the initial organization process to build buy-in
- Recognize that systems require 2-3 weeks to become habitual for regular users
- Adjust storage locations immediately when you notice repeated misplacements
- Celebrate organizational wins with family members to build positive associations with the system
Conclusion
Organized kitchen cabinets transform cooking from a time-consuming challenge into an efficient, enjoyable process. These seven strategies—zone-based storage, visibility optimization, shelving hierarchy, standardized containers, drawer organization, spice systems, and maintenance rules—work together to create a comprehensive organizational framework that supports faster, less stressful meal preparation. The time investment required for initial organization pays ongoing dividends through reduced cooking time and improved kitchen functionality.
Start with one or two strategies that address your most frustrating organizational challenges, then gradually implement additional systems as initial changes prove their value. Remember that an effective organization adapts to your specific cooking style and kitchen layout rather than following rigid rules. Your organized kitchen should feel intuitive and support your natural movements, making cooking faster and more enjoyable with every meal you prepare.
"As an Amazon Associate, I earn from qualifying purchases."