The kitchen hood often becomes an afterthought in renovation projects, yet it plays a crucial role in maintaining air quality and protecting your investment. Many homeowners select hoods based purely on aesthetics, only to discover their beautiful new appliance fails to eliminate cooking odors, grease buildup, or excessive heat. This oversight can lead to lingering smells, damaged cabinetry, and even respiratory issues over time.
Proper ventilation isn’t just about comfort—it’s about creating a healthy cooking environment that functions as efficiently as it looks. The size of your kitchen hood directly impacts its ability to capture steam, smoke, and airborne grease particles before they settle on surfaces or circulate throughout your home. Understanding the relationship between hood dimensions, cooktop size, and room volume helps you make informed decisions that enhance both functionality and safety.
This comprehensive guide explores the technical considerations, measurement guidelines, and practical factors that determine the ideal hood size for your specific cooking space. Whether you’re designing a compact apartment kitchen or a spacious culinary workshop, these principles will help you select ventilation that actually performs.
1. The Coverage Formula That Actually Works
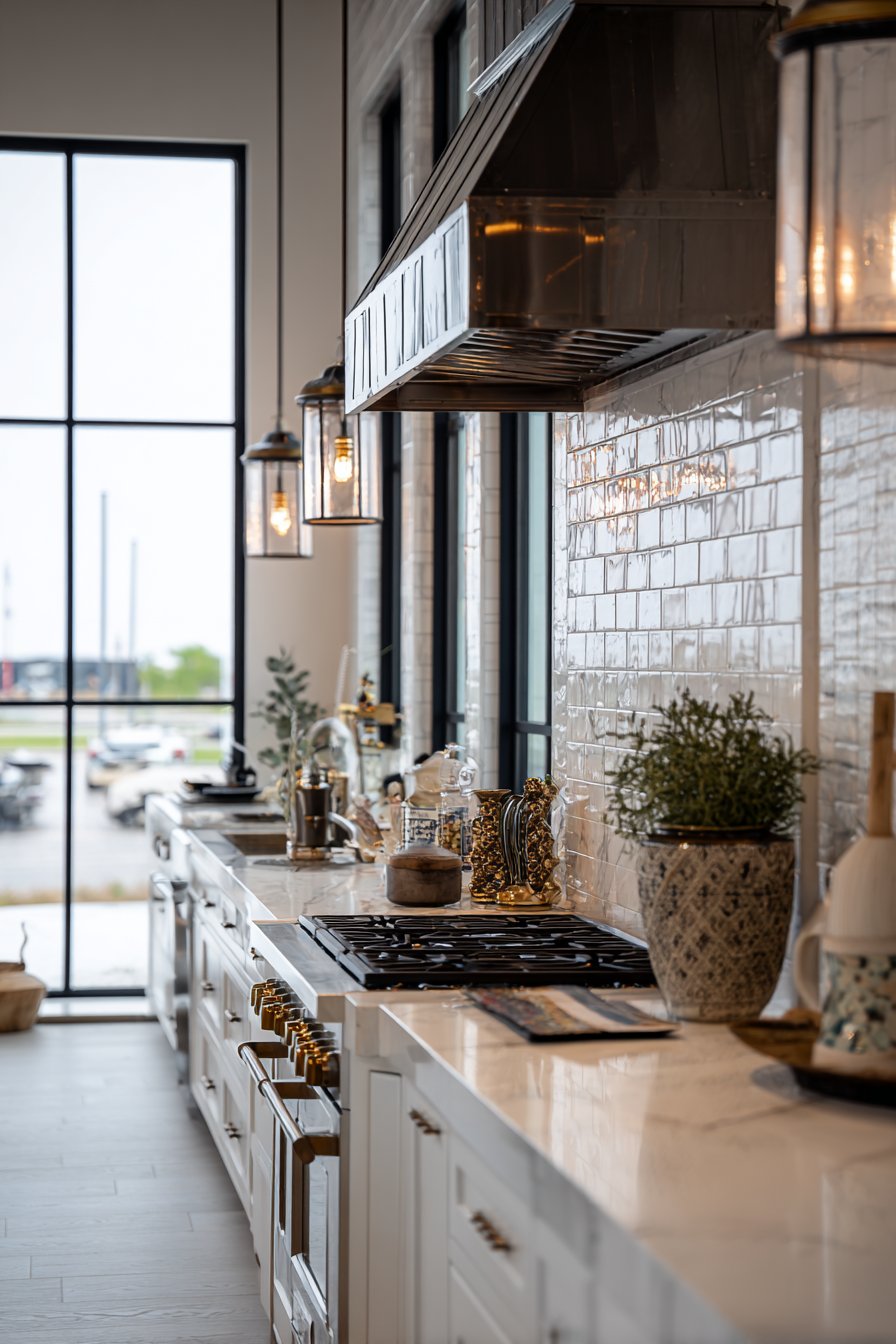
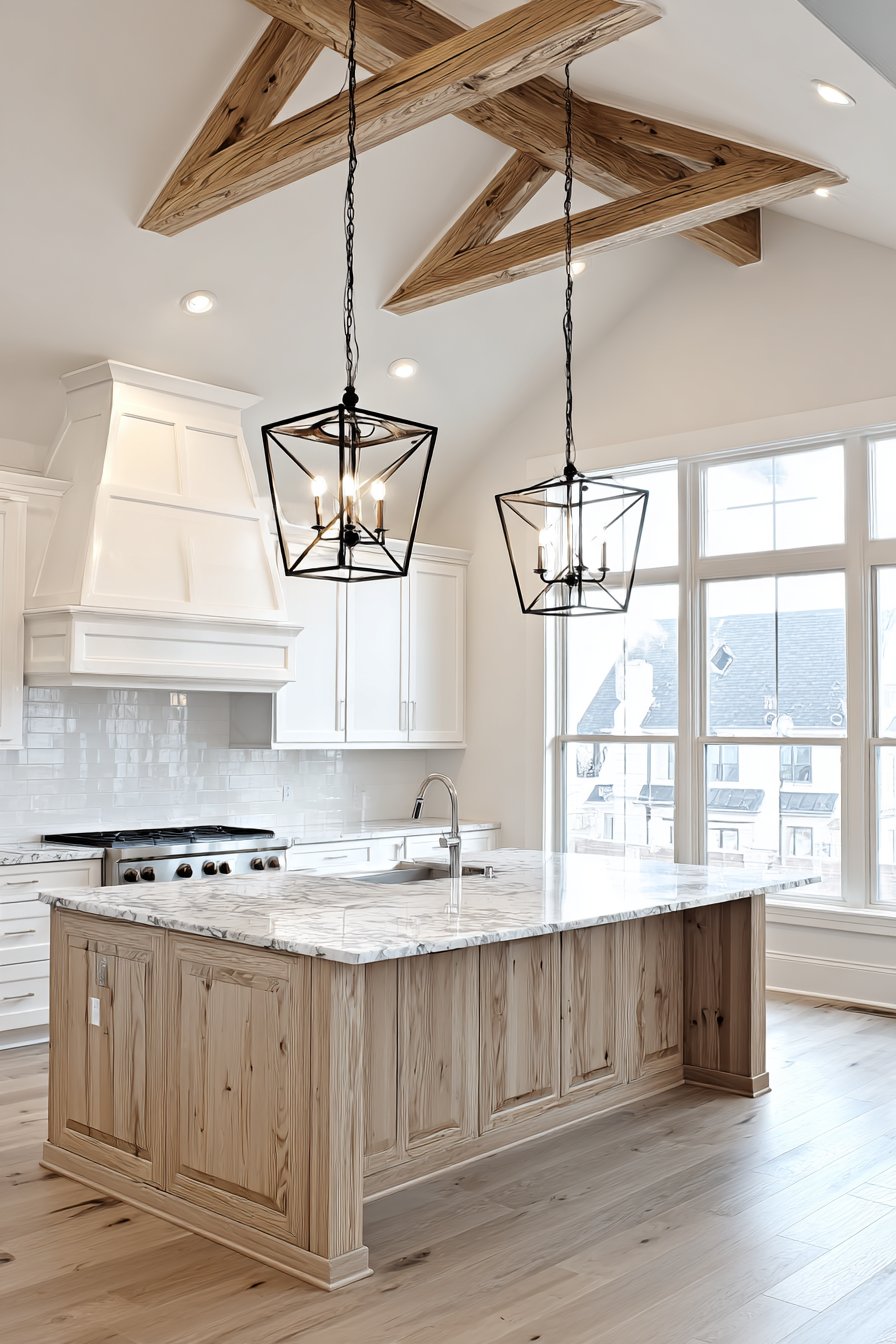
The most fundamental rule in hood sizing requires your ventilation system to extend beyond your cooktop on all sides. Professional designers recommend adding three inches minimum to each side of your cooking surface, though six inches provides optimal coverage. This extra width ensures rising steam and smoke fall within the hood’s capture zone rather than escaping into your kitchen.
For a standard 30-inch range, this translates to a hood measuring at least 36 inches wide, while a 36-inch cooktop demands a 42-inch hood. These measurements aren’t arbitrary—they’re based on the physics of how heated air rises and disperses. Without adequate overhang, cooking vapors escape around the edges before the fan can draw them upward.
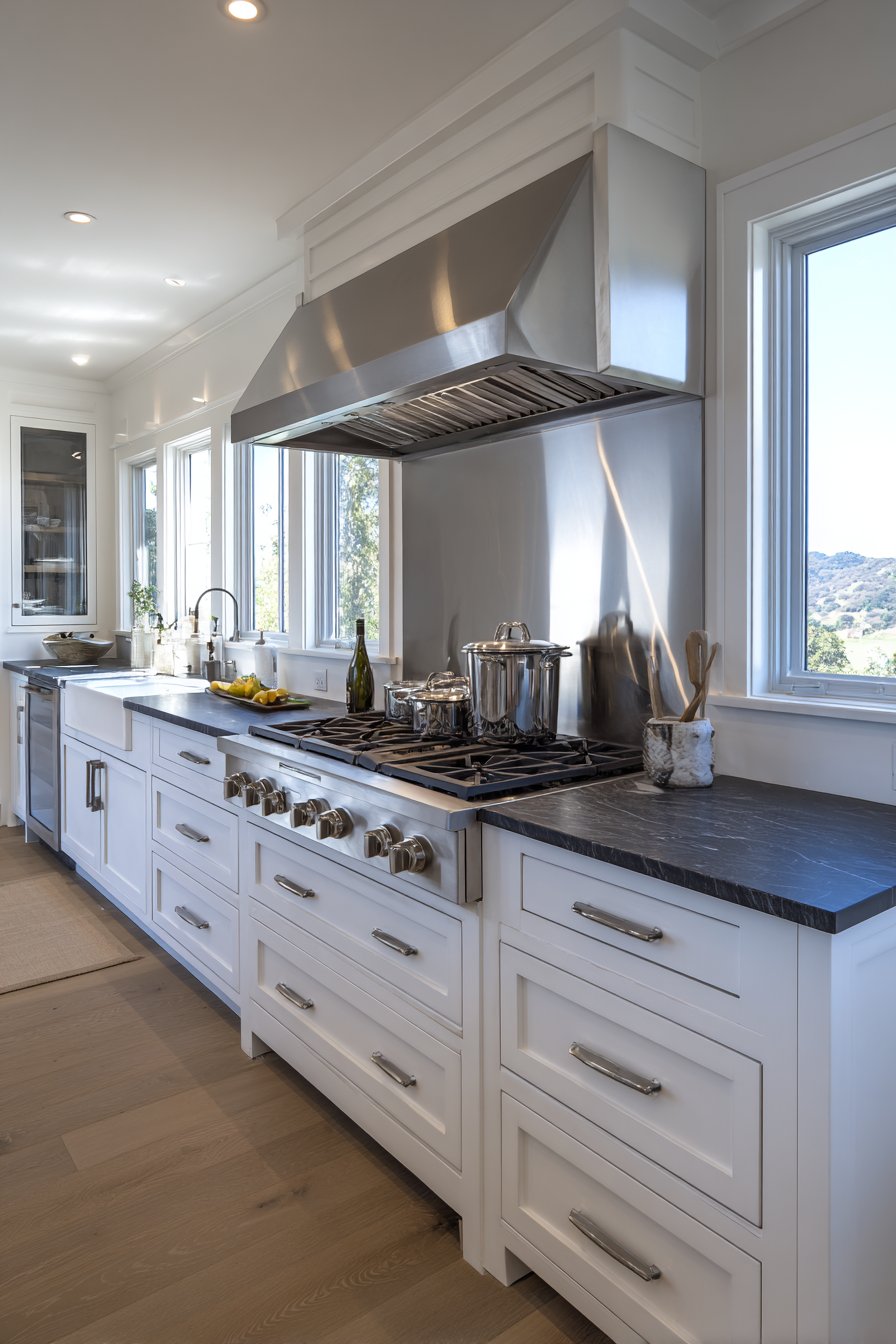
The depth dimension matters equally, especially for ranges positioned against walls. Your hood should match or slightly exceed the depth of your cooktop, typically ranging from 18 to 24 inches. Island installations require even greater consideration since cooking vapors can escape in all directions.
- Measure your cooktop width and add 6 inches for optimal coverage
- Consider depth requirements based on wall-mount versus island placement
- Account for professional ranges that generate more heat and require larger hoods
- Remember that wider is better when choosing between two size options
- Verify clearance requirements don’t force you to mount too high
- Calculate total capture area by multiplying width times depth
2. CFM Ratings Determine Real-World Performance
The cubic feet per minute (CFM) rating indicates how much air your hood moves, but many homeowners purchase underpowered units that look impressive yet perform poorly. The basic calculation requires 100 CFM for every linear foot of cooktop width, meaning a 36-inch range needs at least 300 CFM. However, this represents the absolute minimum for standard electric cooktops.
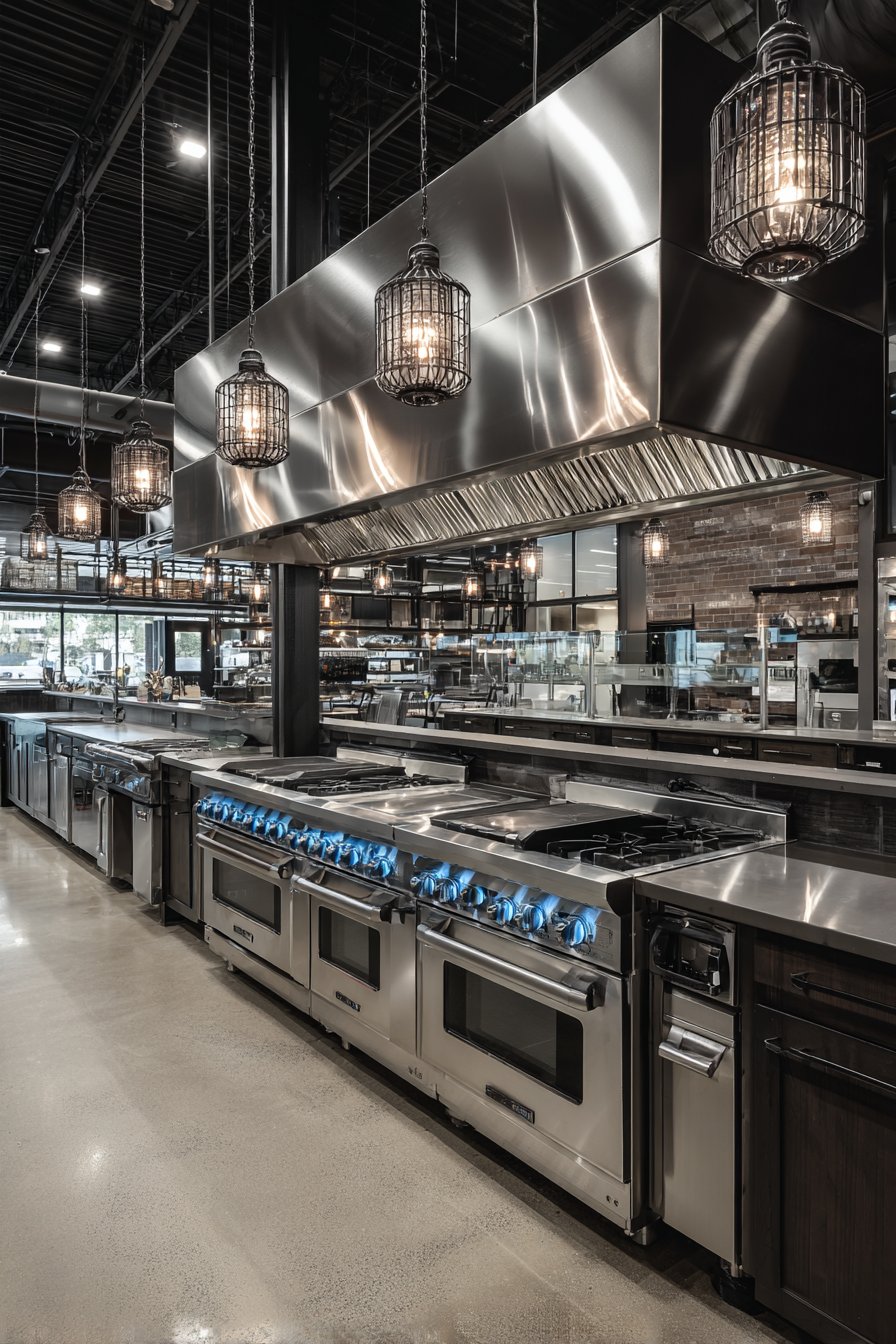
Gas ranges and high-BTU professional equipment demand significantly higher ventilation capacity due to combustion byproducts and greater heat output. A 60,000 BTU range requires approximately 600 CFM, while commercial-style units often need 900 CFM or more. Underpowered ventilation in these scenarios creates dangerous carbon monoxide buildup and excessive humidity.
Ductwork configuration also impacts effective CFM since each elbow, length of duct, and transition reduces airflow efficiency. If your installation requires multiple turns or extends more than 15 feet, compensate by selecting a hood rated 25-30% higher than your calculated requirement.
- Calculate baseline CFM using the 100-per-foot rule for standard cooking
- Add 50-100 CFM for high-heat cooking styles like wok preparation
- Multiply BTU output by 0.01 for gas ranges to determine minimum CFM
- Consider makeup air requirements when exceeding 400 CFM in tight homes
- Test noise levels since higher CFM often means louder operation
- Verify your existing ductwork can handle increased airflow without modifications
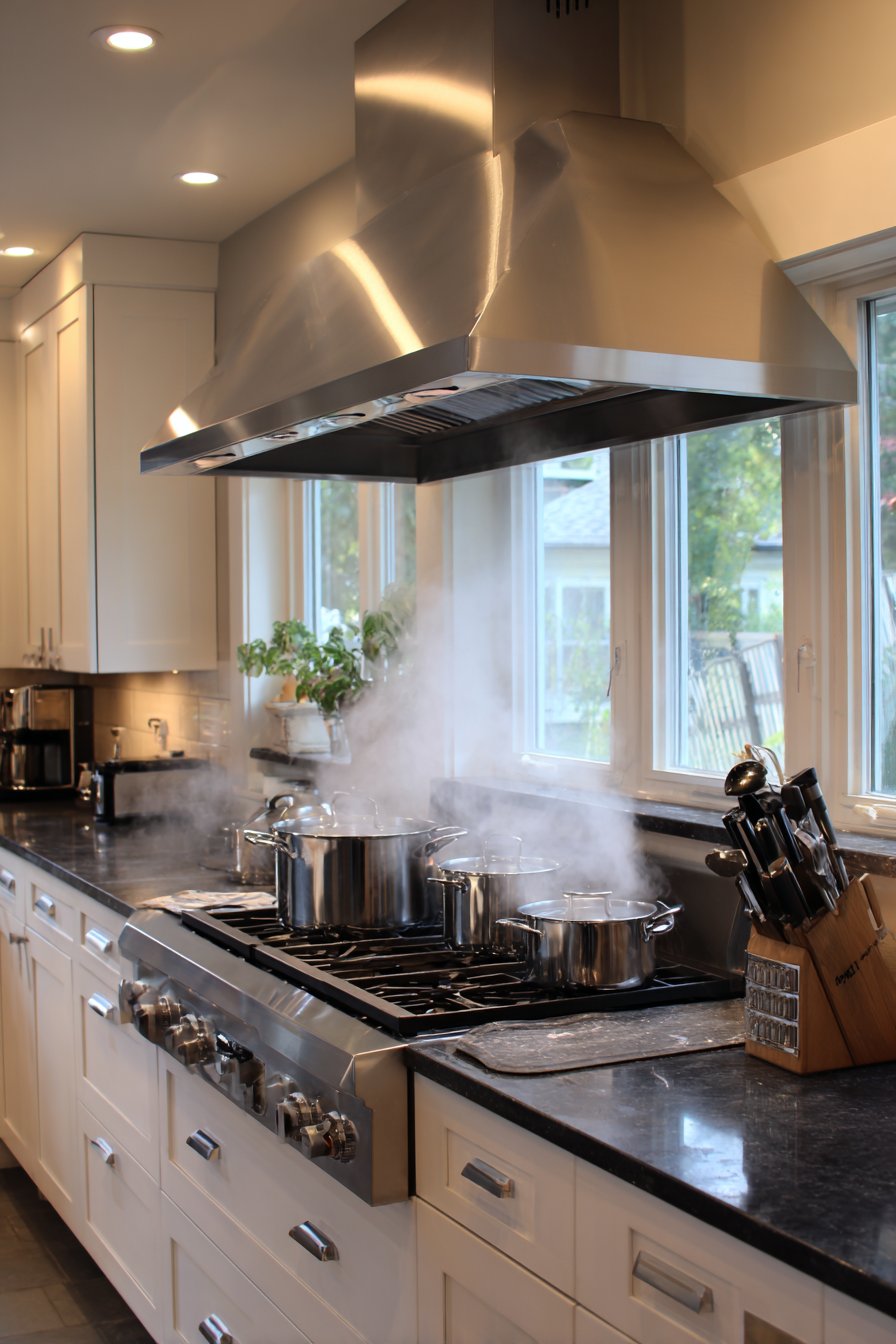
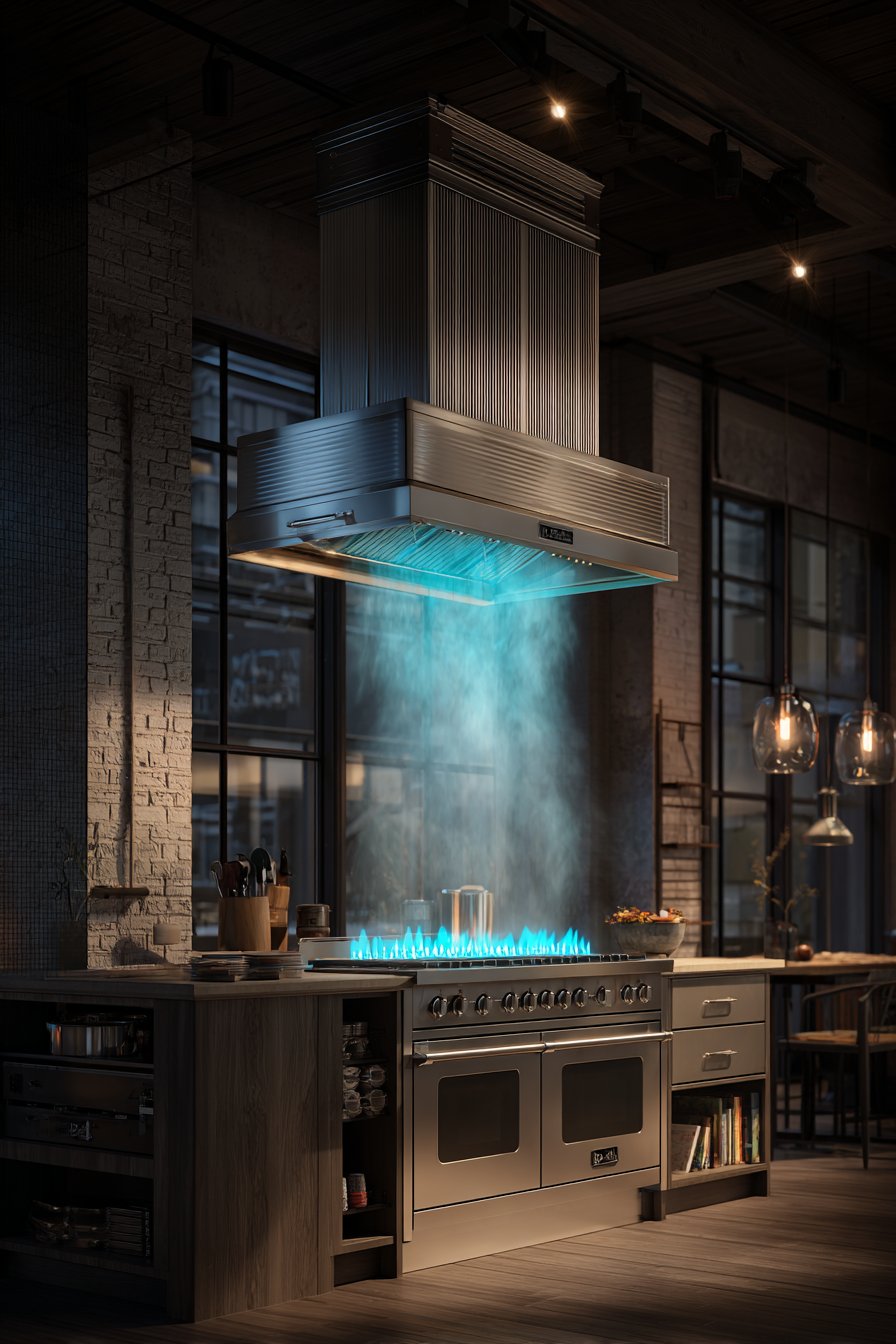
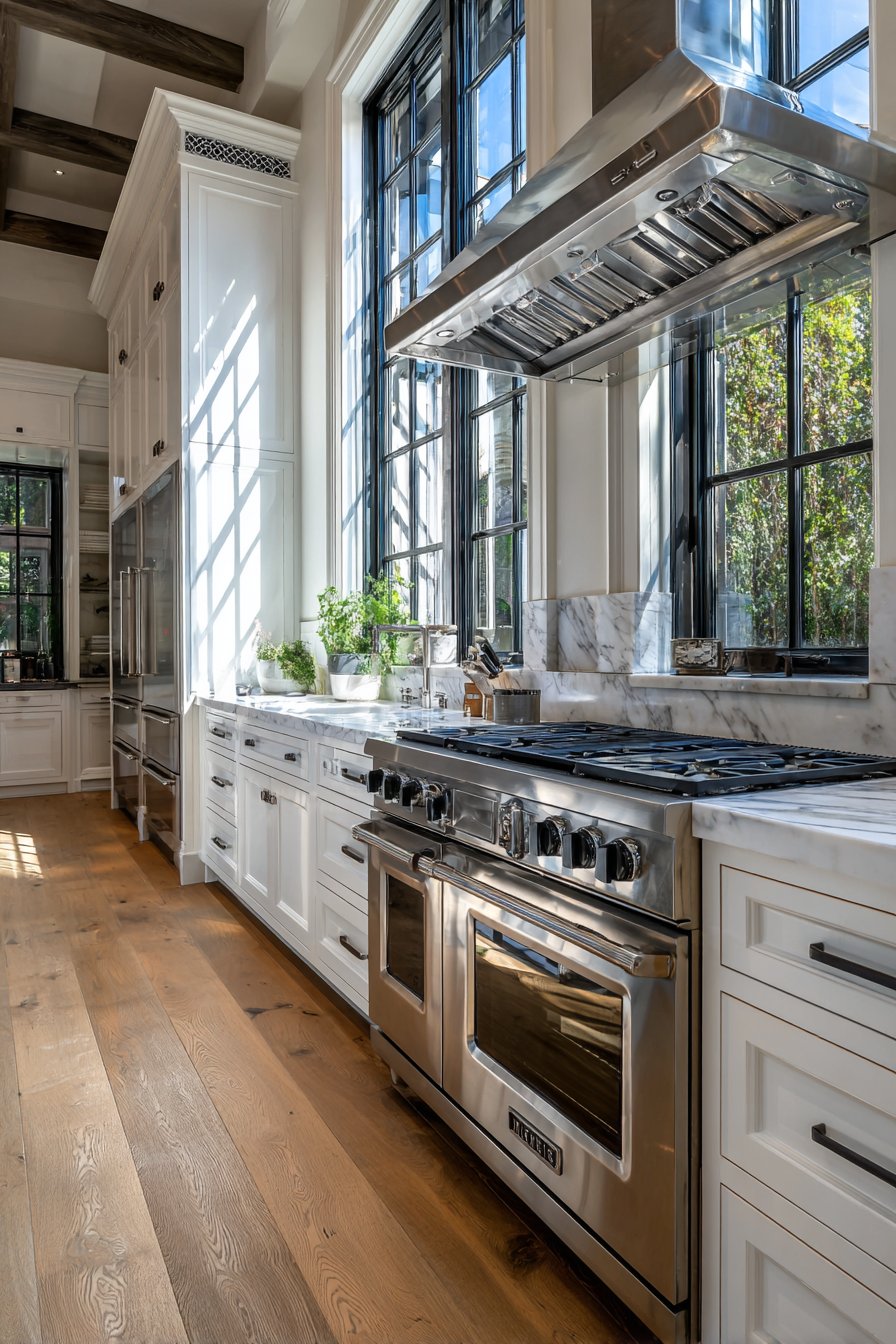
3. Mounting Height Creates the Capture Zone

Installing your hood at the correct height proves just as important as choosing the right size, yet many installations compromise effectiveness by mounting too high. Standard guidelines recommend 24 to 30 inches above electric cooktops and 28 to 36 inches above gas ranges. These ranges balance effective capture with comfortable working clearance.
Mounting too low creates hazards including head bumps and fire risks if flammable materials contact heating elements. Positioning too high allows cooking vapors to disperse before entering the capture zone, rendering even properly sized hoods ineffective. Each inch above recommended heights reduces efficiency by approximately 10-15%.
Island hoods face additional challenges since they lack wall backing to help funnel vapors upward. These installations typically require larger hoods with higher CFM ratings and often benefit from mounting slightly lower within the safe range. The three-dimensional nature of island cooking demands more robust ventilation.
- Use a tape measure to mark exact mounting points before installation
- Account for ceiling height when planning island hood placement
- Consider adjustable-height models for kitchens with multiple cooks
- Verify clearance for tall pots and stock pots you regularly use
- Check manufacturer specifications since some designs perform better at specific heights
- Photograph your cooktop with a person standing nearby to visualize working clearance
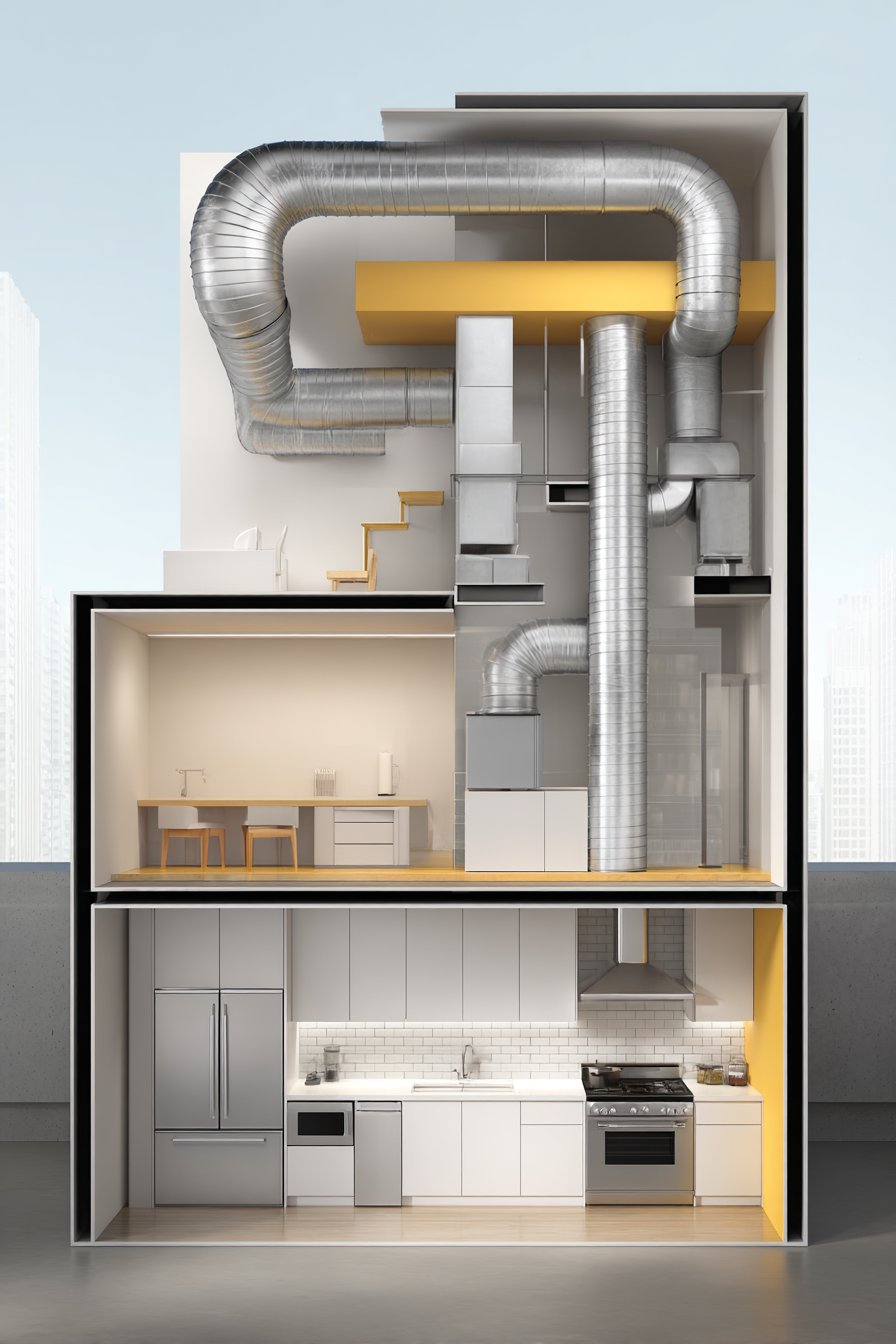
4. Ductwork Sizing Prevents Performance Bottlenecks
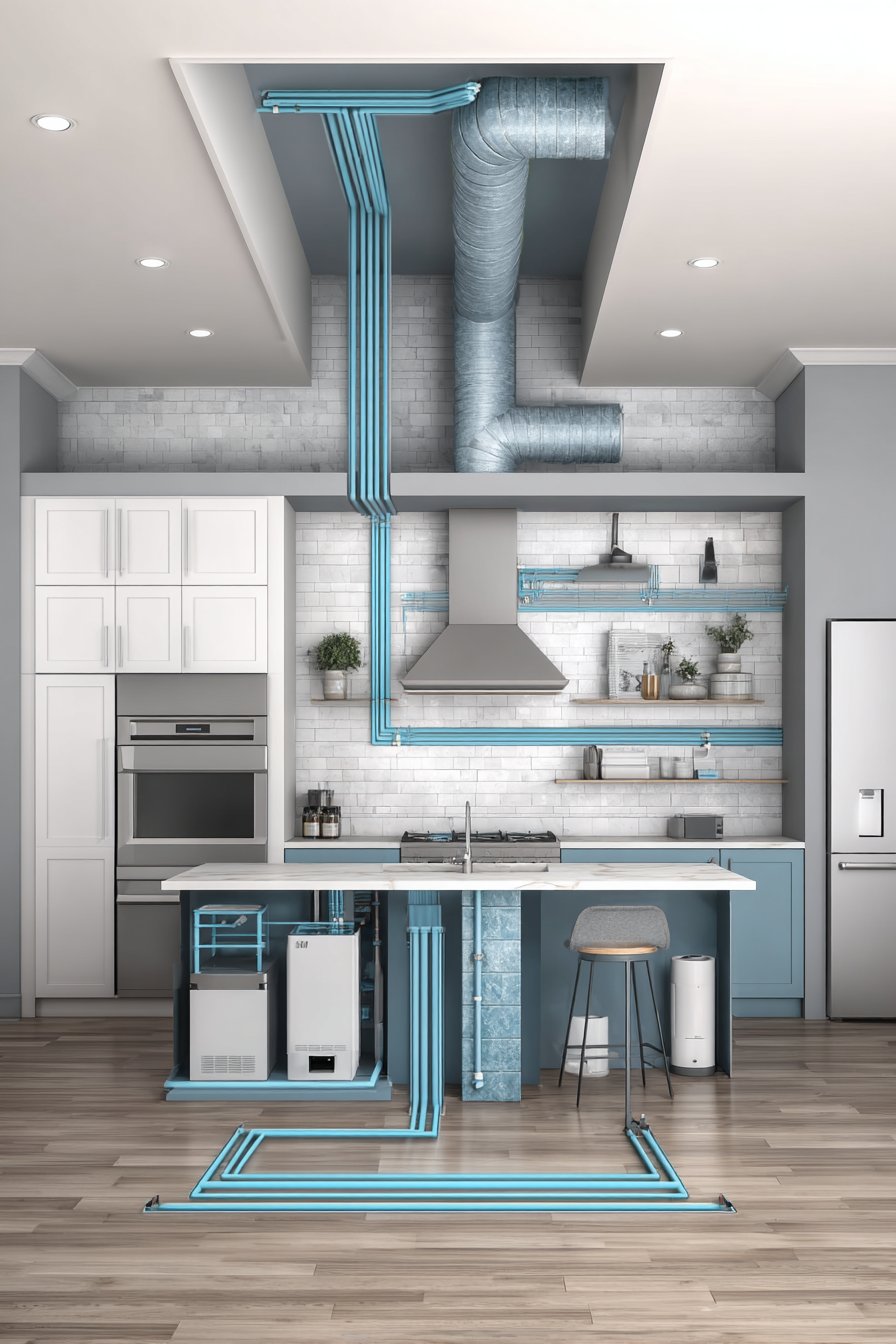
Even perfectly sized hoods fail when connected to undersized ductwork that restricts airflow like pinching a garden hose. Most residential installations require 6-inch round ducting for hoods up to 400 CFM, while units rated 600 CFM or higher demand 8-inch or even 10-inch ducting. Using inadequate duct diameter creates backpressure that reduces actual CFM by 40-60%.
The duct path matters tremendously—each 90-degree elbow reduces efficiency by approximately 25 CFM, while longer runs decrease performance proportionally. Straight vertical ducting through the roof provides optimal performance, whereas horizontal runs exceeding 20 feet may require professional-grade blowers to maintain adequate ventilation.
Rectangular transitional ducting offers flexibility in tight spaces but creates more turbulence than round ducting. If your installation requires rectangular sections, use them sparingly and maintain equivalent cross-sectional area. A 3.25 x 10-inch rectangular duct approximates a 6-inch round duct in capacity.
- Sketch your duct path before purchasing materials to identify potential bottlenecks
- Minimize elbows by choosing the most direct route to exterior walls
- Use insulated ducting in unconditioned spaces to prevent condensation
- Avoid flexible ducting that creates excessive friction and reduces airflow
- Install a duct booster fan for runs exceeding manufacturer recommendations
- Seal all joints with appropriate HVAC tape rather than standard duct tape
5. Kitchen Size and Ceiling Height Influence Requirements
Large open-concept kitchens with high ceilings require more powerful ventilation than compact enclosed spaces since cooking vapors have greater volume to fill before detection. A 200-square-foot kitchen with 10-foot ceilings contains roughly 2,000 cubic feet of air, meaning your hood should theoretically exchange this volume 10-15 times per hour during cooking.
Standard 8-foot ceilings concentrate cooking vapors in a smaller area, allowing properly sized hoods to perform more efficiently. However, cramped kitchens demand careful attention to makeup air since powerful hoods can create negative pressure that backdrafts furnaces or water heaters. Building codes in many jurisdictions now require makeup air systems when hood CFM exceeds 400.
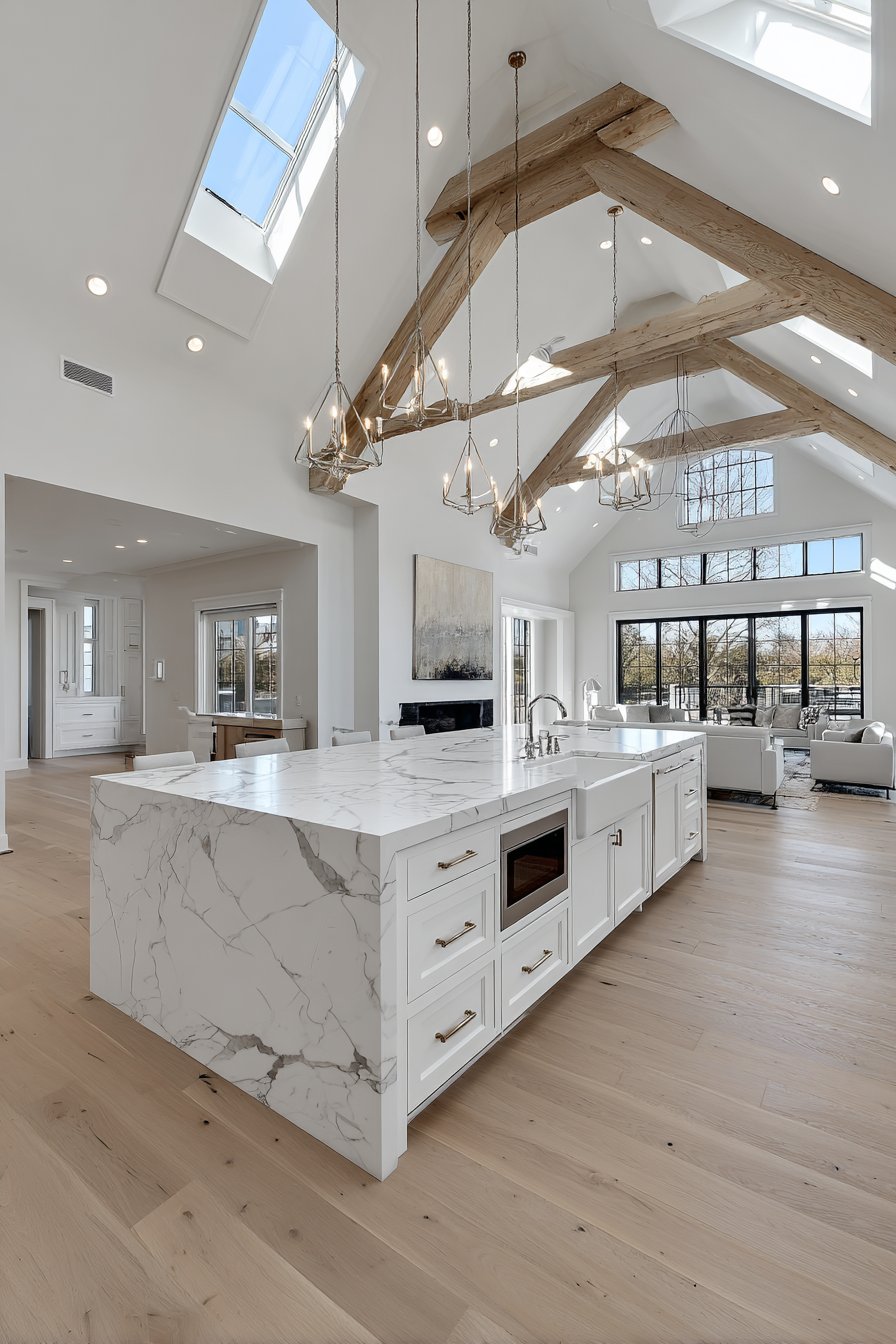
Cathedral ceilings and two-story great rooms present unique challenges requiring commercial-grade solutions despite residential cooking loads. The vertical space allows significant dispersion before vapors reach standard hood heights, often necessitating island hoods rated 50-100% higher than wall-mounted equivalents would require.
- Calculate room volume by multiplying length times width times height
- Increase CFM requirements by 25% for ceilings over 9 feet
- Consult HVAC professionals about makeup air in tightly sealed homes
- Consider downdraft ventilation for extremely high ceilings where hoods prove impractical
- Test your existing ventilation’s effectiveness using steam from boiling water
- Monitor humidity levels in adjacent rooms which indicate inadequate kitchen ventilation
6. Material Quality Affects Long-Term Effectiveness
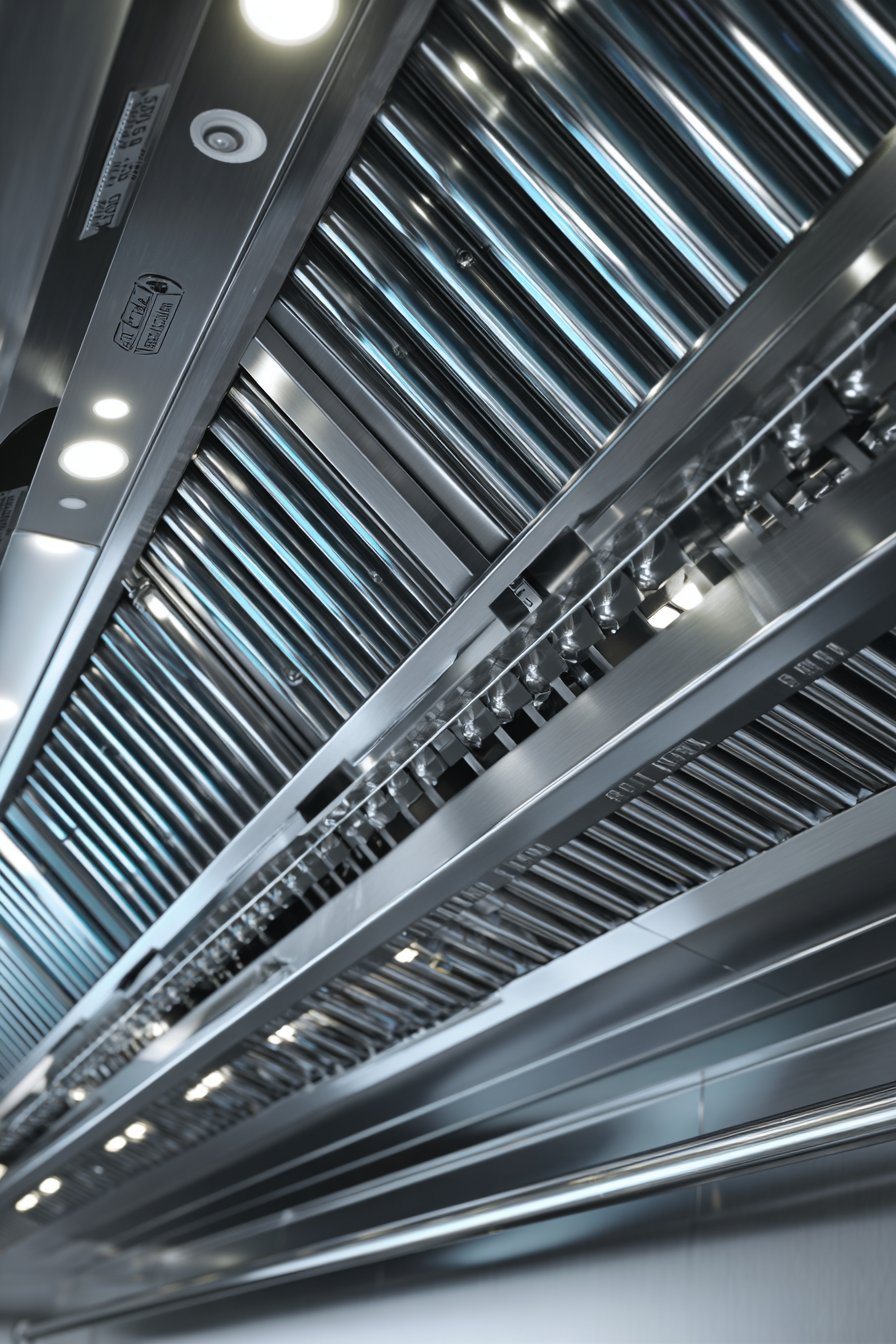
Budget hoods constructed from thin-gauge steel and weak internal baffles deteriorate rapidly when exposed to cooking grease and steam. Professional-grade stainless steel ranging from 18 to 20 gauge provides durability that maintains performance over decades rather than years. The thickness prevents warping and facilitates thorough cleaning without damage.
Baffle filters made from stainless steel outperform aluminum mesh filters by capturing grease more efficiently while allowing better airflow. These commercial-style filters withstand dishwasher cleaning repeatedly without degrading, whereas mesh filters often require hand washing and eventual replacement. The initial investment in quality filtration pays dividends through reduced maintenance and better air quality.

Internal blower construction determines both longevity and noise levels. Squirrel-cage blowers provide quieter operation than centrifugal designs while moving equivalent air volumes. Sealed motor housings prevent grease infiltration that causes premature failure in economy models. Variable speed controls allow precise adjustment from gentle ventilation during simmering to maximum power during high-heat searing.
- Inspect filter quality before purchasing by checking weight and construction
- Choose sealed internal components over exposed motor assemblies
- Verify all metal construction rather than plastic internal parts
- Compare warranty coverage which indicates manufacturer confidence
- Test speed controls for smooth transitions rather than abrupt changes
- Read long-term reviews from users who’ve owned hoods for 5+ years
Conclusion
Selecting the right kitchen hood size involves more than matching your cooktop width—it requires understanding the complex relationship between dimensions, power, and installation factors. The three-inch-per-side rule provides a starting point, but your specific cooking style, equipment, and kitchen configuration demand thoughtful consideration of CFM requirements, mounting height, and ductwork capacity.
Investing time in proper sizing prevents the frustration of inadequate ventilation and the expense of premature replacement. A correctly specified hood transforms your kitchen into a comfortable cooking space where you control air quality rather than tolerating persistent odors and grease accumulation. Prioritize function alongside aesthetics to create ventilation that truly performs.
"As an Amazon Associate, I earn from qualifying purchases."