
Creating an outdoor culinary space transforms your backyard into a dynamic entertainment hub. A well-designed backyard kitchen extends your living area while adding significant value to your property. Whether you’re hosting summer barbecues or enjoying quiet family dinners under the stars, a functional outdoor kitchen combines practicality with aesthetic appeal.
The rise of outdoor living culture has made backyard kitchens increasingly popular among homeowners. These spaces offer more than just a place to grill—they provide complete cooking facilities that rival indoor kitchens.
From food preparation to dining and cleanup, a thoughtfully planned outdoor kitchen handles every aspect of meal service. The key lies in understanding how to balance functionality, durability, and design within your available space and budget.
This comprehensive guide walks you through essential considerations for building a backyard kitchen that serves your needs for years to come. We’ll explore everything from layout optimization to appliance selection, material choices, and practical storage solutions. Each element plays a crucial role in creating a space that’s both beautiful and hardworking.
1. Choose the Right Location for Your Outdoor Kitchen
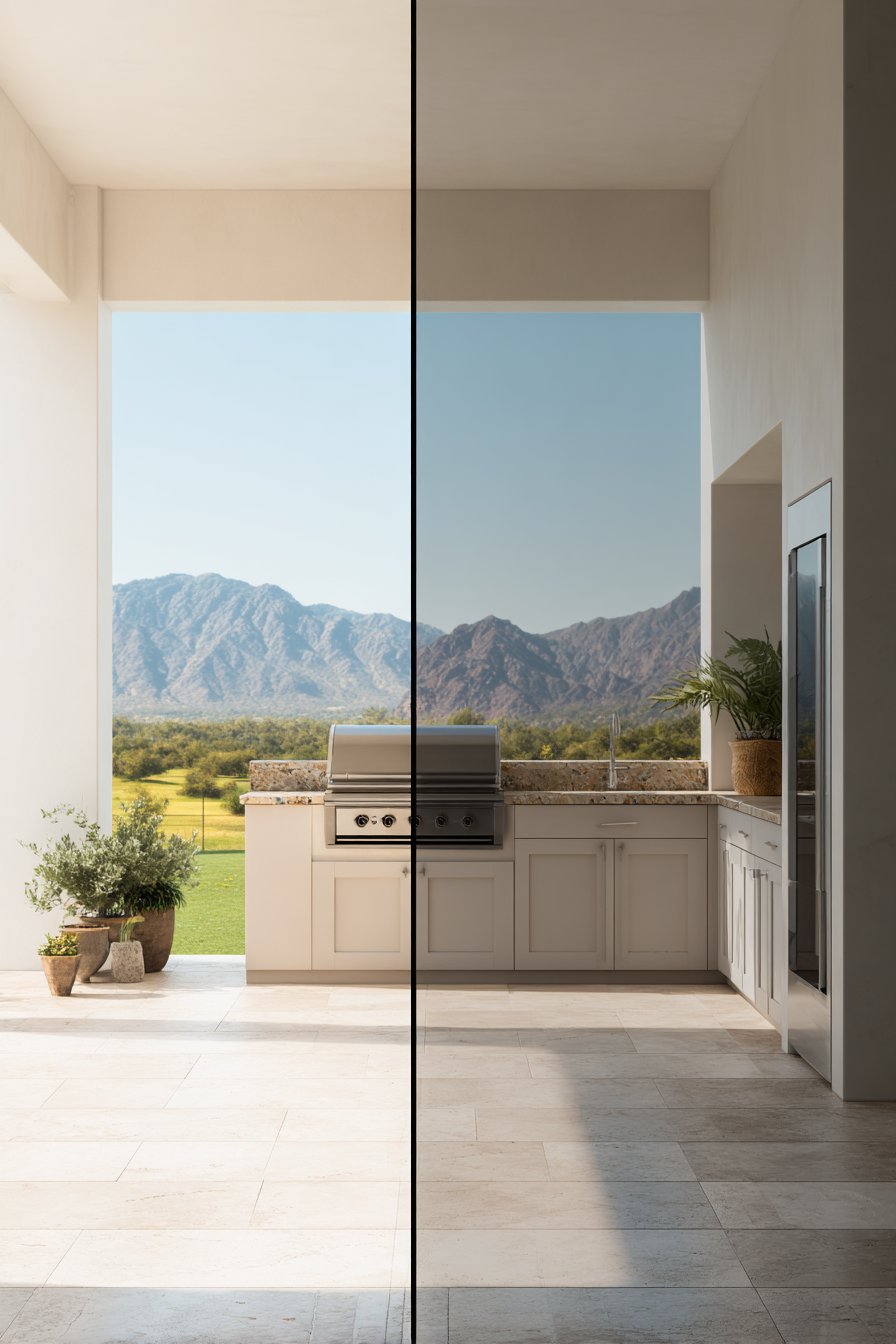
Selecting the perfect spot determines your kitchen’s functionality and enjoyment level. Proximity to your indoor kitchen should be your first consideration, as you’ll frequently move between spaces. Position your outdoor kitchen within 20-30 feet of your house for easy access to supplies, electricity, and plumbing connections.
Consider prevailing wind patterns before finalizing placement. You don’t want smoke blowing toward your house or seating areas during cooking sessions. Observe wind direction during different times of day and seasons. Natural windbreaks like fences, walls, or strategic landscaping can help control airflow patterns around your cooking zone.
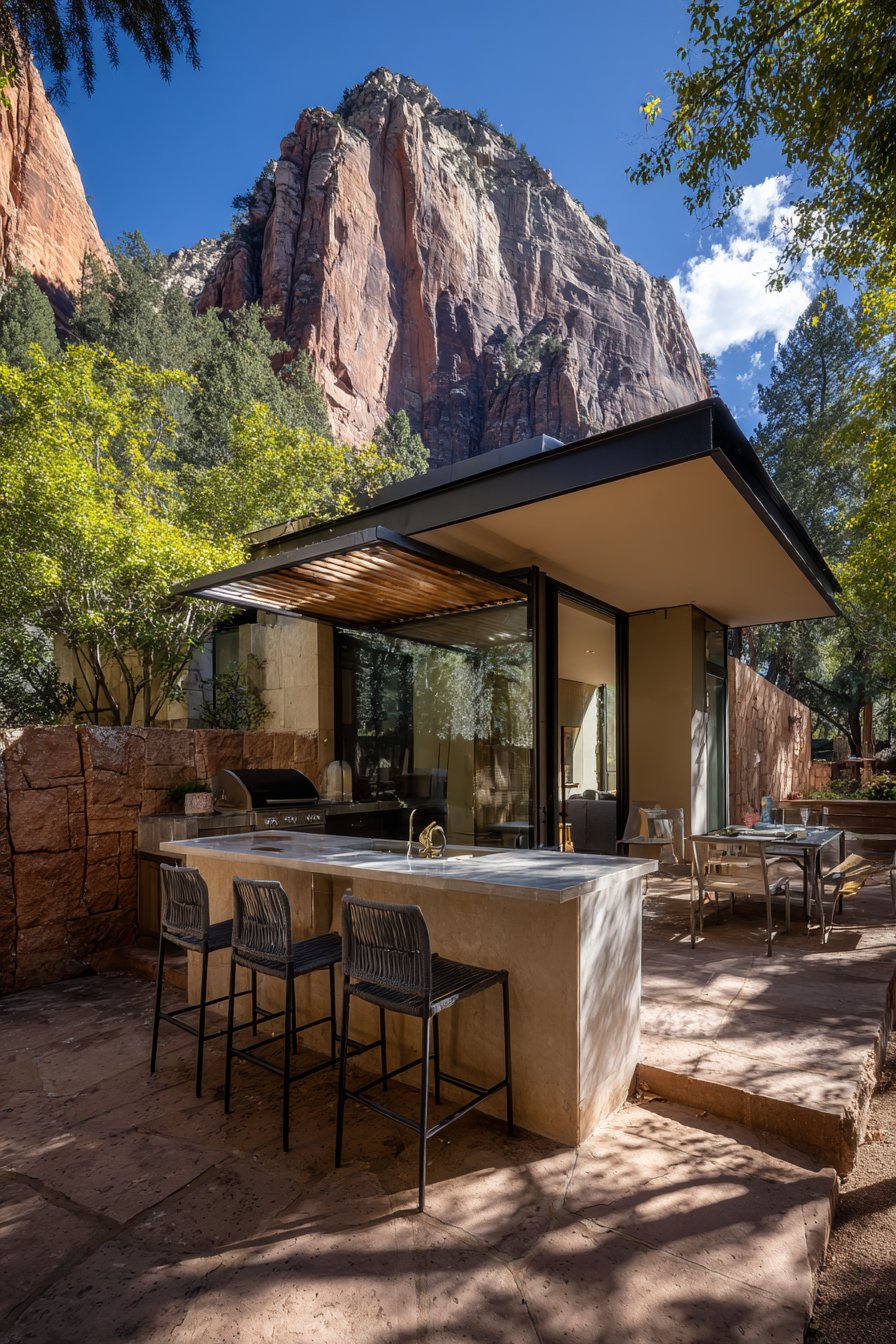
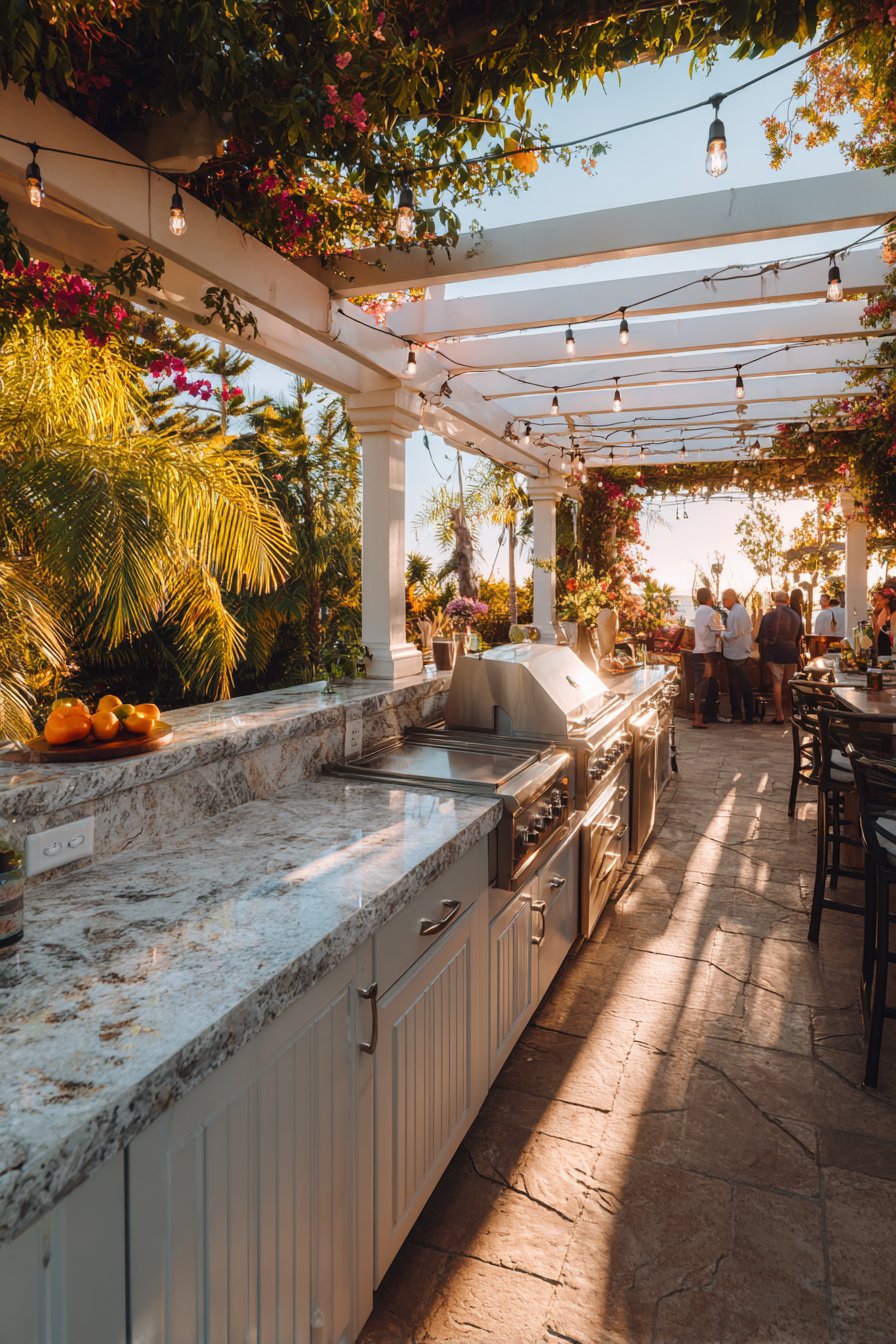
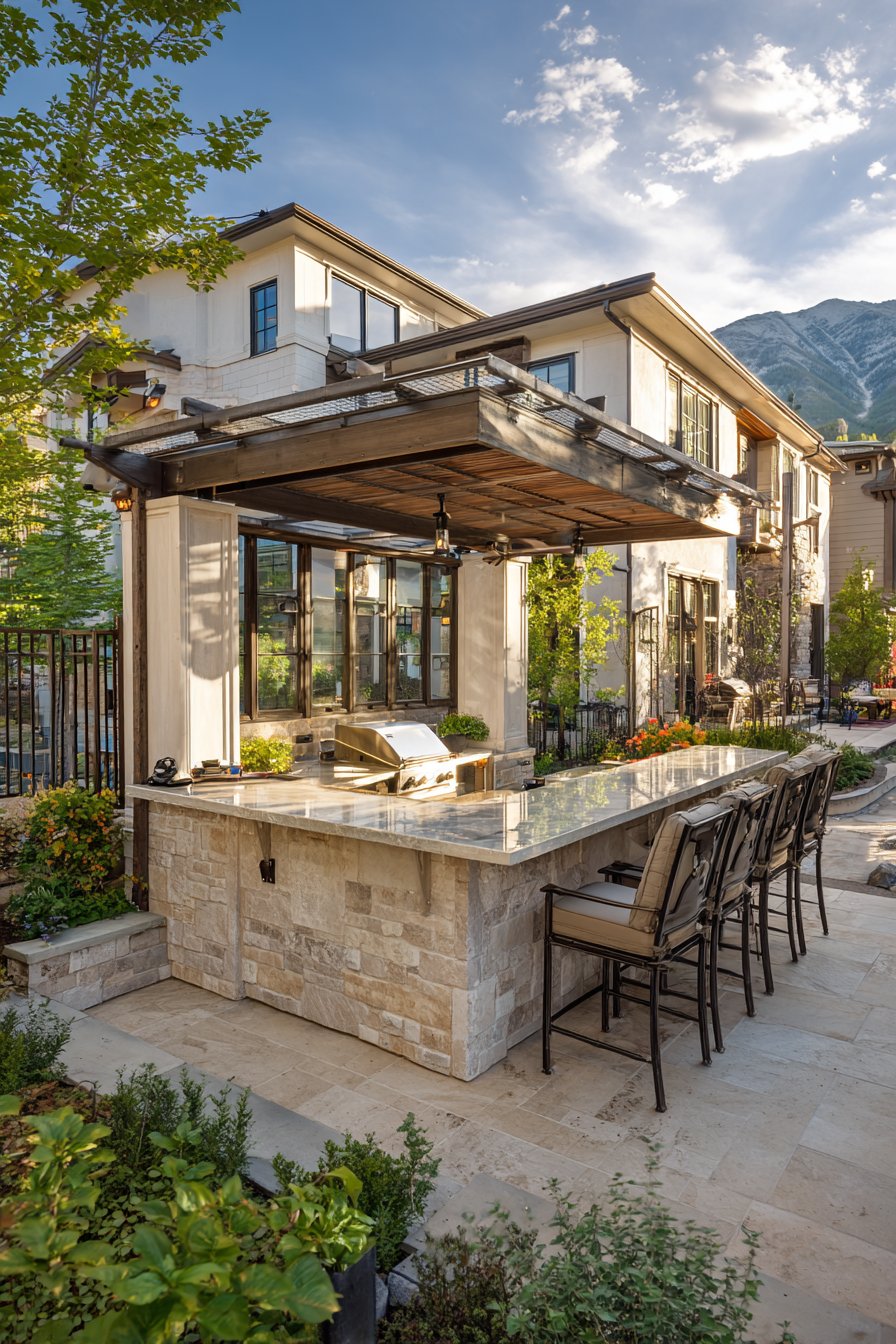
Evaluate sun exposure throughout the day for optimal comfort. Morning shade and afternoon sun create ideal conditions for most climates. Consider adding a pergola or covered structure to provide protection from harsh midday rays. Factor in views, privacy from neighbors, and accessibility from your main entertaining areas when making location decisions.

- Position kitchen 20-30 feet from indoor kitchen for convenient access
- Observe wind patterns for multiple weeks before construction begins
- Consider installing a pergola or roof structure for weather protection
- Ensure level ground or budget for proper site preparation
- Check local building codes for setback requirements from property lines
- Plan for adequate lighting to extend usability into evening hours
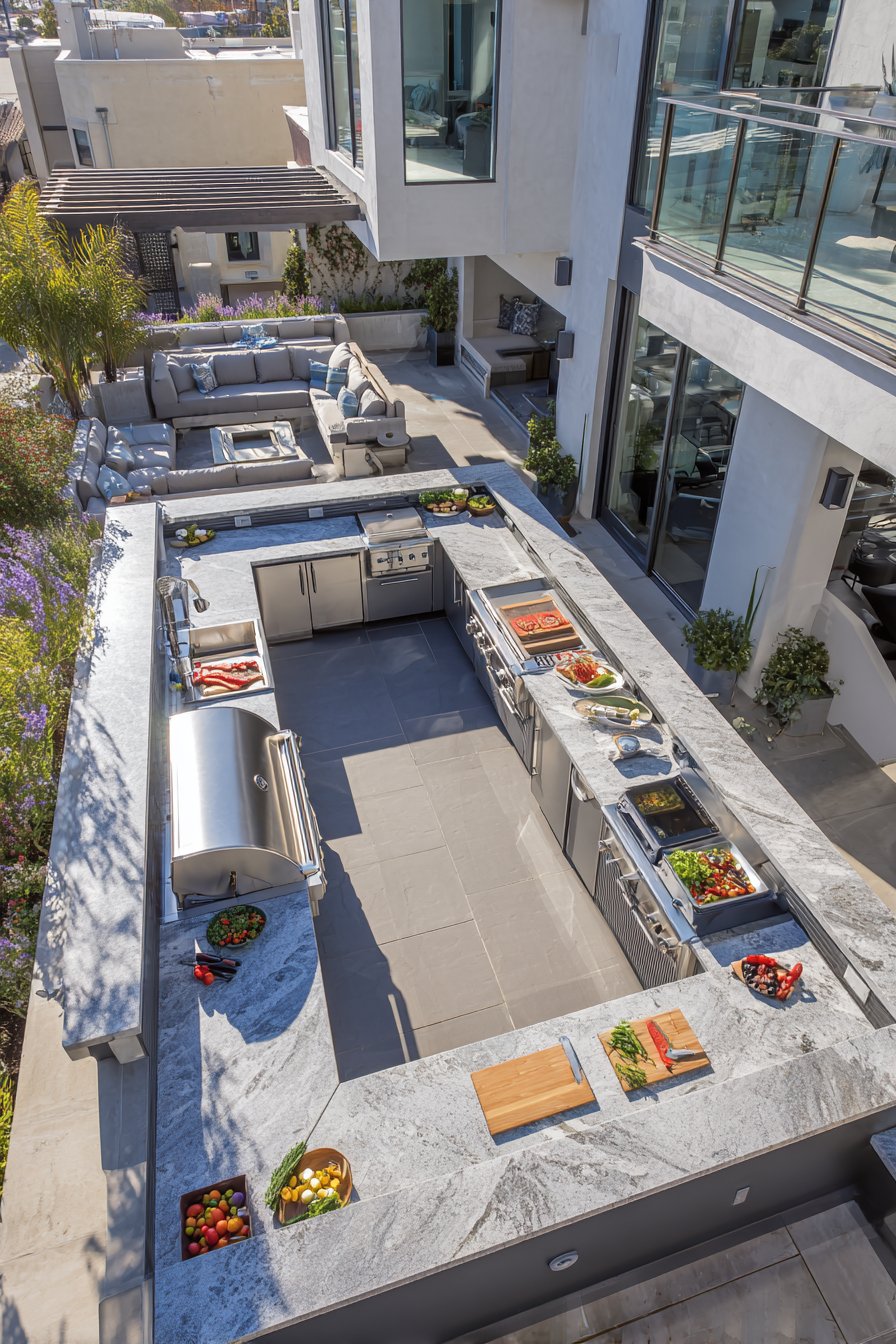
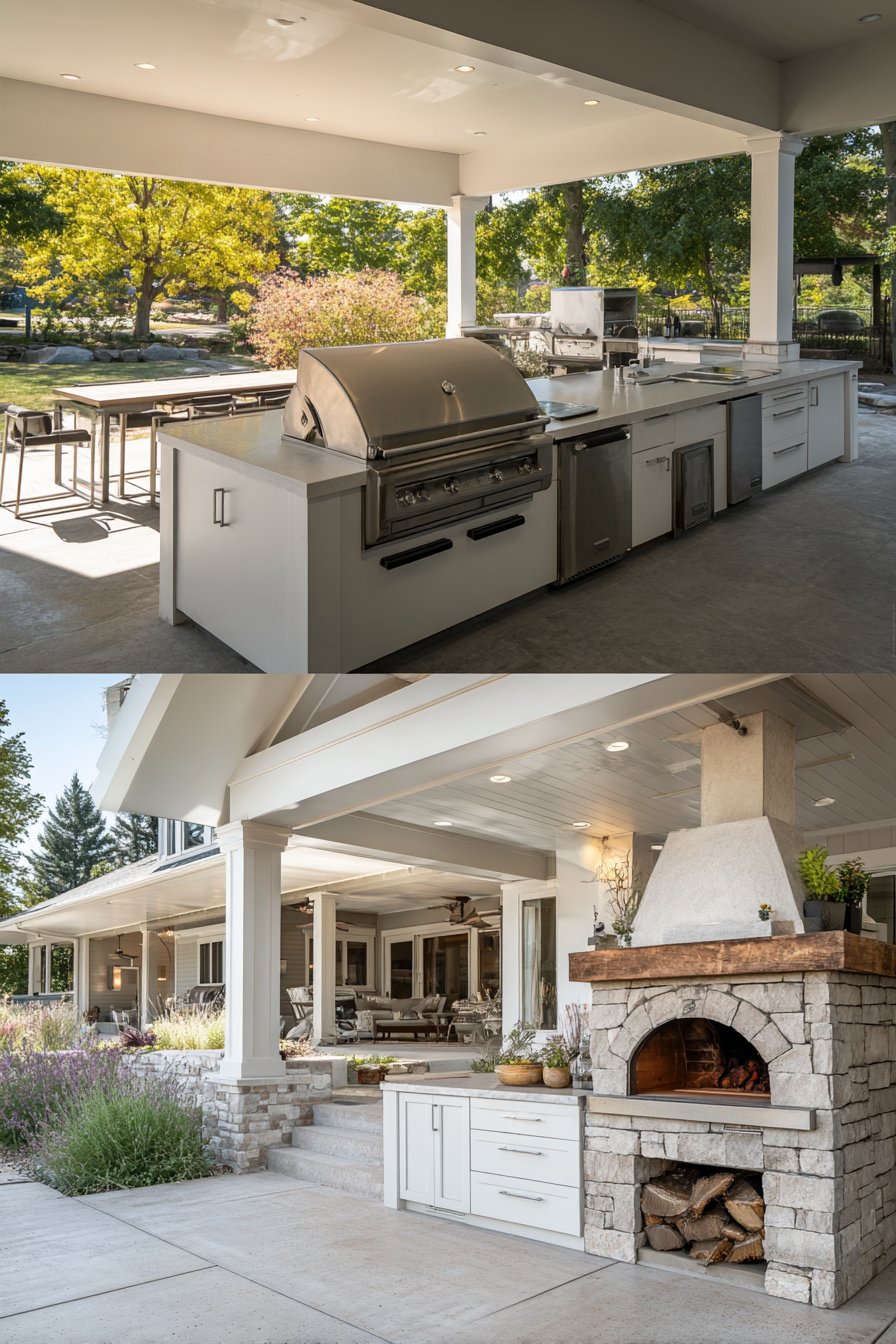
2. Design an Efficient Work Triangle Layout
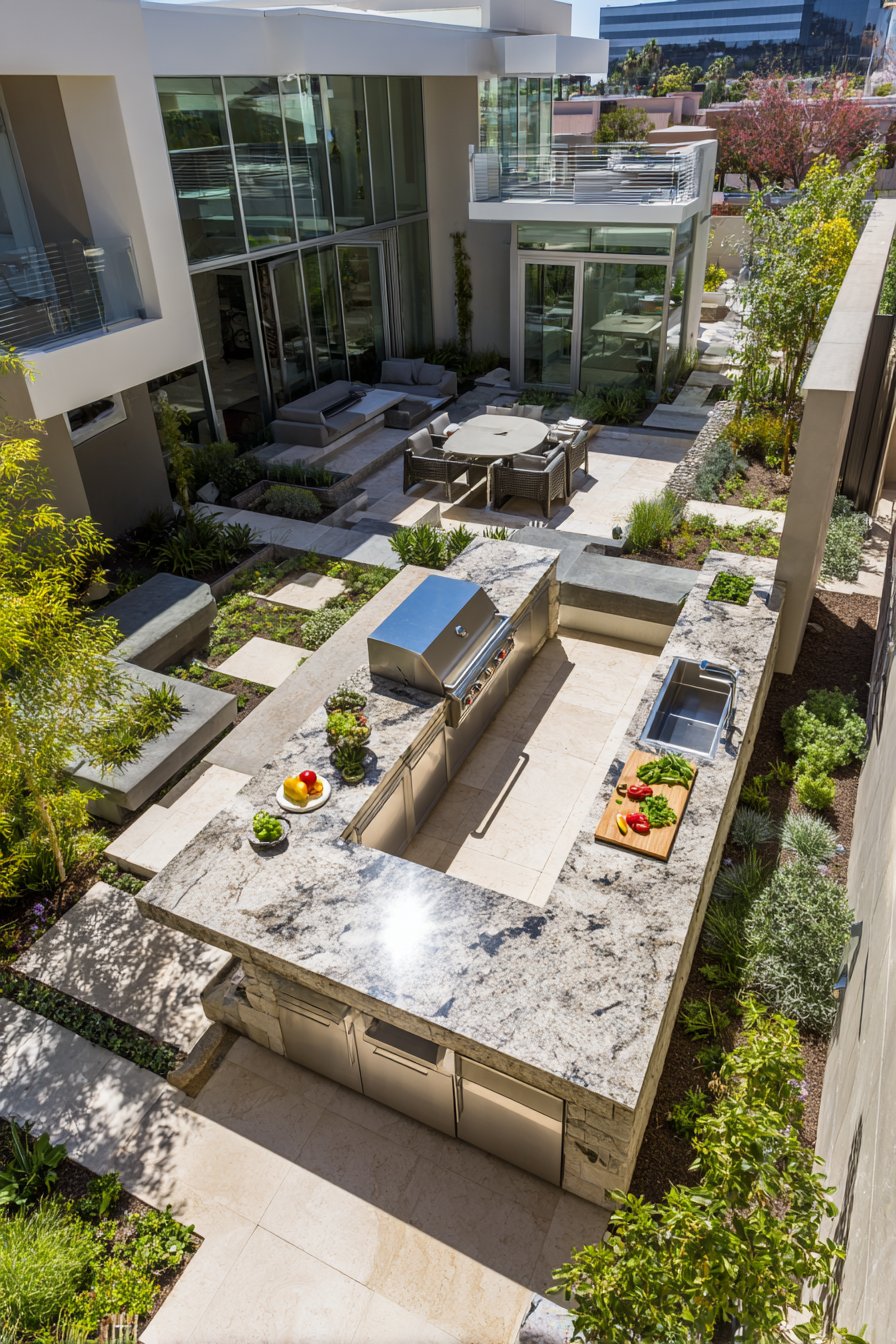
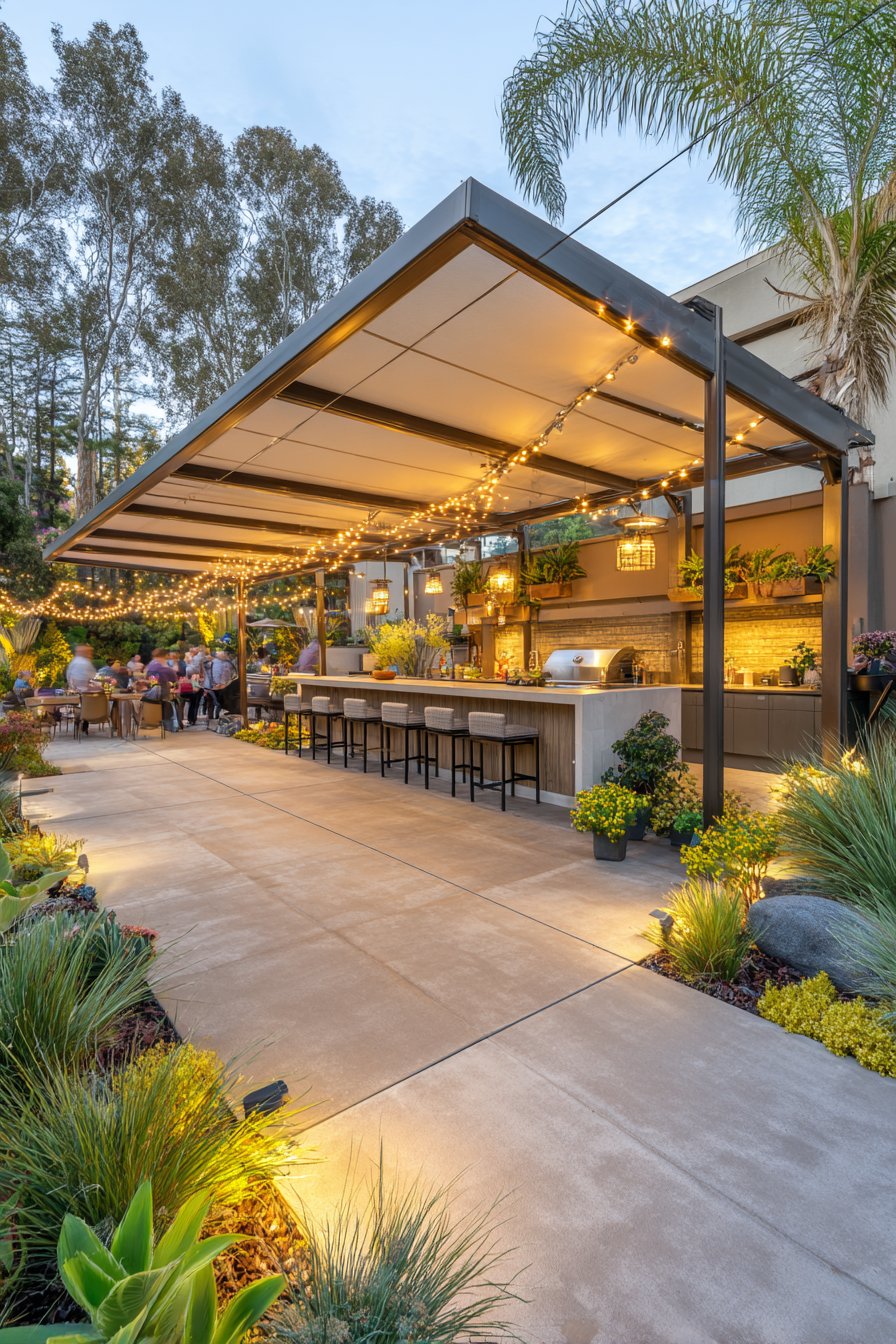
The classic work triangle principle applies equally to outdoor kitchens. This concept places your grill, sink, and refrigeration within a comfortable 4-9 foot distance from each other. The arrangement minimizes unnecessary steps while cooking, creating a natural workflow that reduces fatigue during meal preparation.
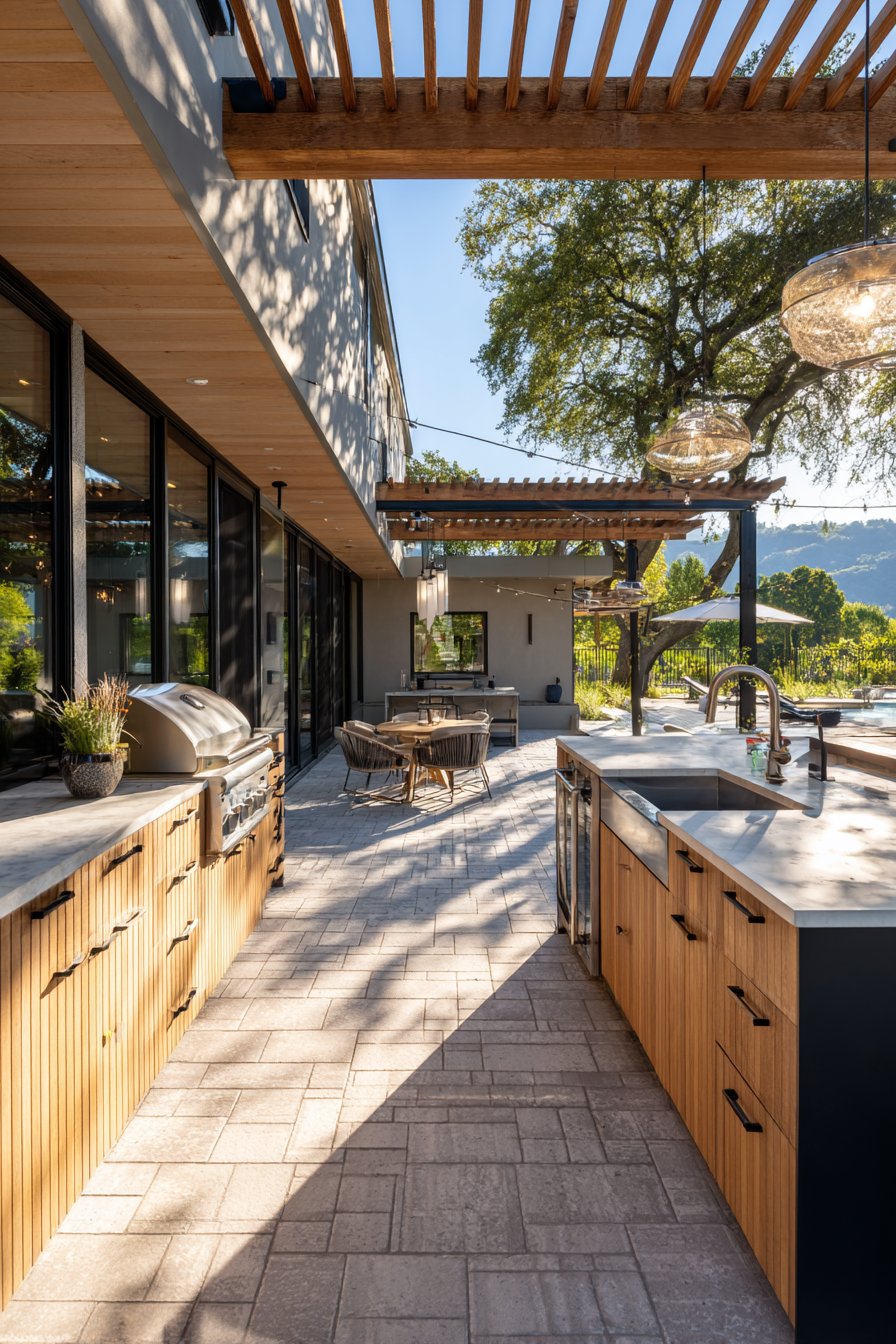
Counter space between stations is crucial for functionality. Allow at least 18-24 inches of workspace on either side of your primary grill. This landing space accommodates plates, utensils, and ingredients safely away from heat sources. Additional counter runs provide room for food prep, plating, and serving without creating congestion in your cooking zone.
Consider traffic patterns when finalizing your layout design. Create clear pathways that allow guests to access seating and beverage stations without interrupting the cook. Separate preparation zones from social areas to maintain efficiency while keeping everyone engaged. An L-shaped or U-shaped configuration often works best for maximizing workspace while maintaining an open, inviting atmosphere.
- Place sink between grill and refrigerator for optimal workflow
- Allocate 36-48 inches of total prep counter space minimum
- Keep grill at least 3 feet from combustible surfaces
- Design separate zones for cooking, prep, and socializing
- Include a secondary landing area for finished dishes
- Plan for 36-inch minimum clearance behind work areas
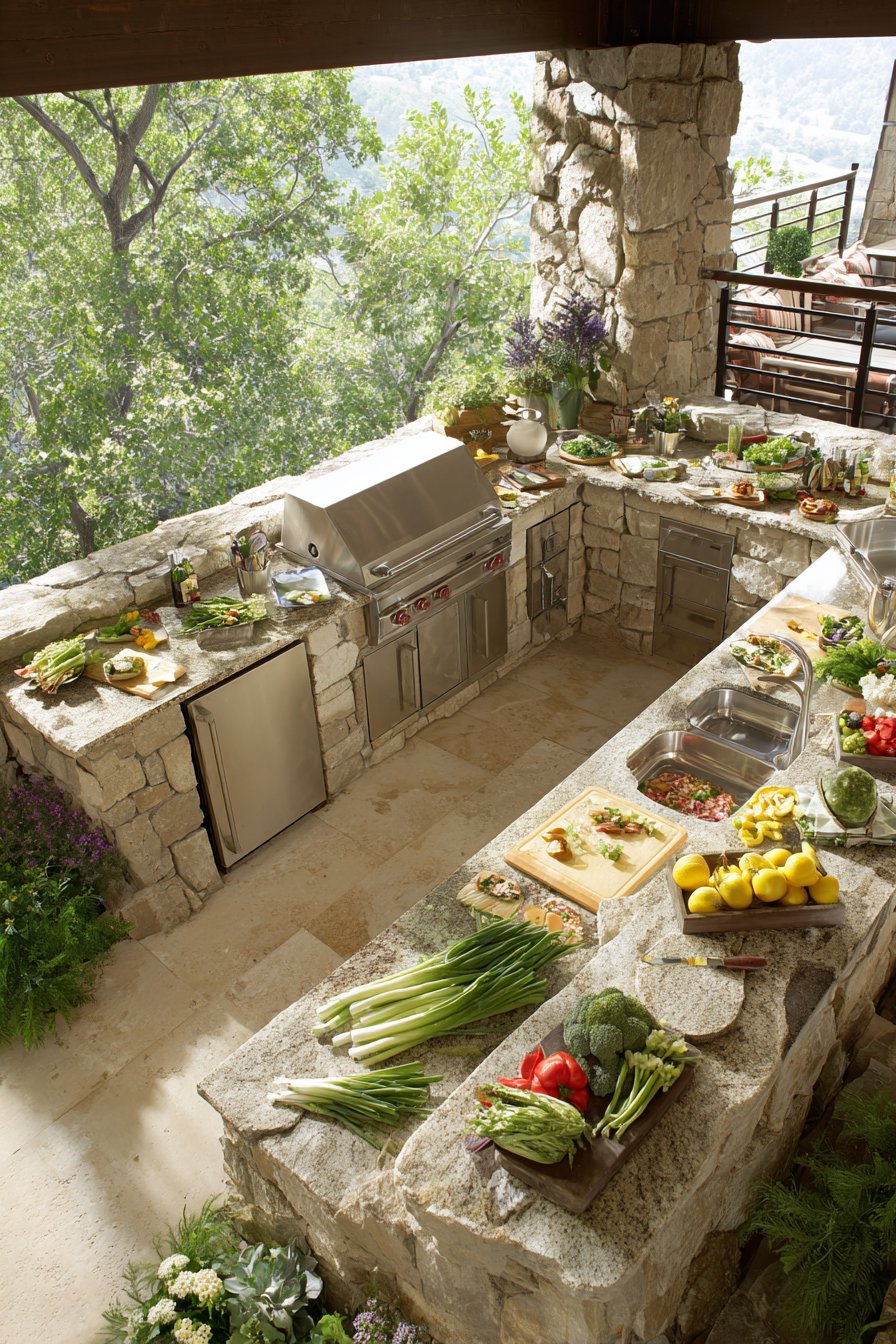
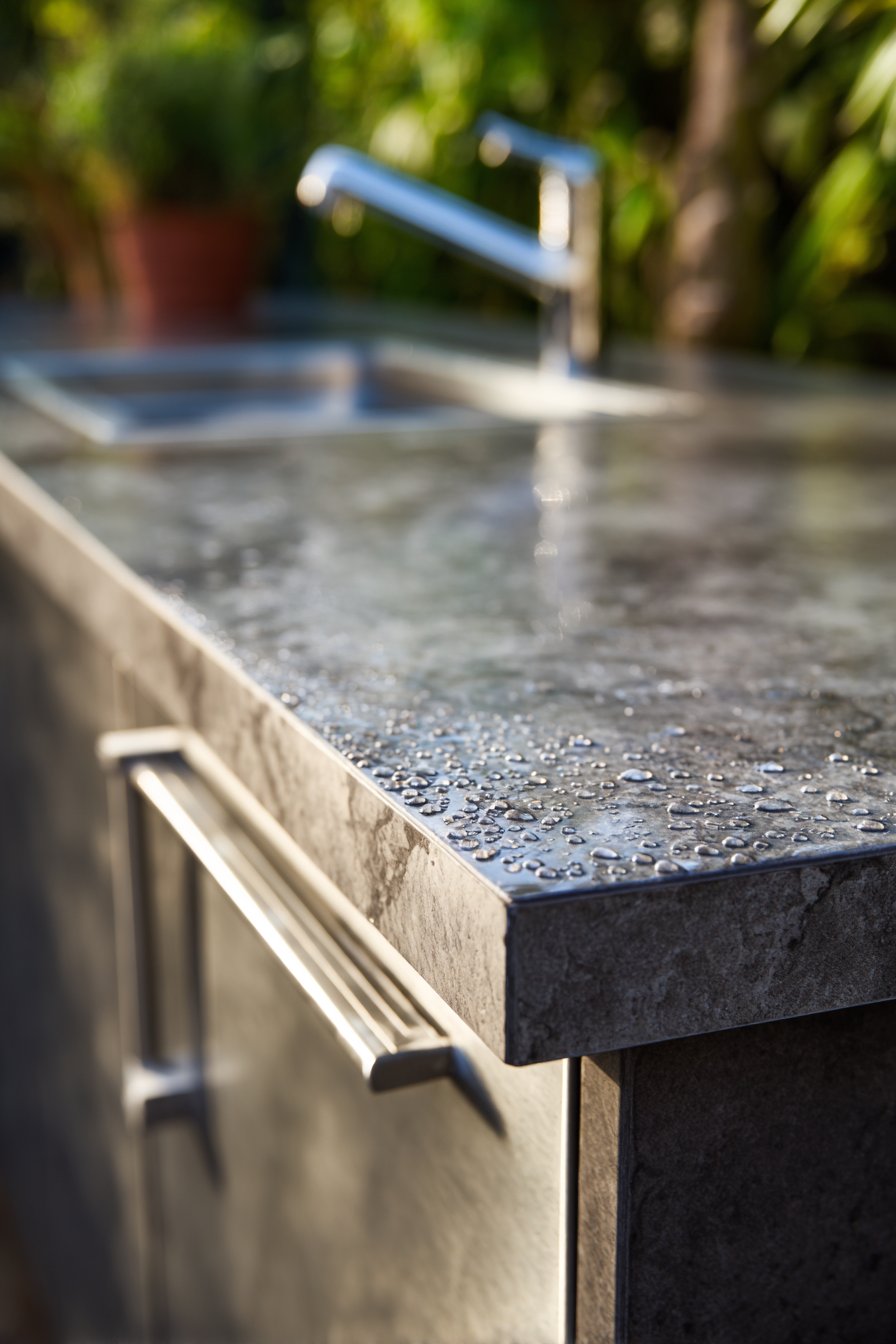
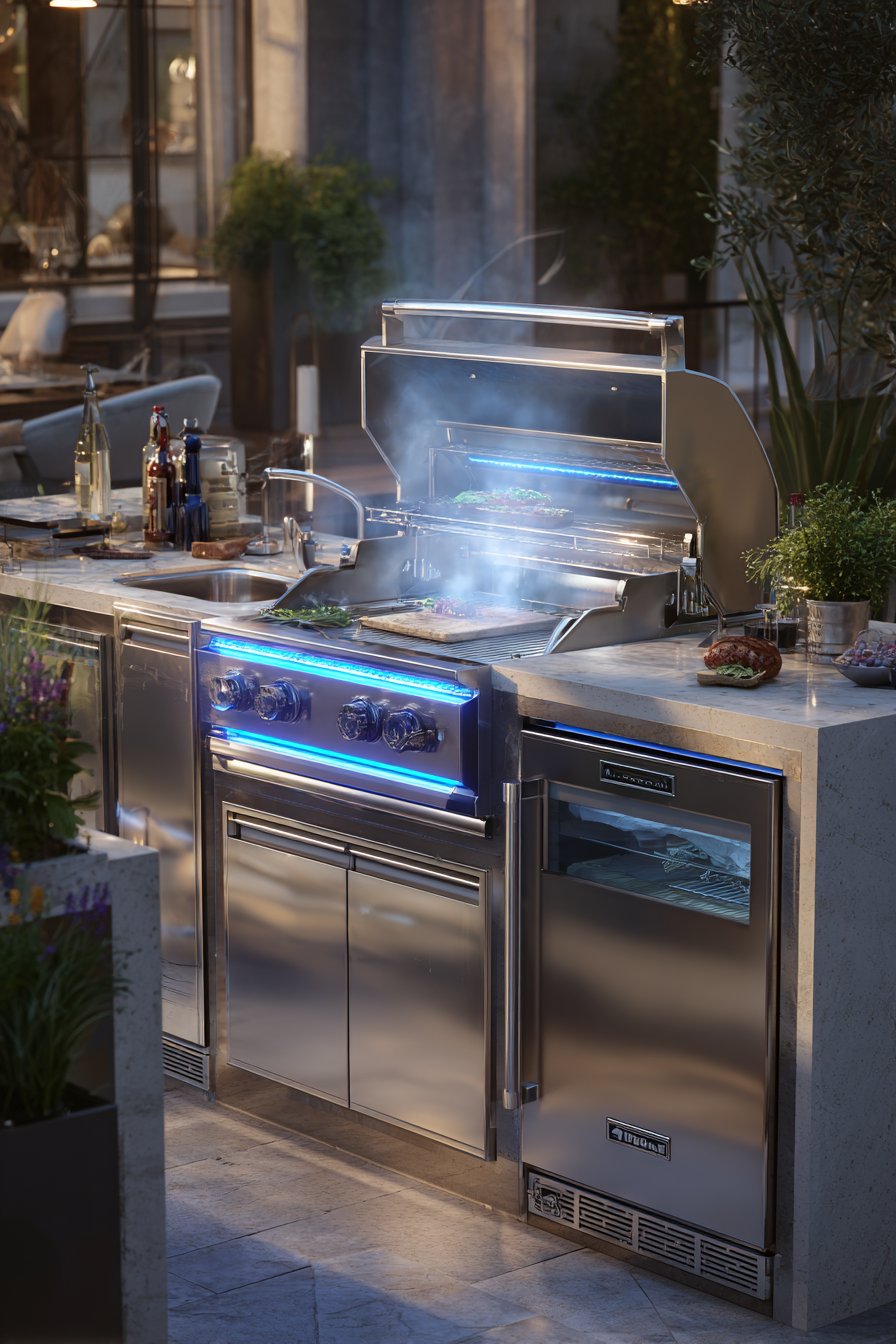
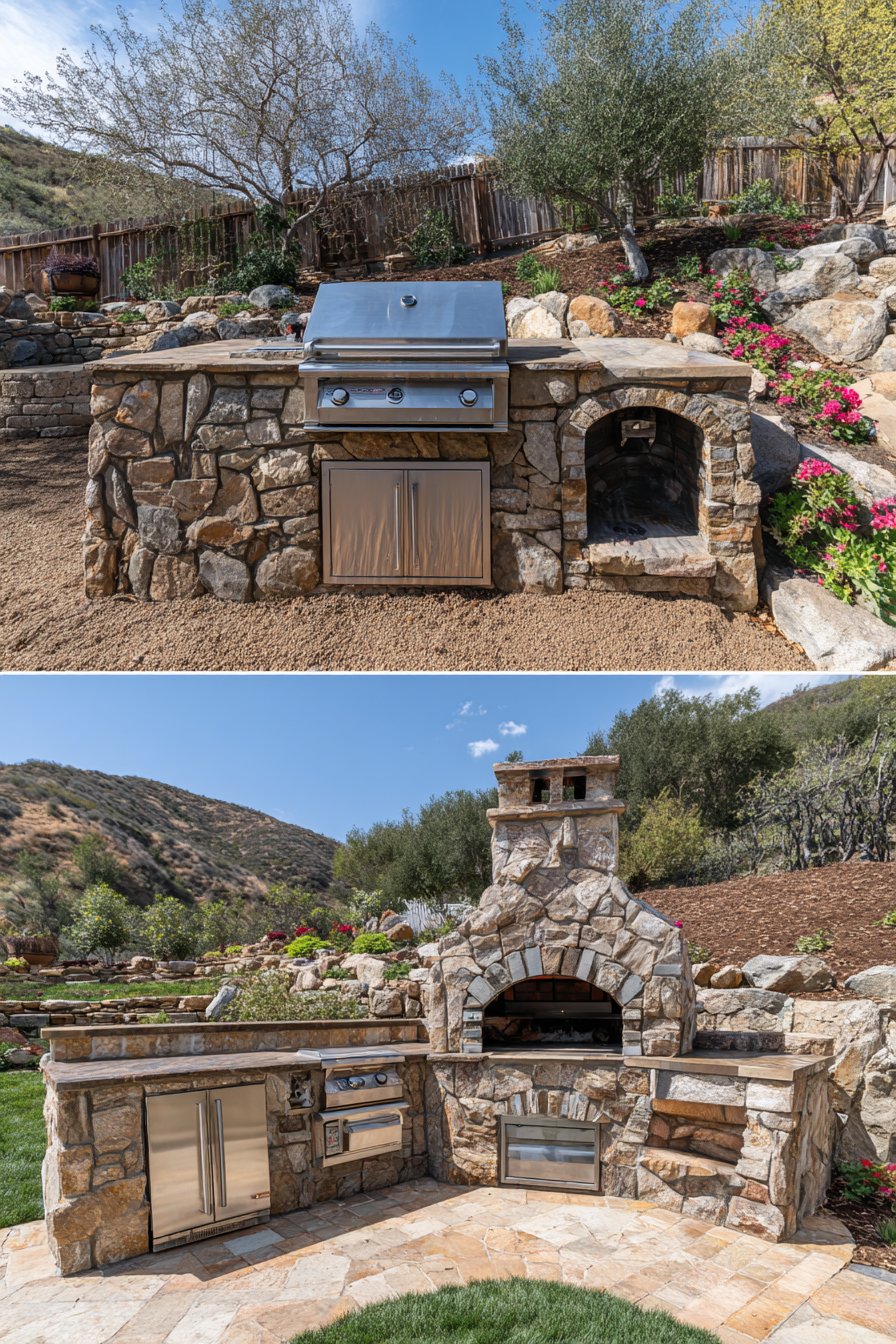
3. Select Durable Weather-Resistant Materials
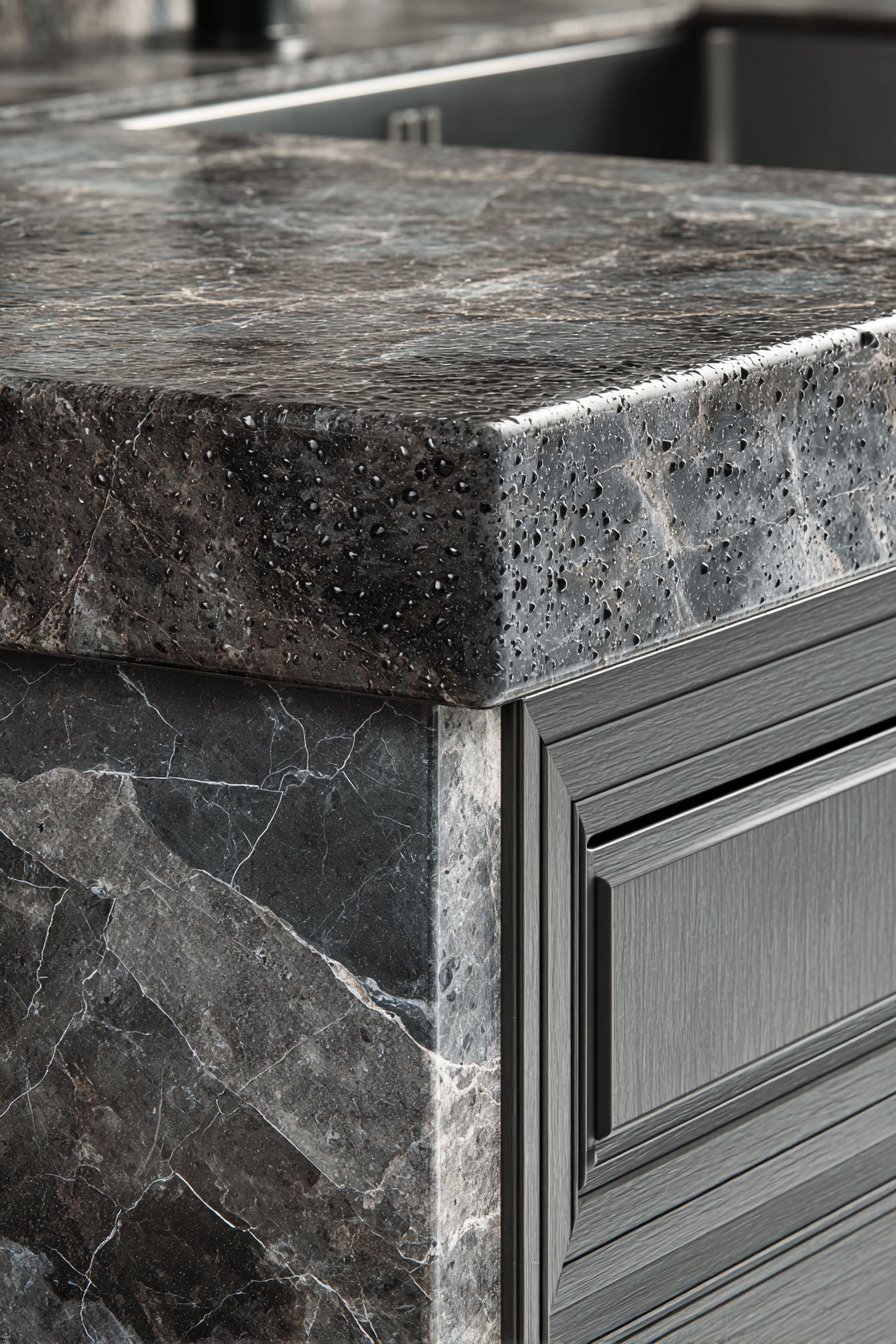
Material selection directly impacts your kitchen’s longevity and maintenance requirements. Stainless steel components dominate outdoor kitchens for good reason—they resist rust, withstand temperature extremes, and clean easily. Invest in marine-grade 304 stainless steel for coastal areas or regions with high humidity. Standard 430 stainless works well for drier climates with fewer corrosive elements.
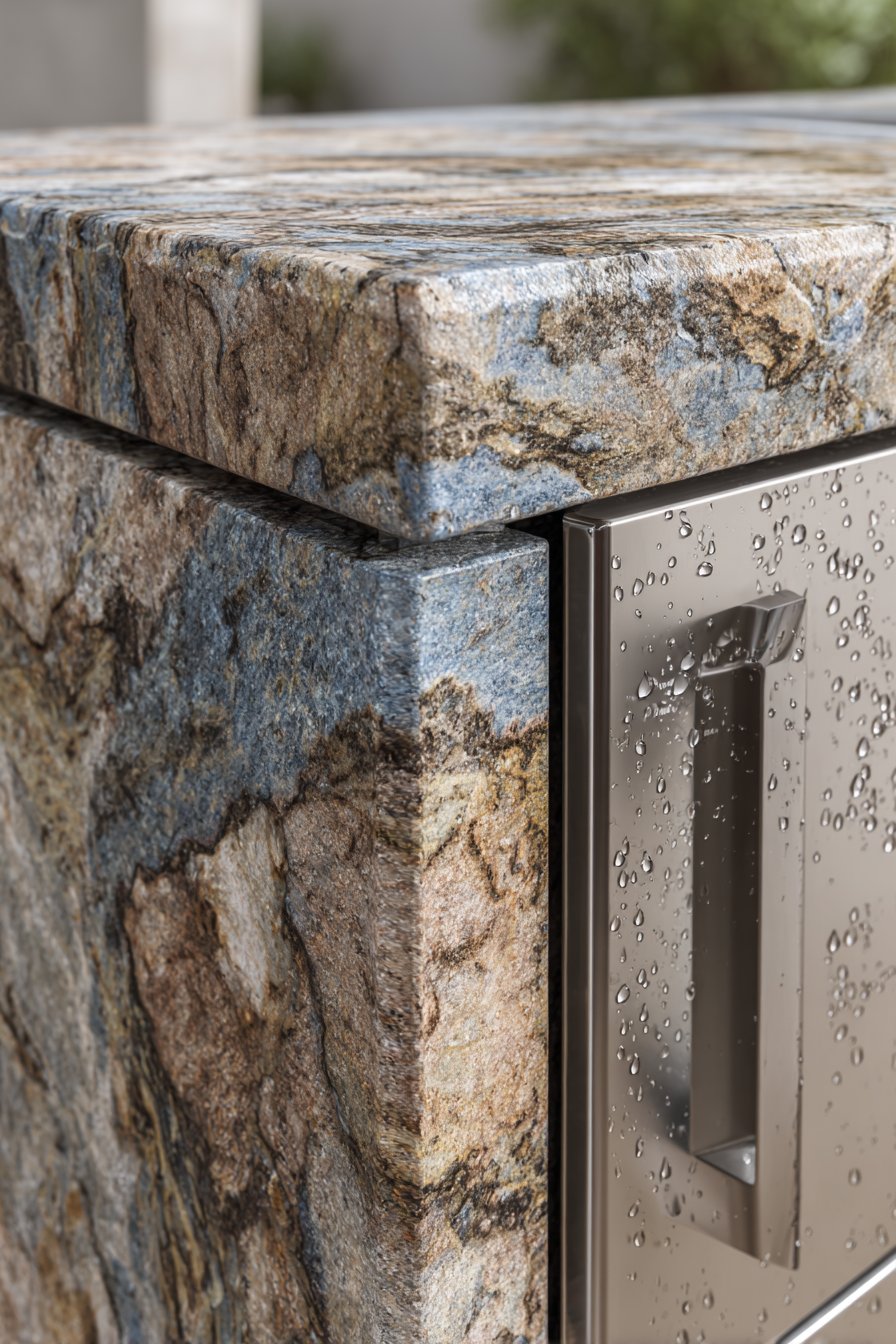
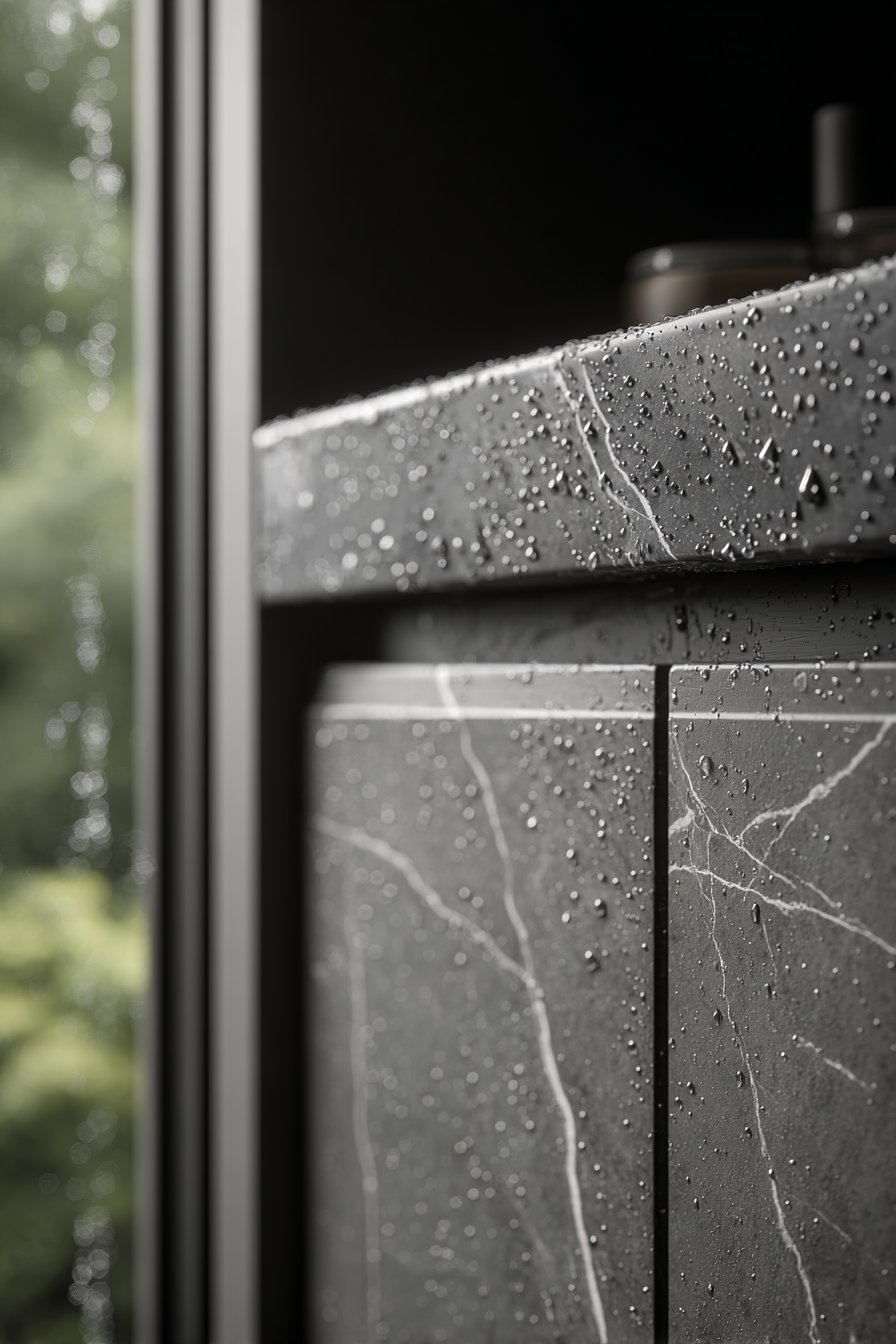
Countertop materials must endure rain, snow, UV exposure, and temperature fluctuations. Granite and concrete lead the field for outdoor applications. Granite offers natural beauty with minimal maintenance, while polished concrete provides modern aesthetics at lower cost. Avoid laminate, wood, and marble—these materials deteriorate quickly when exposed to weather extremes and moisture.
Cabinet materials require equal scrutiny for outdoor durability. Polymer and HDPE cabinetry outperform traditional wood in harsh conditions. These synthetic materials won’t rot, warp, or require annual refinishing like wood alternatives. If you prefer the wood aesthetic, choose marine-grade teak or ipe with proper sealing, though maintenance demands remain substantially higher than polymer options.
- Use marine-grade stainless steel (304) in humid or coastal locations
- Choose granite or concrete countertops over porous alternatives
- Install polymer cabinetry to eliminate wood rot concerns
- Select ceramic or porcelain tile for backsplash areas
- Avoid materials that require annual sealing or refinishing
- Invest in quality now to minimize replacement costs later
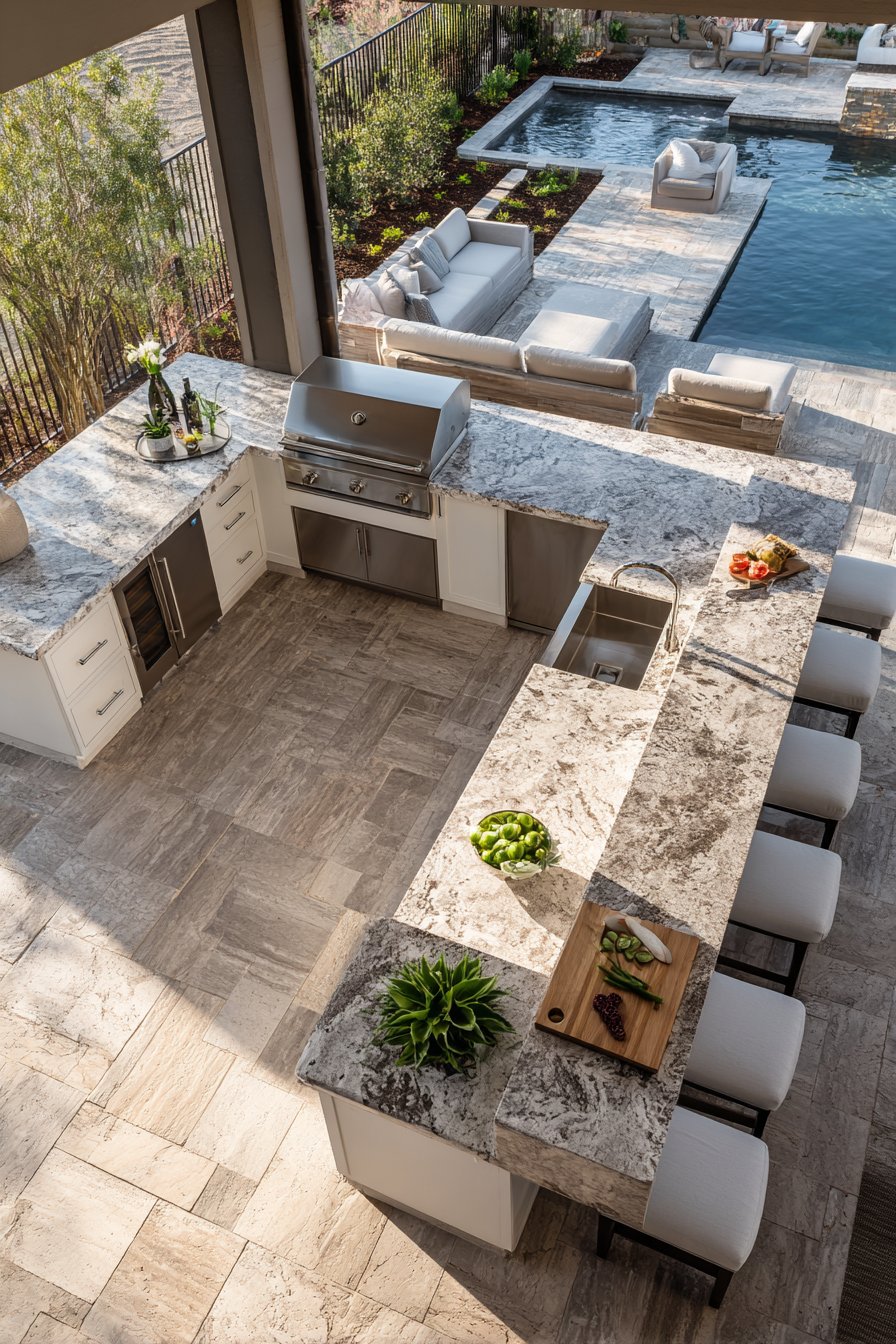
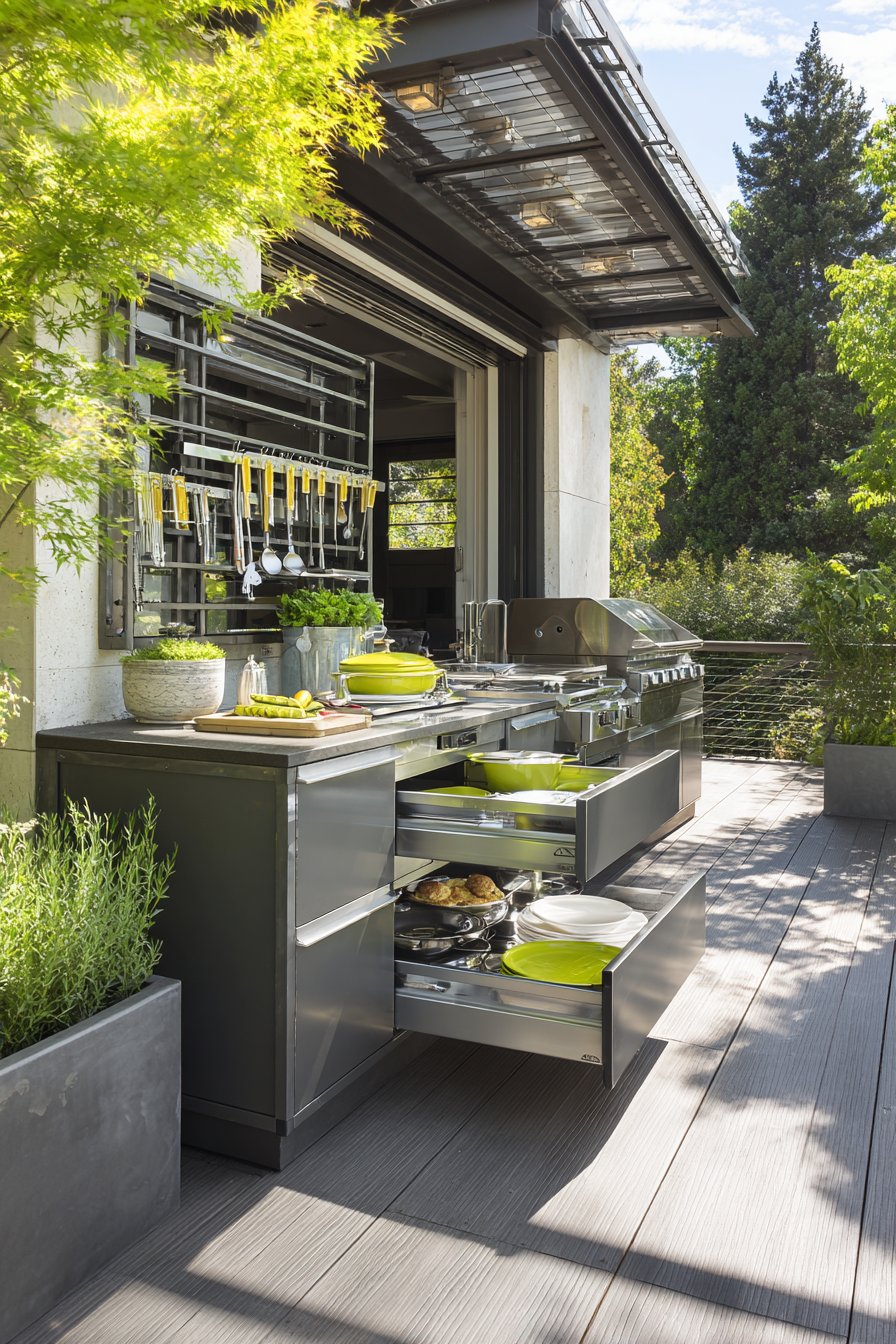
4. Install Essential Appliances and Equipment
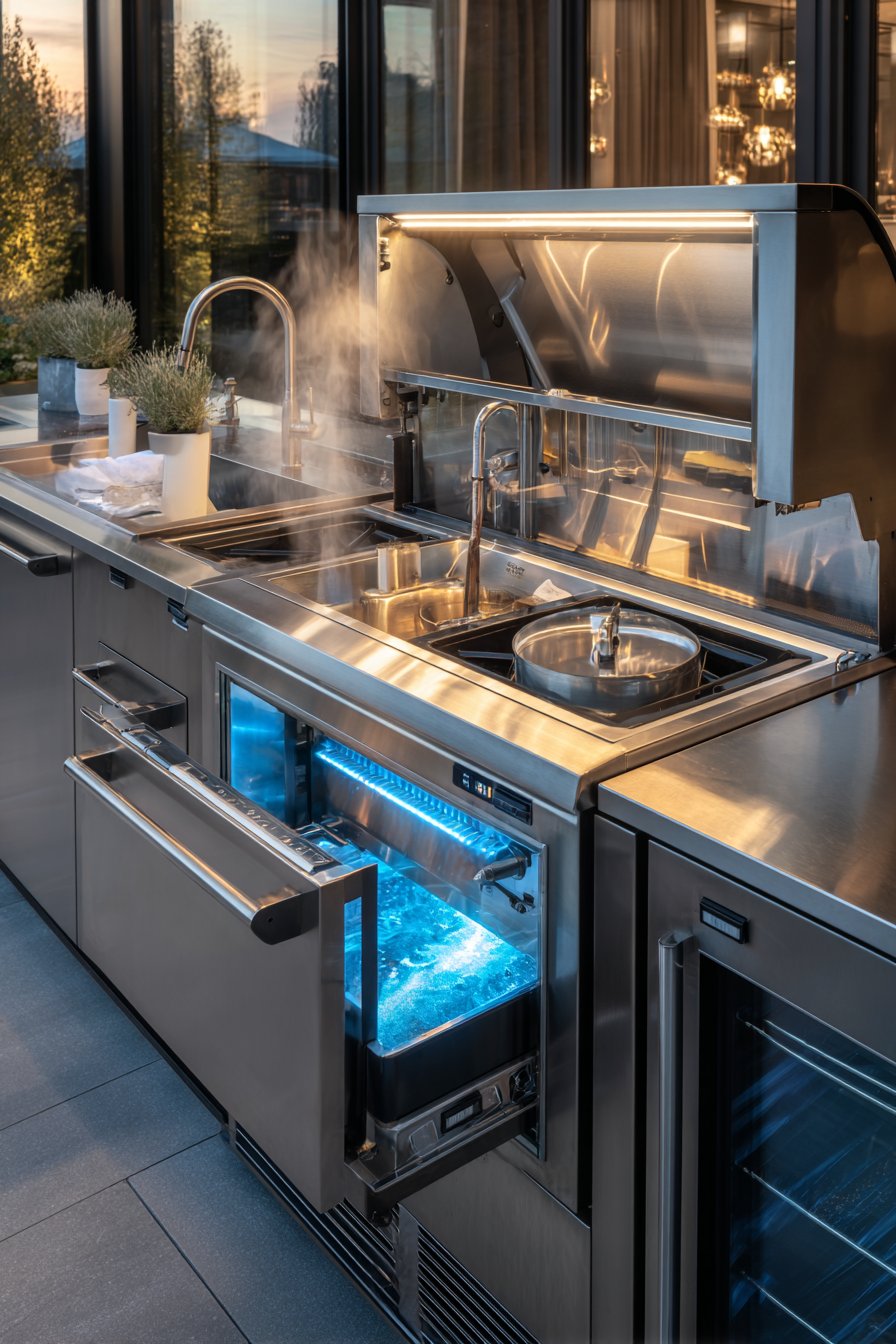
Your grill serves as the centerpiece appliance of any outdoor kitchen. Built-in gas grills offer convenience and consistent temperature control, while charcoal or wood-fired options provide distinctive smoky flavors. Size your grill based on typical serving needs—a 36-inch grill accommodates meals for 6-8 people comfortably. Consider models with infrared burners for superior searing capabilities.
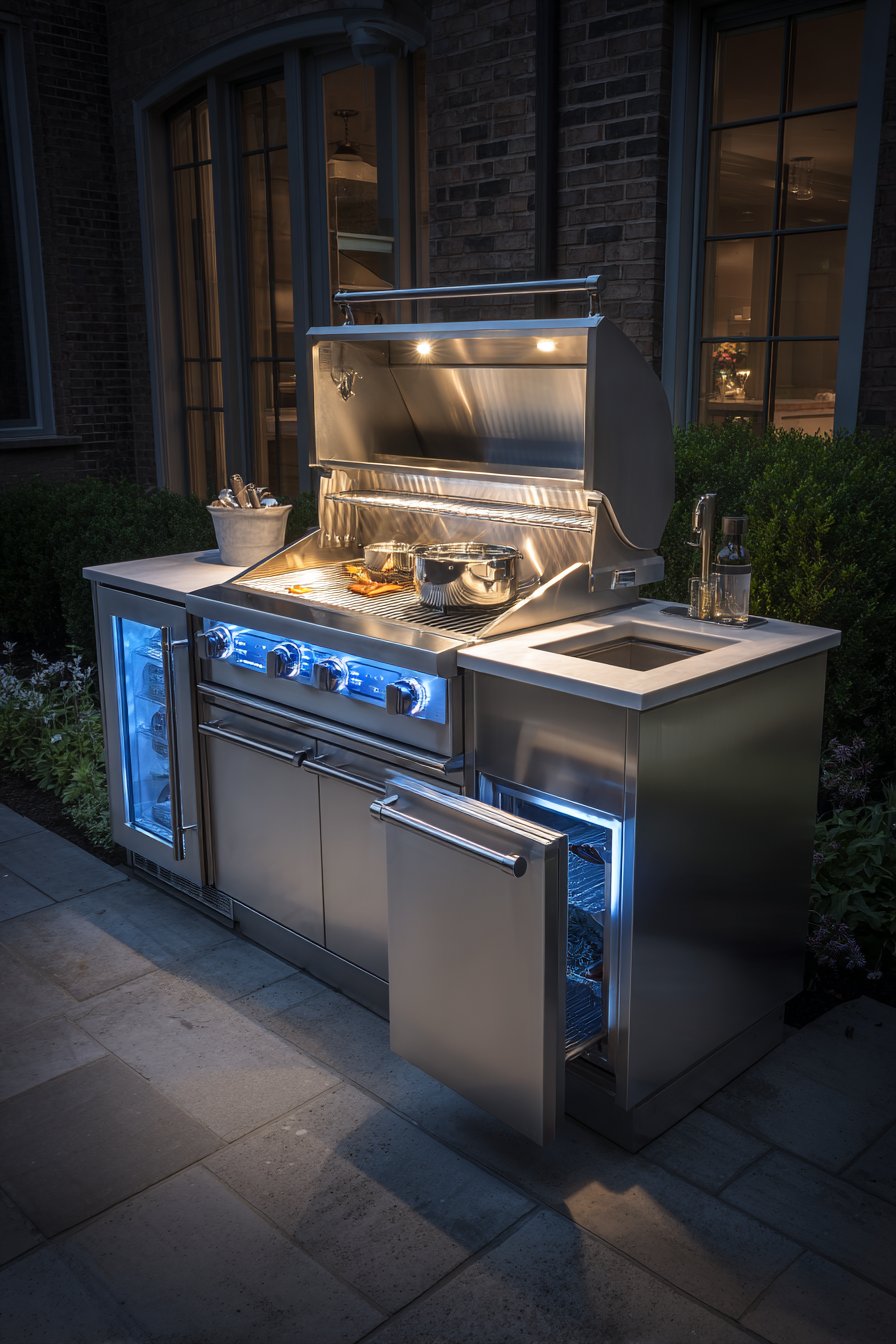
A dedicated outdoor sink eliminates constant trips to your indoor kitchen. Cold water connections suffice for most climates, though hot water access enhances cleanup efficiency. Install a bar sink (15-18 inches) for basic tasks or upgrade to a full-size sink for serious cooking operations. Include a pull-down faucet with extended reach for filling large pots.
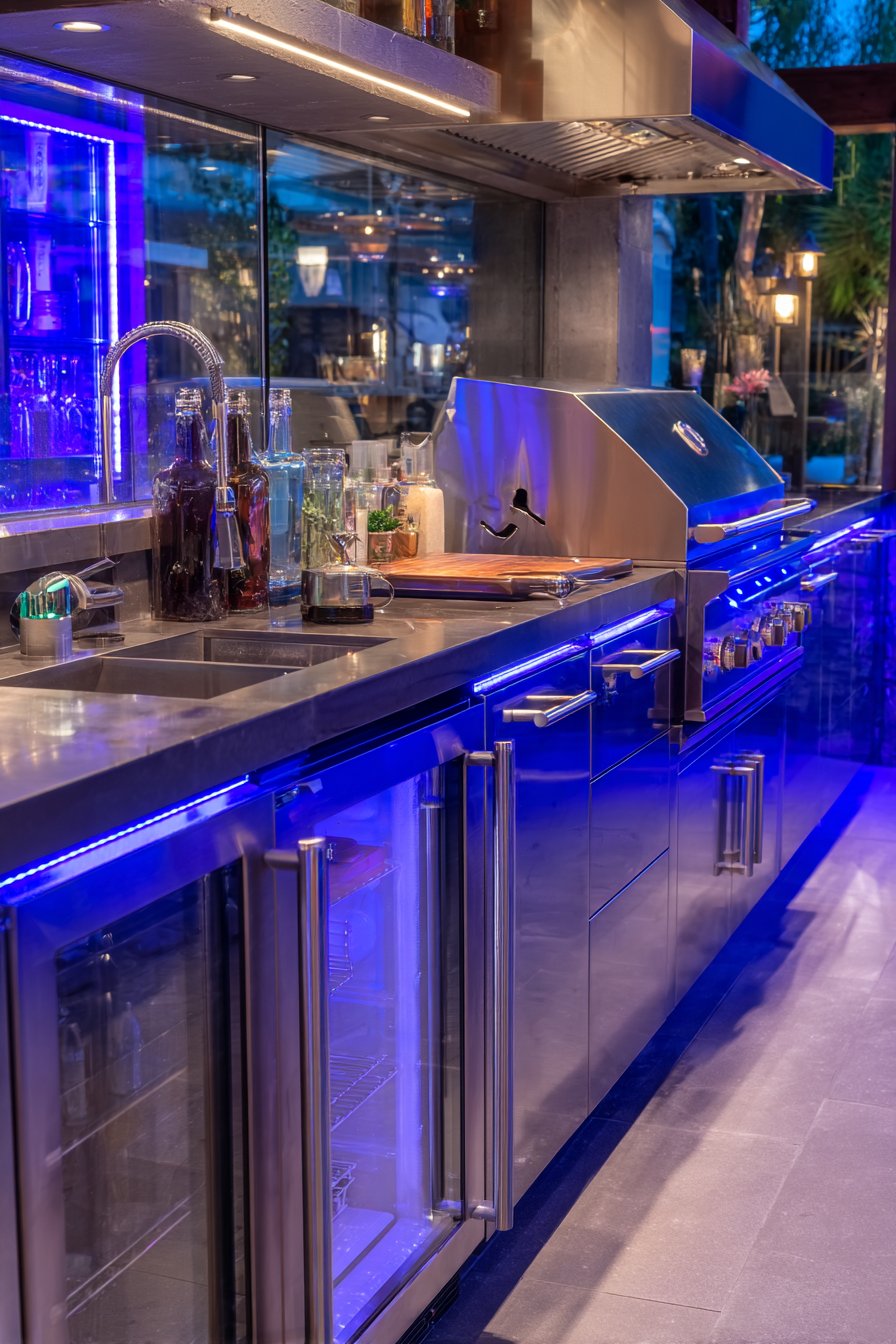
Refrigeration keeps ingredients fresh and beverages cold throughout your cooking sessions. Outdoor-rated refrigerators feature weatherproof components and proper ventilation for built-in installations. Choose a model with at least 4.5 cubic feet capacity for standard entertaining needs. Side burners, warming drawers, and pizza ovens expand your cooking capabilities based on personal preferences and budget allocation.
- Select grill size based on regular guest count
- Install outdoor-rated fridge with proper ventilation clearances
- Add side burner for sauces, sides, and versatility
- Include warming drawer to keep dishes at serving temperature
- Consider outdoor-rated ice maker for serious entertainers
- Install GFCI outlets for all electrical connections
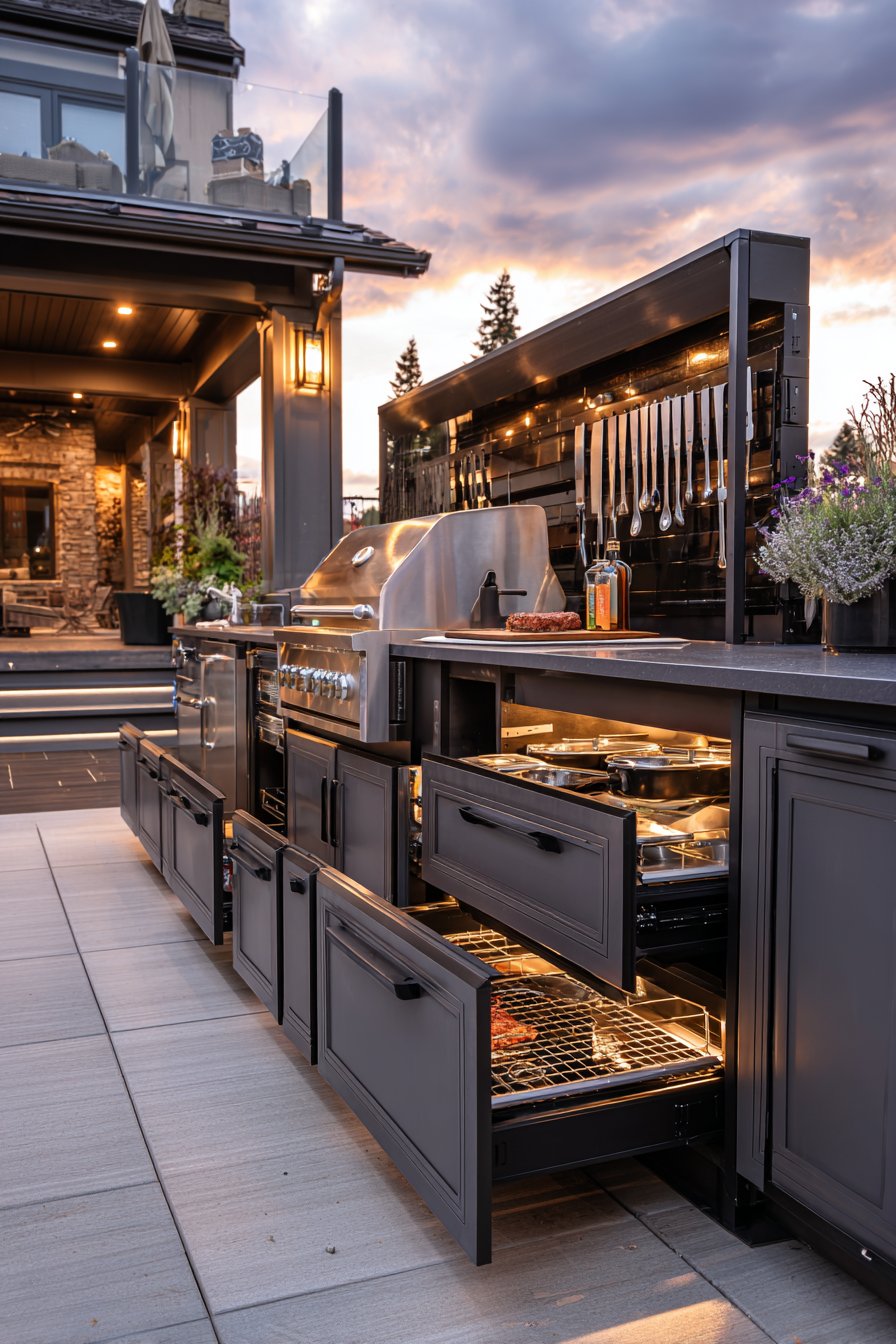
5. Plan for Adequate Storage Solutions
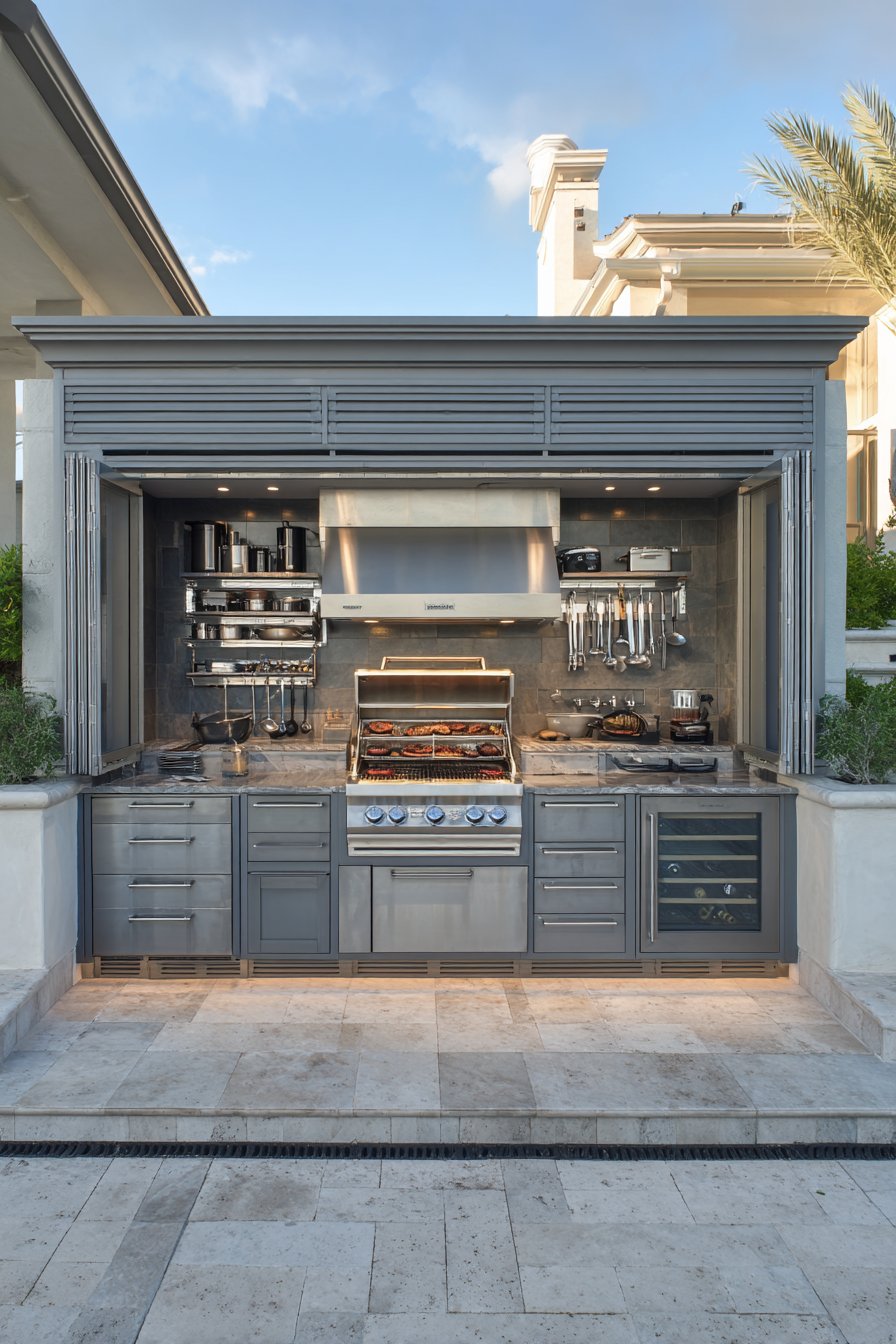
Strategic storage placement keeps cooking tools and supplies within arm’s reach. Install base cabinets directly below your prep counters for pots, pans, and serving dishes. Drawer systems with full-extension slides work better than traditional cabinets for accessing items in outdoor settings. Include dividers and organizers to maximize space efficiency within each storage compartment.
Covered storage protects items from weather exposure and pest intrusion. Lockable cabinet doors secure expensive equipment and prevent unauthorized access when you’re away. Stainless steel or polymer doors withstand moisture better than wood alternatives. Install soft-close hinges to prevent slamming during windy conditions and extend hardware lifespan.
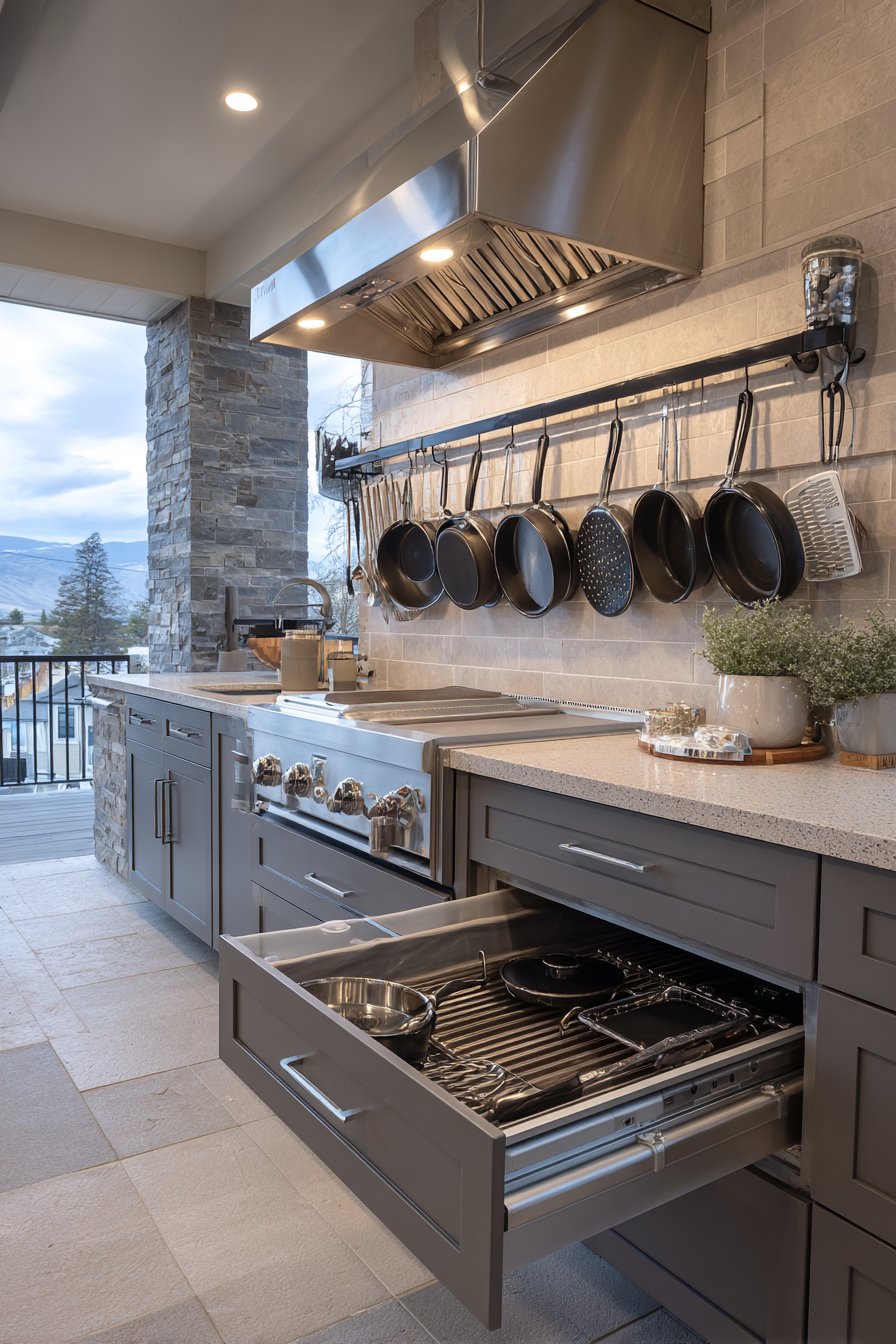
Vertical storage solutions multiply your capacity without expanding the footprint. Wall-mounted racks hold grilling tools, cutting boards, and utensils near cooking stations. Install hooks under overhangs for hanging frequently used items. Consider a dedicated storage closet or shed nearby for bulk supplies, rarely used equipment, and seasonal items that don’t require immediate access.
- Install pull-out trash and recycling bins within cabinet runs
- Include dedicated spice and condiment storage near prep areas
- Add towel bars or hooks for easy access to cleaning supplies
- Design storage for propane tanks with proper ventilation
- Create zones for different item categories (cooking, serving, cleaning)
- Include weatherproof storage for cushions and outdoor dining linens
6. Incorporate Proper Lighting for Safety and Ambiance
Task lighting ensures safe food preparation after sunset. Install LED strip lights under upper cabinets or overhangs to illuminate countertops without glare. Position adjustable spotlights directly over grills and prep stations for focused illumination. These lights should produce at least 50 foot-candles of brightness in work zones for adequate visibility during cooking tasks.
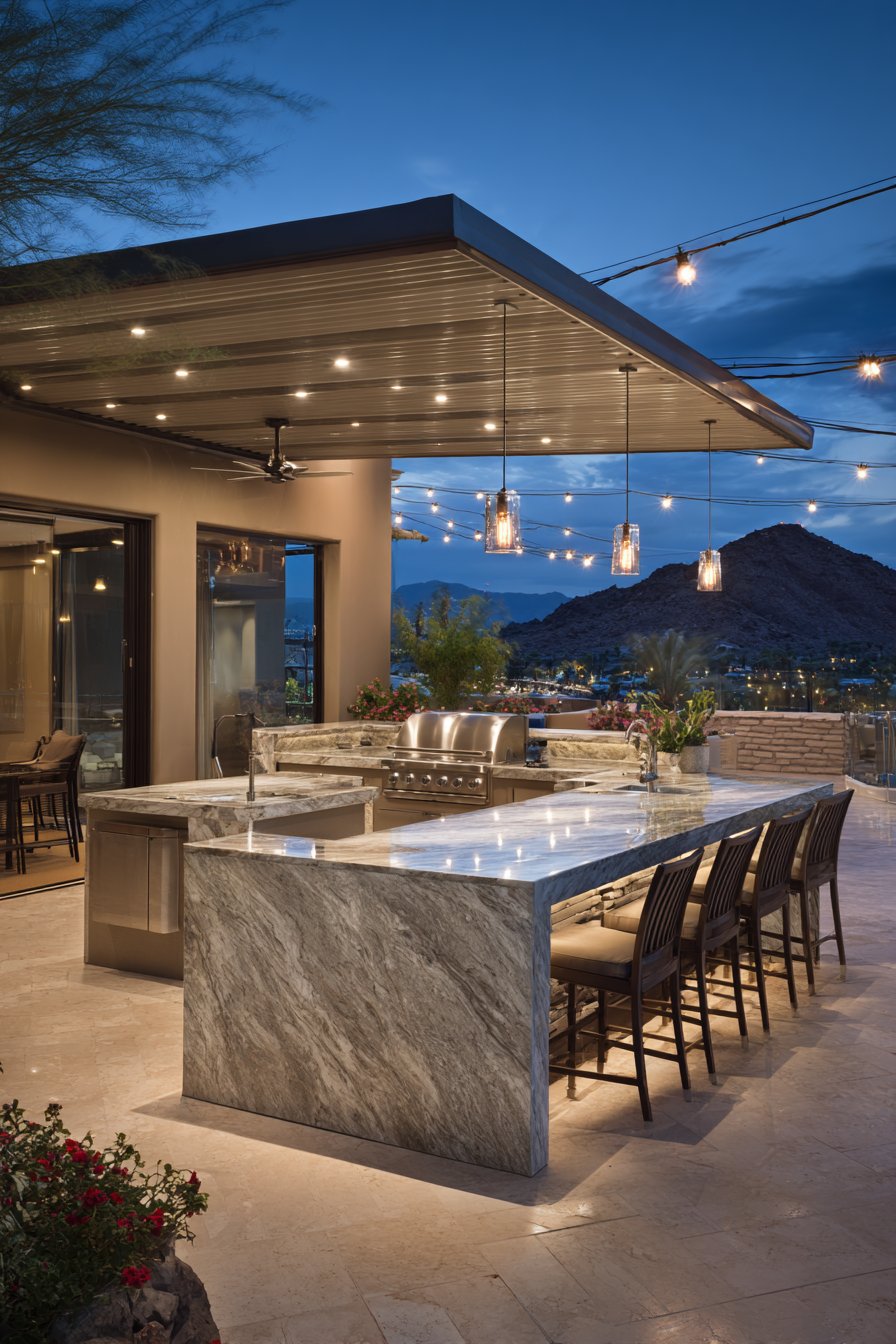
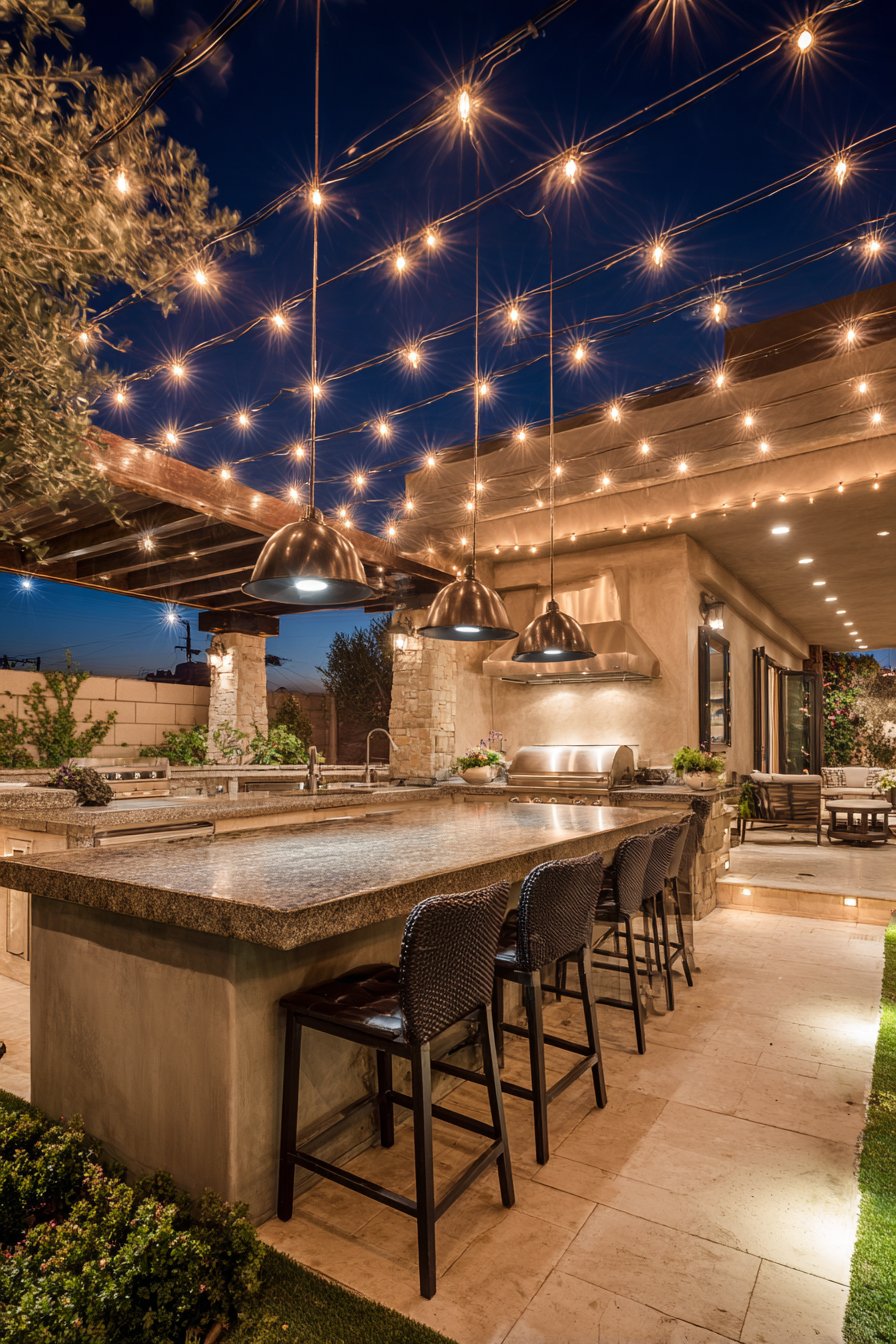
Ambient lighting creates atmosphere while providing general illumination for your outdoor space. String lights and pendant fixtures add charm above dining areas and social zones. Use dimmable LED bulbs to adjust brightness levels based on mood and activity. Warm color temperatures (2700-3000K) create inviting environments that complement outdoor settings better than cool white alternatives.
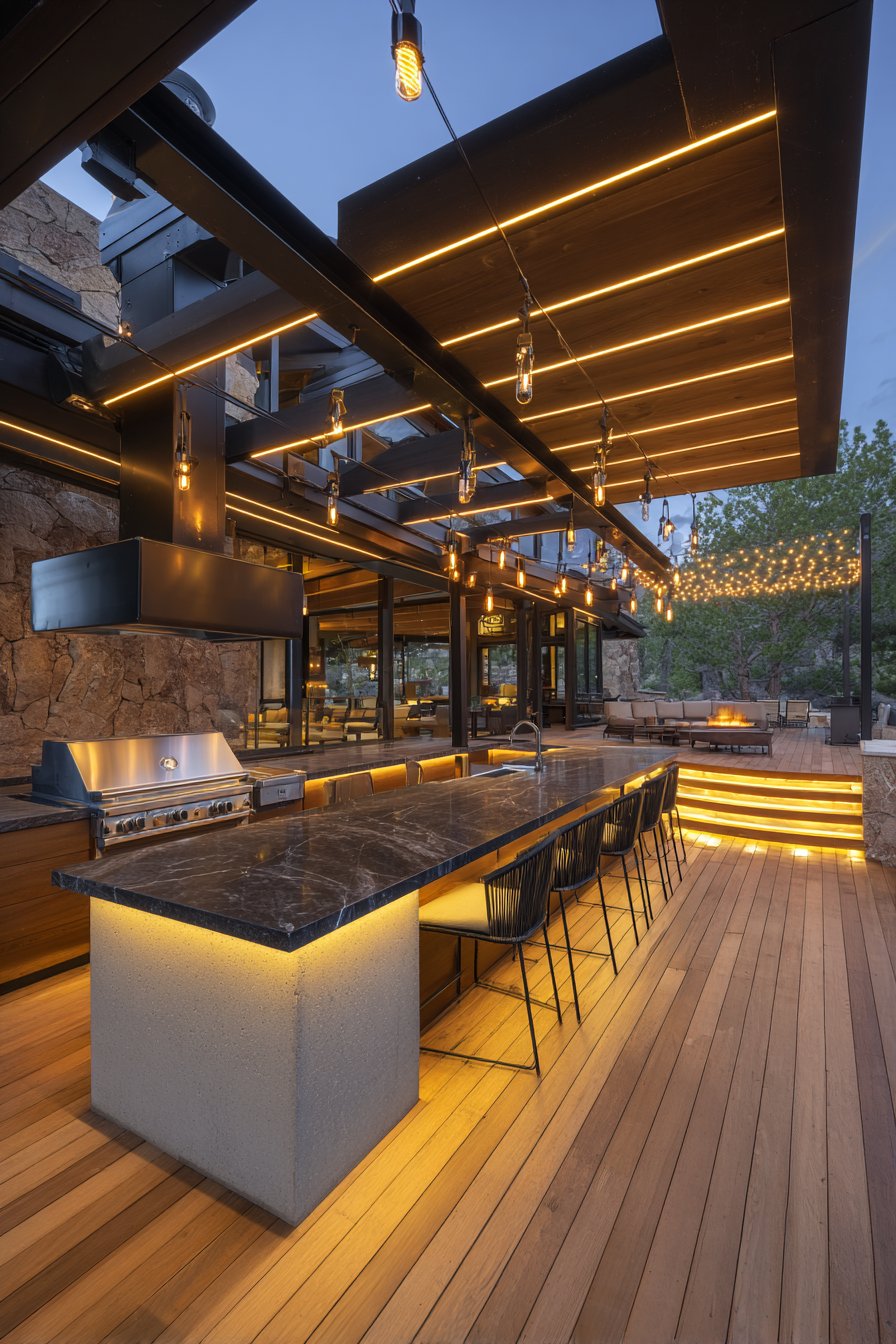
Pathway and accent lighting enhance safety while highlighting architectural features. Low-voltage LED systems reduce energy consumption and installation complexity compared to line-voltage alternatives. Illuminate stairs, grade changes, and walkways leading to your kitchen. Add accent lights to showcase landscaping, water features, or structural elements that define your outdoor living space.

- Install separate switches for task, ambient, and accent lighting zones
- Use weatherproof fixtures rated for wet locations
- Choose LED bulbs for energy efficiency and long lifespan
- Include dimmer controls for adjustable mood lighting
- Position task lights to minimize shadows over work surfaces
- Add motion sensors for pathway lighting and security
7. Ensure Proper Utility Connections and Infrastructure
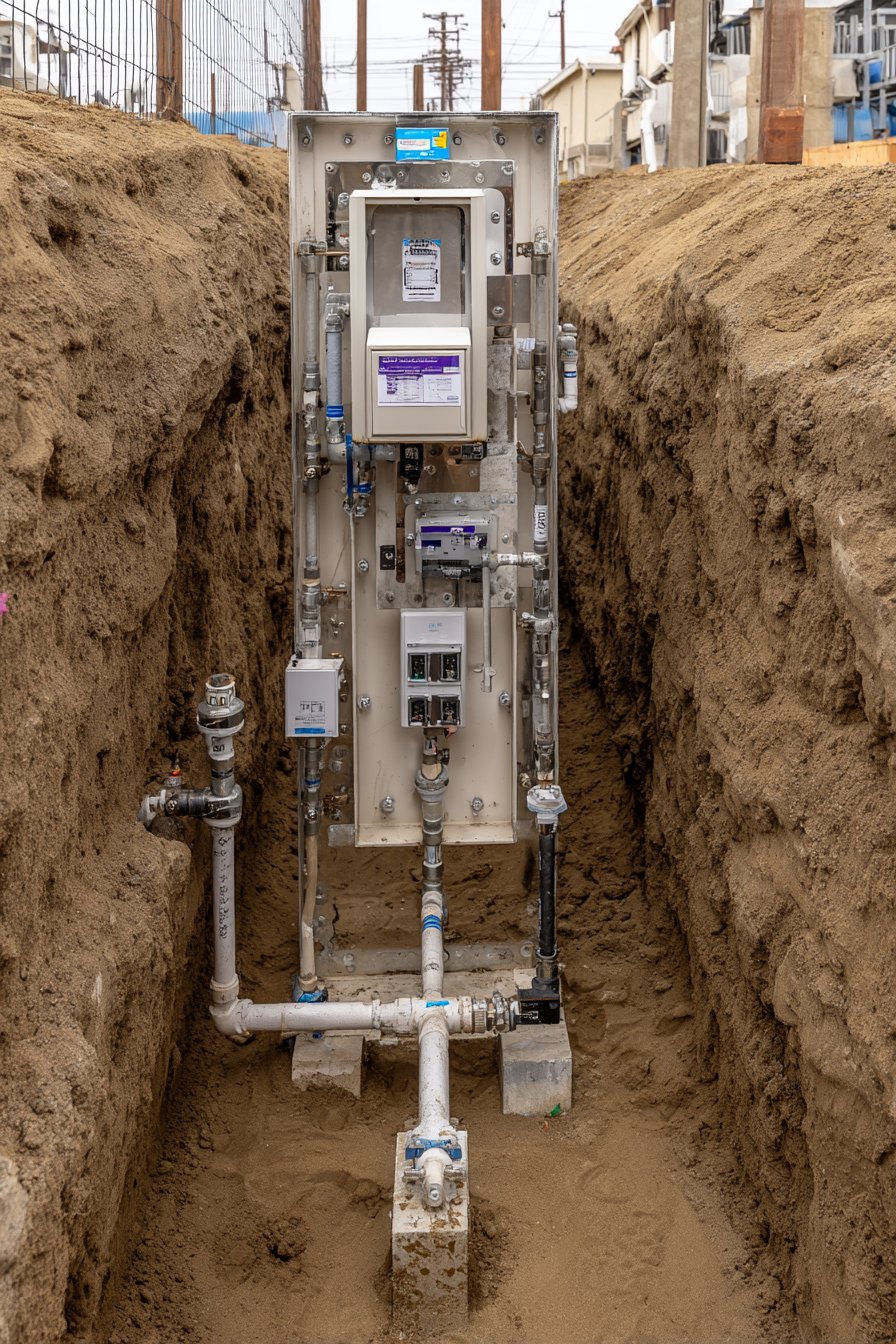
Gas line installation requires professional expertise and local permit approval. Natural gas provides unlimited fuel supply without tank changes, though initial installation costs more than propane alternatives. Size gas lines appropriately for all planned appliances—undersized lines reduce performance and create safety hazards. Install manual shutoff valves in accessible locations for emergency situations.
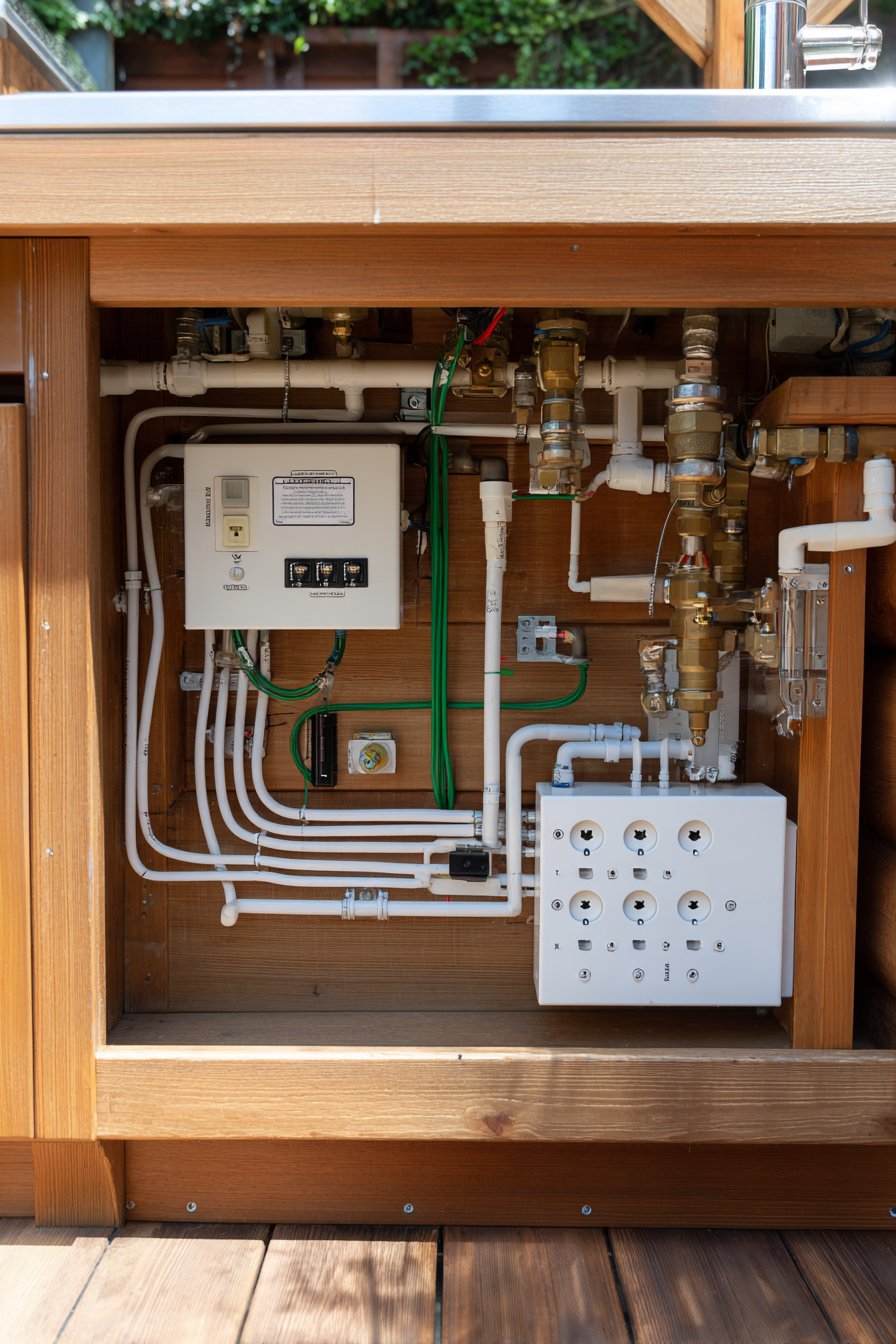
Electrical infrastructure powers lighting, refrigeration, and small appliances safely. Dedicated circuit breakers prevent overloading your home’s electrical system. Outdoor kitchens typically require 2-3 dedicated 20-amp circuits minimum. All outlets must be GFCI-protected and housed in weatherproof boxes with spring-loaded covers. Bury electrical lines at proper depths according to local codes.

Plumbing connections bring water to sinks and ice makers while removing wastewater efficiently. Frost-free faucets prevent freeze damage in cold climates. Install shutoff valves inside your home for winter drainage in freezing regions. Plan drainage carefully to prevent standing water—slope drain lines at minimum 1/4 inch per foot. Consider gray water drainage systems to avoid overloading septic systems with outdoor kitchen wastewater.
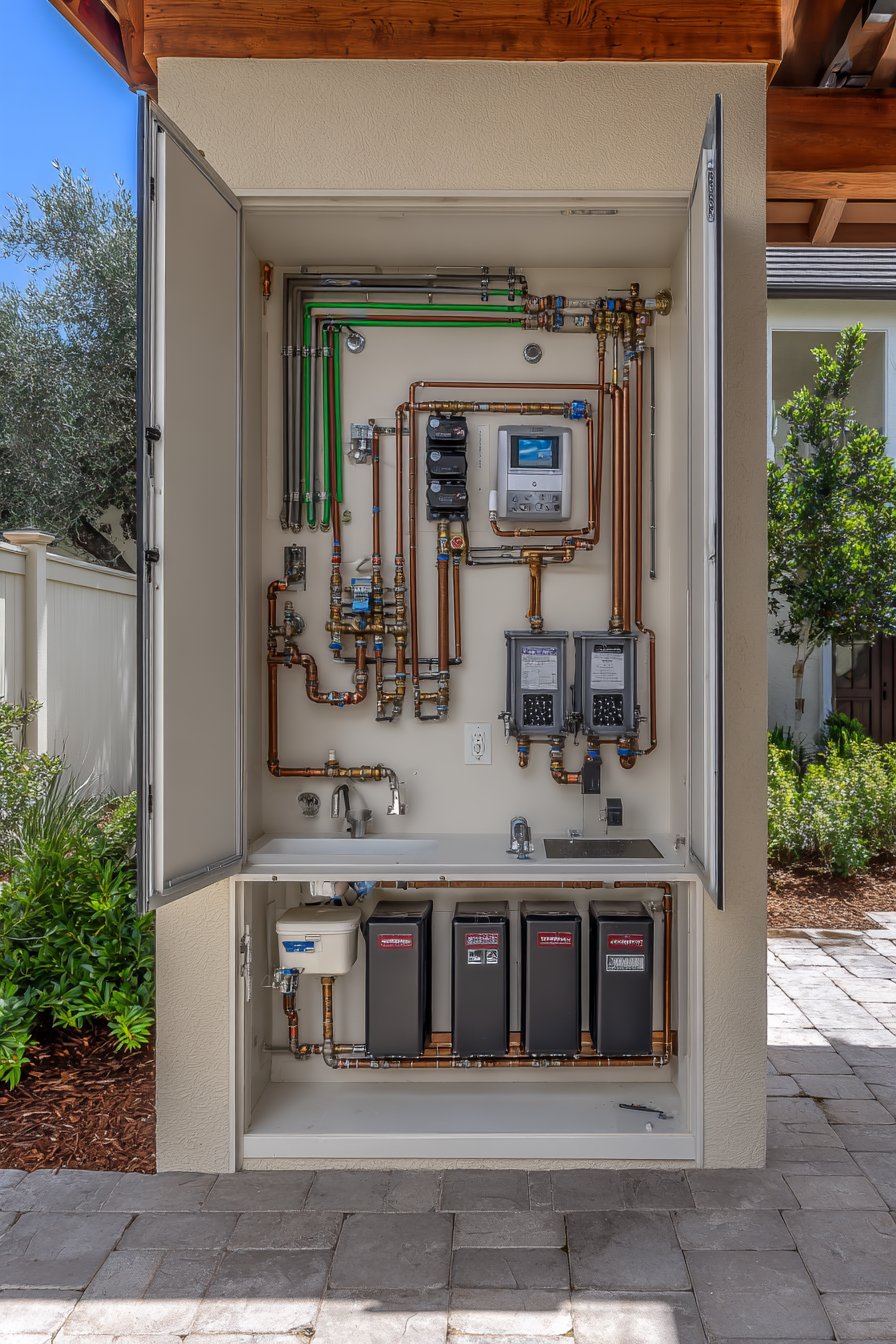
- Hire licensed professionals for all gas, electric, and plumbing work
- Obtain necessary permits before starting utility installations
- Install whole-system shutoffs accessible from inside your home
- Bury utility lines below frost depth in cold climates
- Add floor drains in covered kitchen areas for cleanup
- Include outdoor-rated outlets every 6 feet along counter runs
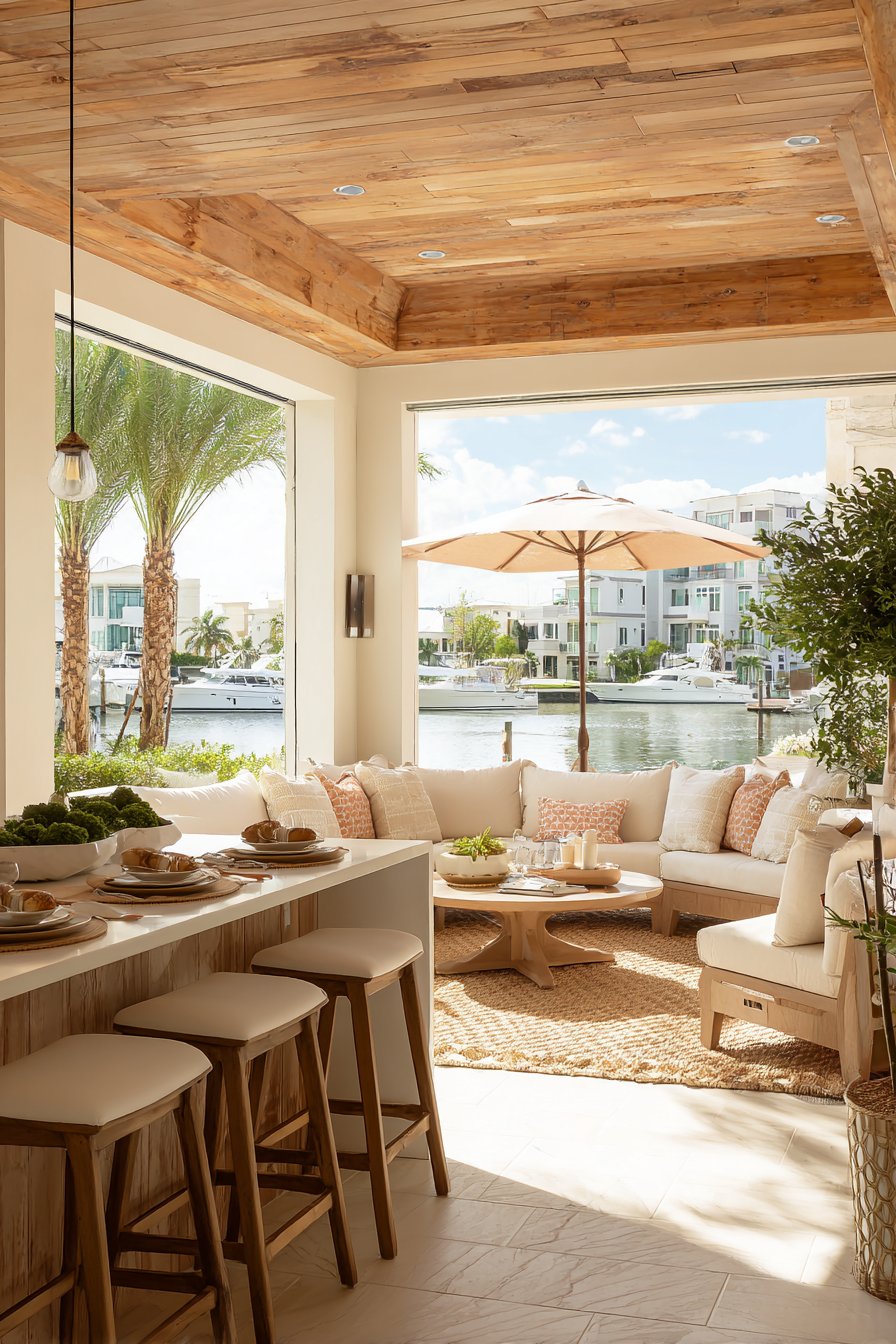
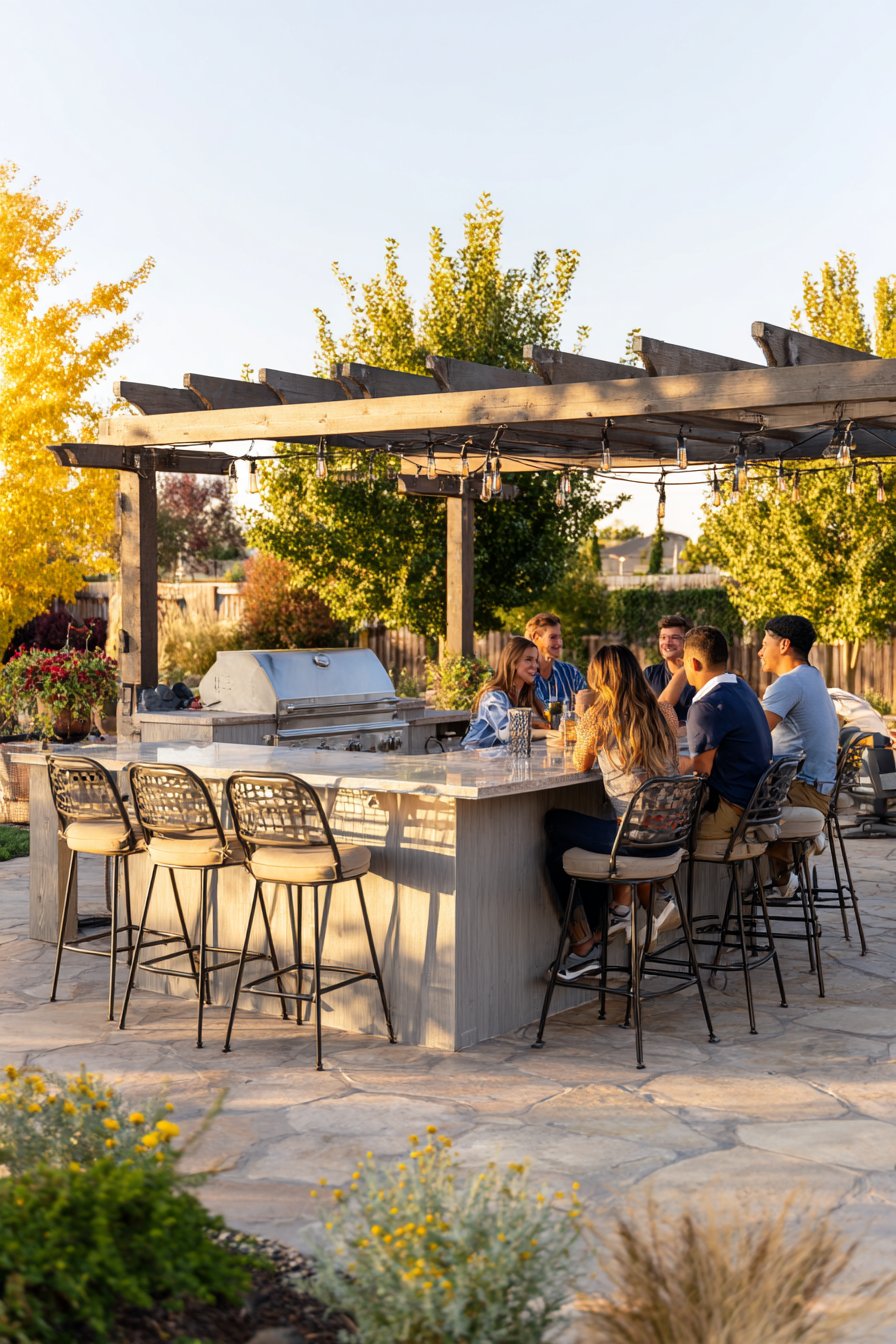
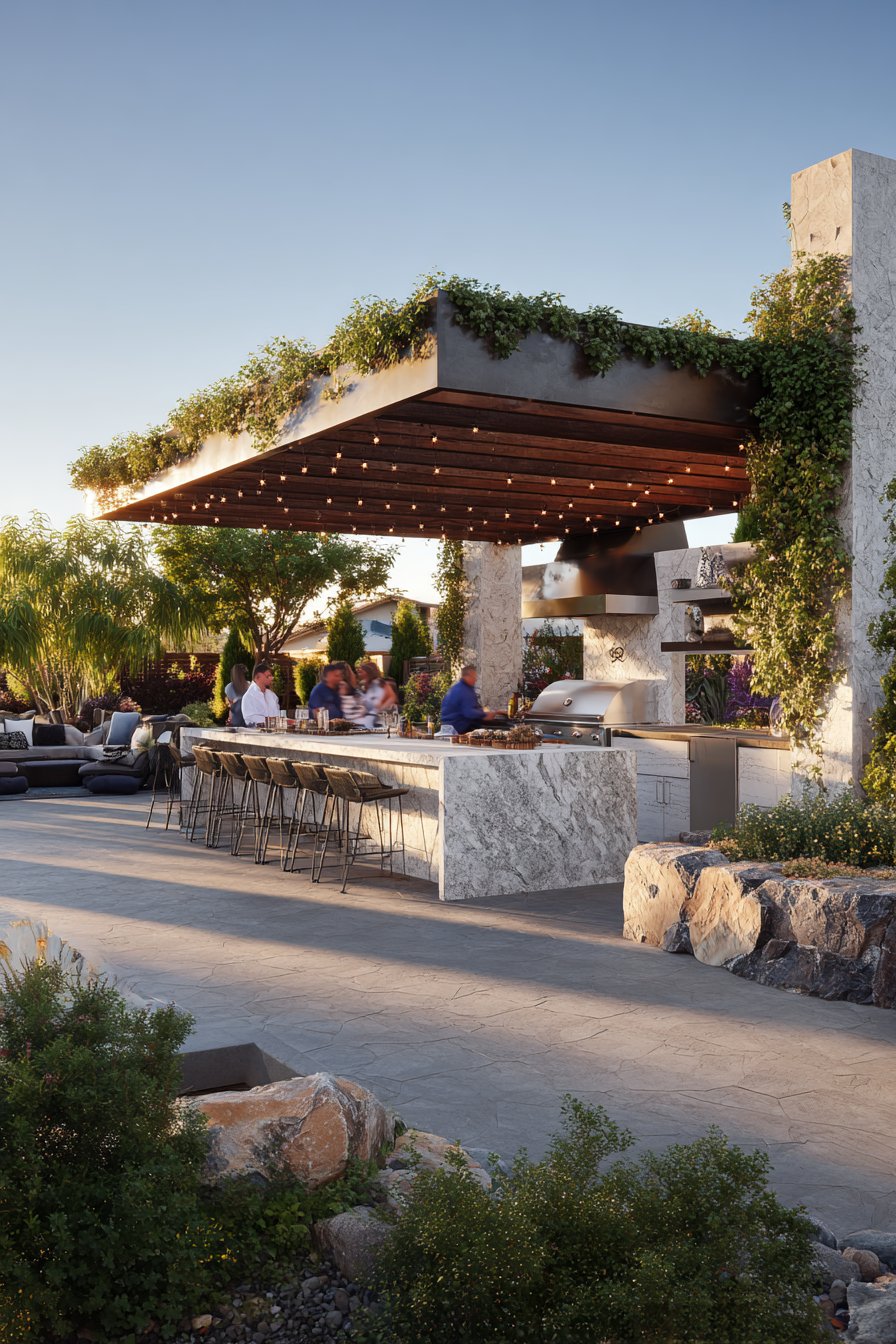
8. Add Comfortable Seating and Dining Areas
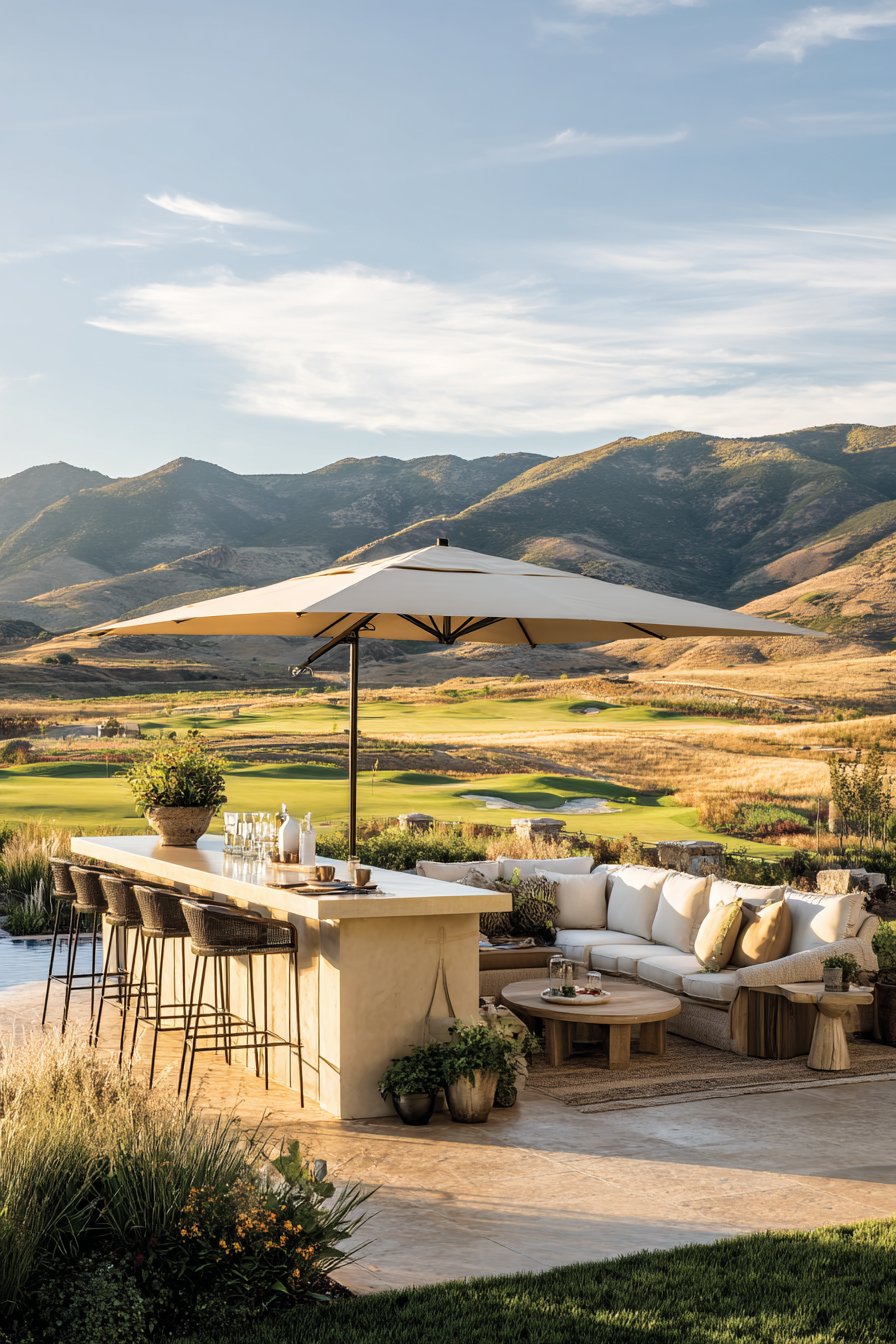
Bar-height seating along your kitchen perimeter encourages guest interaction while you cook. Install a raised bar section with 12-15 inches of overhang for comfortable knee clearance. Counter height (36 inches) requires 24-inch bar stools, while bar height (42 inches) needs 30-inch stools. Allow 24-30 inches of width per seat to prevent crowding.
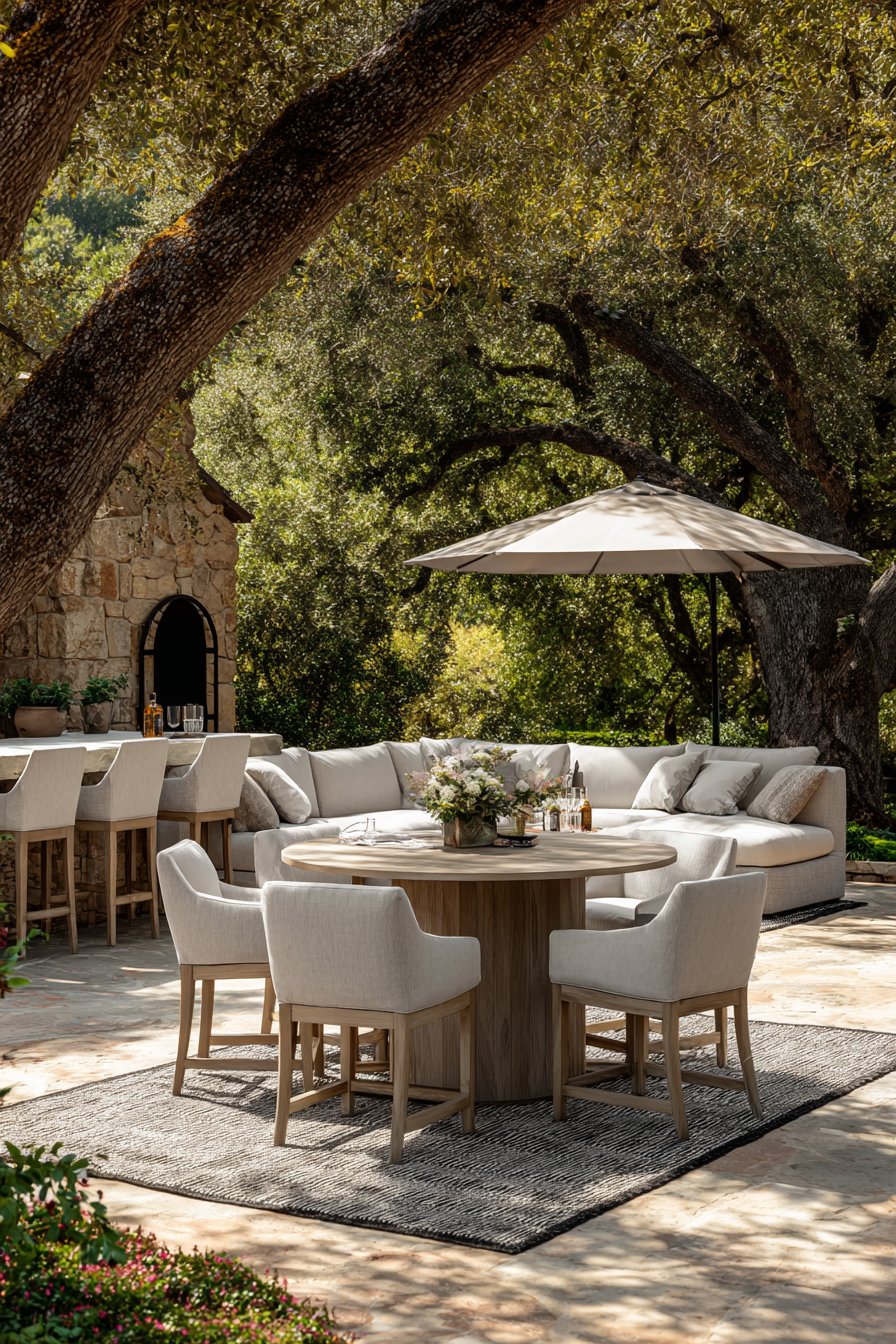
Separate dining areas create dedicated spaces for enjoying finished meals. Weather-resistant dining sets withstand outdoor exposure while providing comfortable seating for extended periods. Choose tables sized appropriately for your typical guest count—a 60-inch round table accommodates six people comfortably. Position dining areas within convenient serving distance from your kitchen but separate from cooking zones.
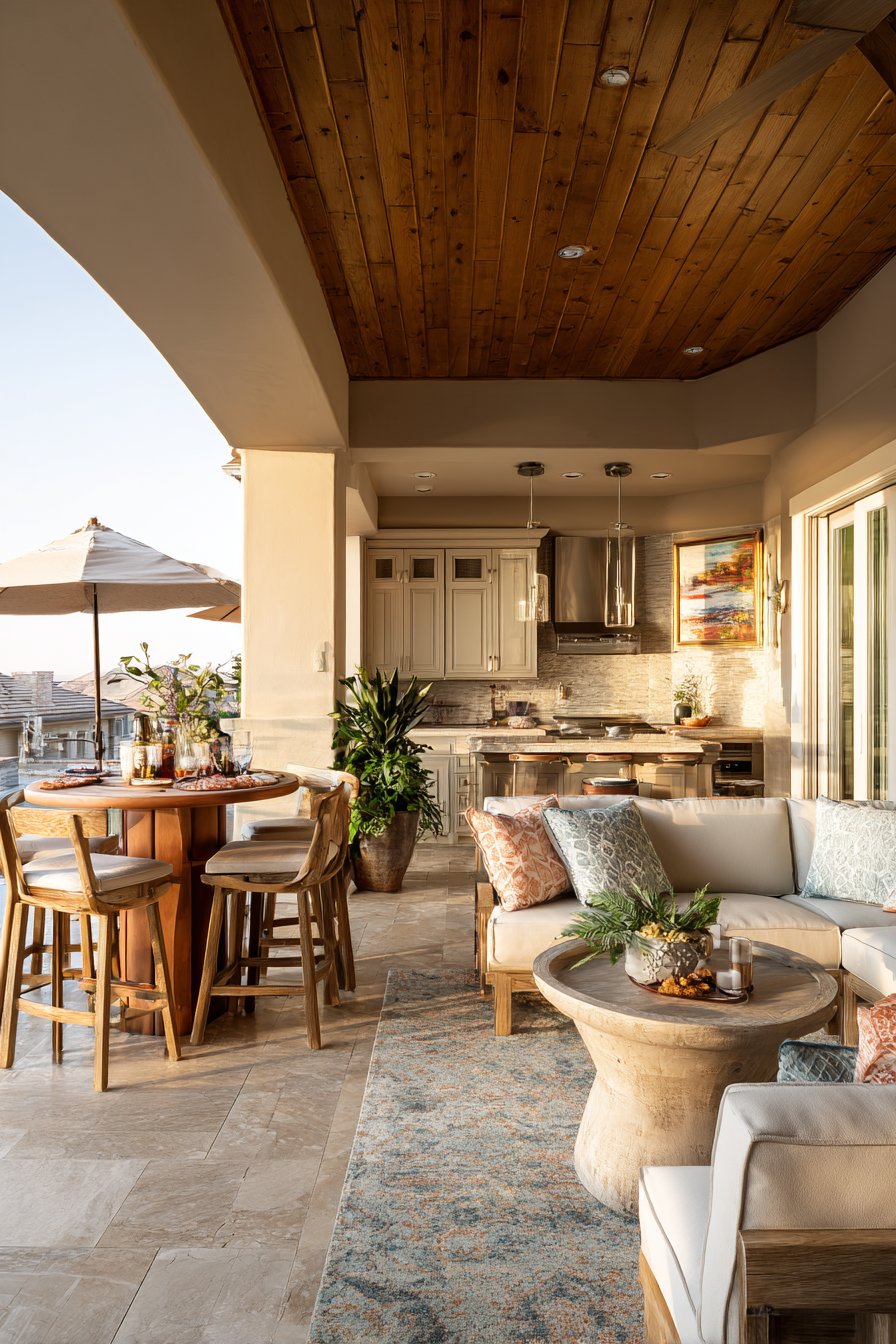
Lounge seating extends your outdoor living beyond meal times. Sectional sofas and comfortable chairs transform your backyard into true living space. Select furniture with fade-resistant, quick-drying cushions specifically designed for outdoor use. Create conversation groupings that encourage social interaction while maintaining clear pathways to your kitchen and dining areas.
- Allow 24-30 inches of space per person at bars and tables
- Choose furniture with rust-proof aluminum or teak frames
- Include shade options over dining areas for daytime comfort
- Add outdoor rugs to define separate functional zones
- Install ceiling fans in covered areas for air circulation
- Consider built-in bench seating with storage underneath
9. Implement Fire Safety and Ventilation Systems
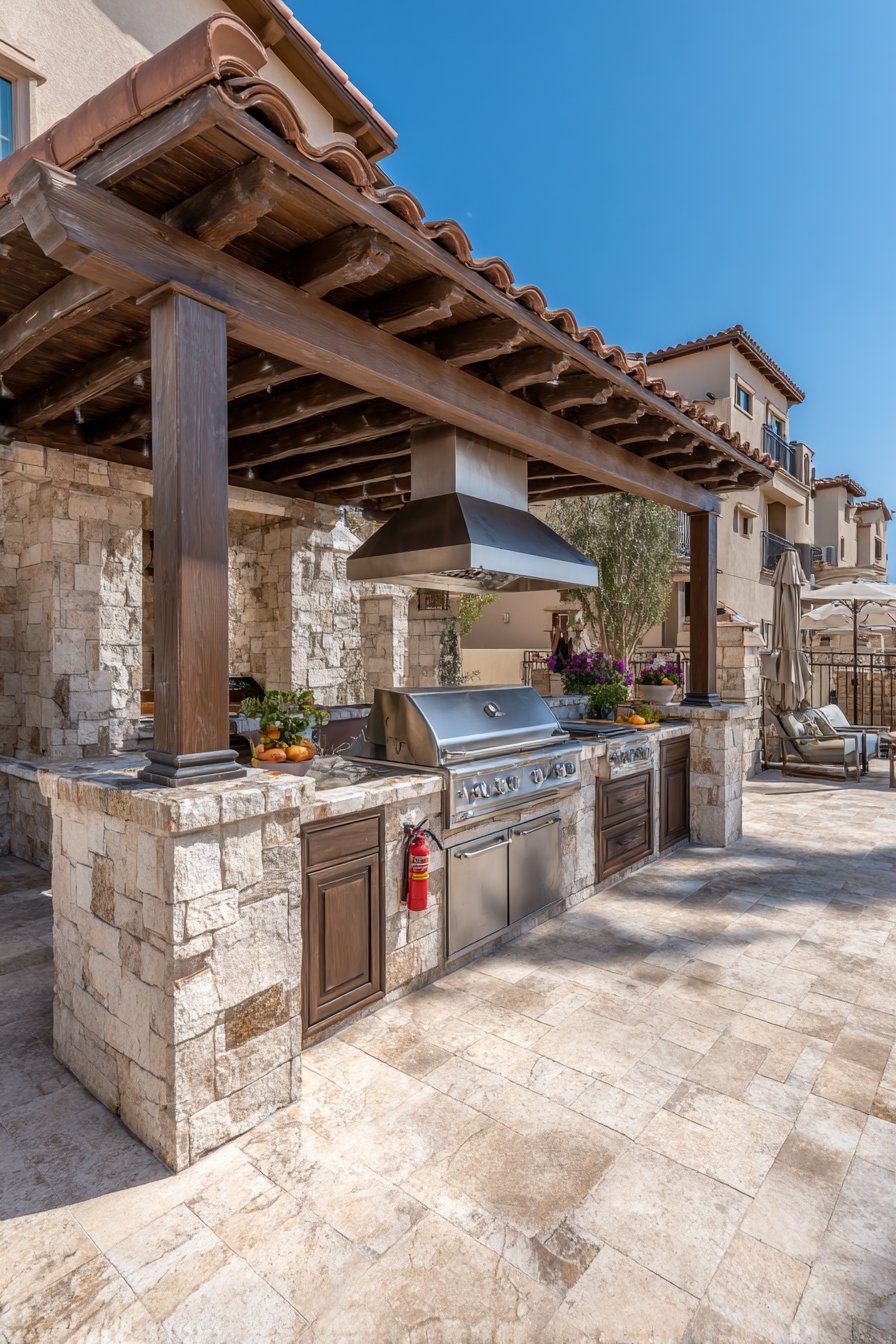
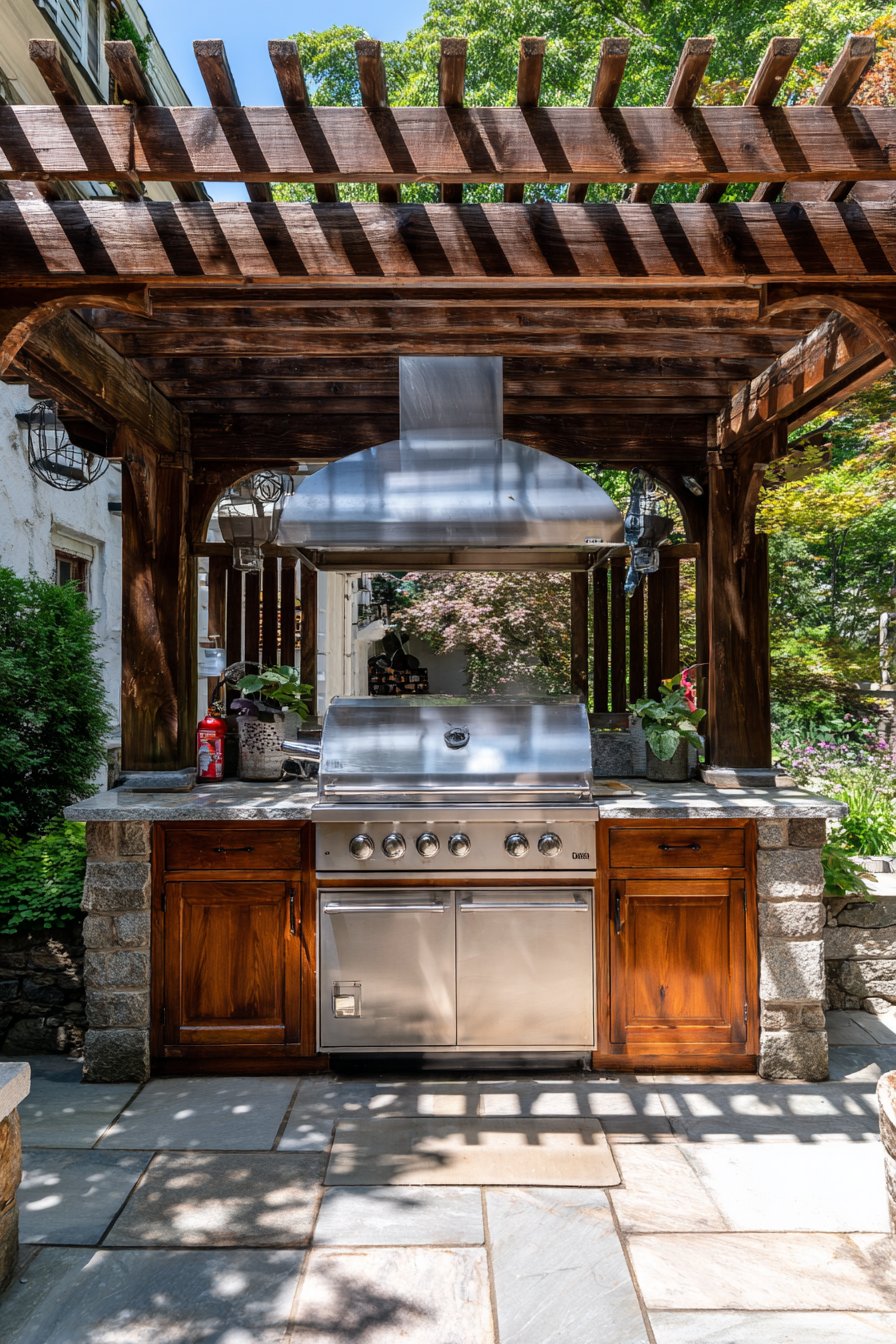
Proper ventilation prevents smoke accumulation while protecting overhead structures from heat damage. Range hoods designed for outdoor use capture grease and smoke effectively. Install hoods 24-30 inches above cooking surfaces for optimal capture without interference. Ducted systems that vent smoke away from living areas work better than recirculating models in outdoor settings.
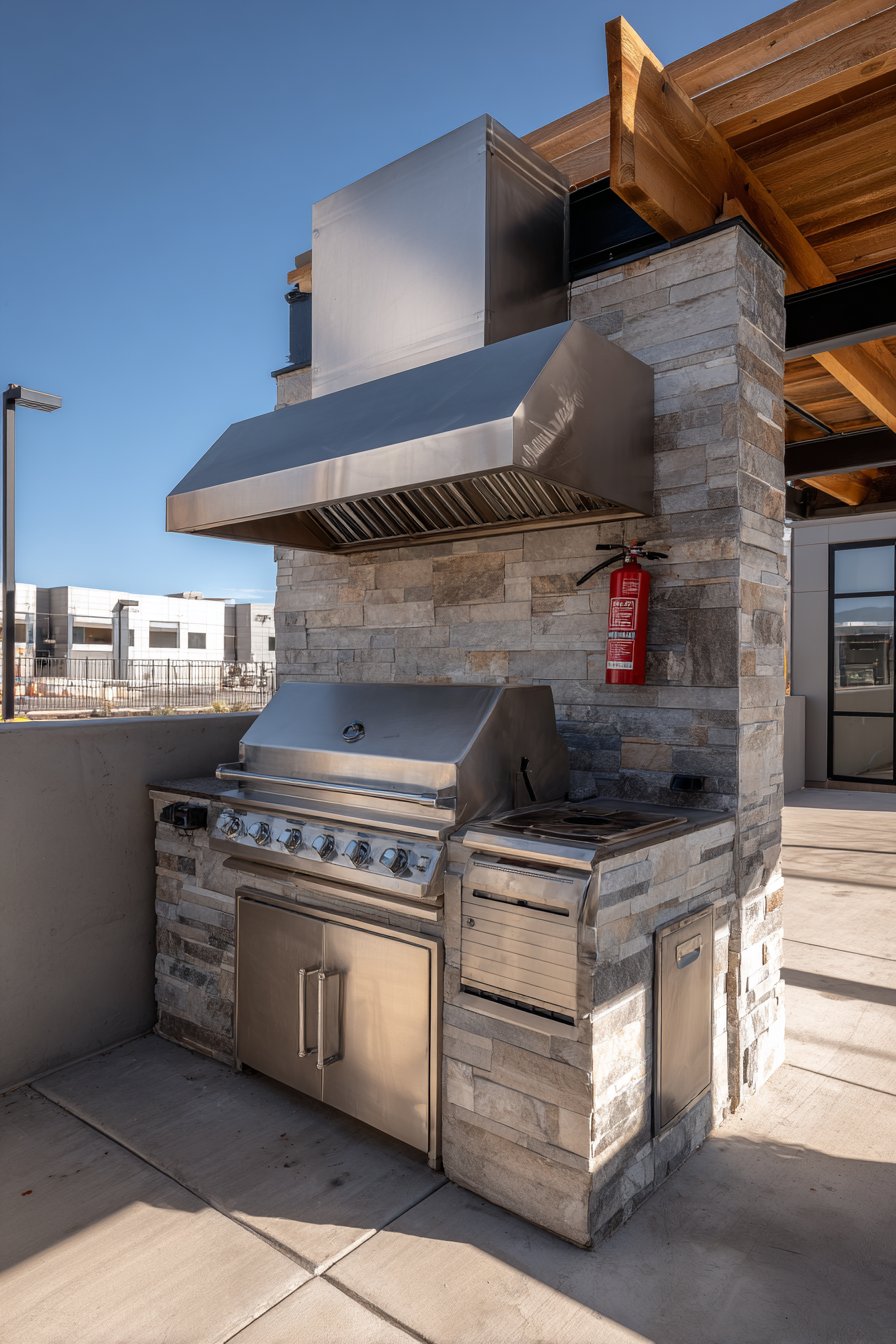
Fire safety equipment provides essential protection for your outdoor cooking area. ABC-rated fire extinguishers handle grease, electrical, and common combustible fires. Mount extinguishers within easy reach but away from potential fire sources—typically 10-15 feet from grills. Check pressure gauges monthly and replace or service units annually to maintain readiness.
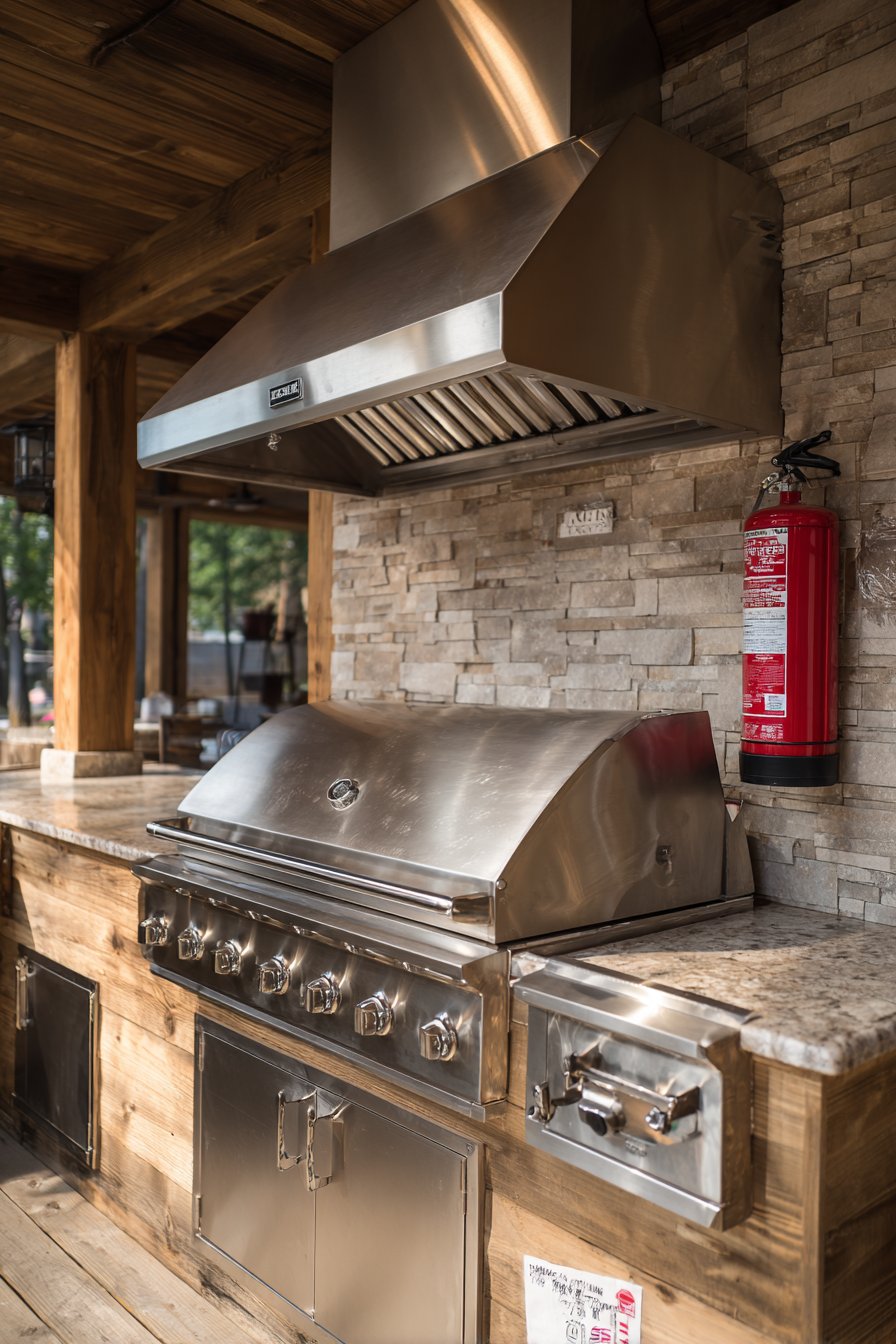
Clearance requirements prevent structure fires and ensure safe operation. Minimum 3-foot spacing between grills and combustible materials protects wooden structures, pergolas, and overhead coverings. Never install grills under low ceilings or enclosed spaces without commercial-grade ventilation systems. Include heat shields behind grills when space limitations prevent adequate clearance from walls or cabinetry.
- Install UL-listed outdoor range hood with proper CFM rating
- Mount fire extinguisher where visible but protected from weather
- Maintain 10-foot clearance from low tree branches
- Use non-combustible materials within grill splash zones
- Install heat-resistant backsplash materials behind cooking areas
- Keep grill covers, cushions, and flammables away from heat sources
10. Budget Wisely and Phase Your Project
Initial cost planning prevents mid-project surprises and financial stress. Basic outdoor kitchens start around $3,000-$5,000 for simple grill islands, while elaborate setups exceed $30,000-$50,000. Allocate 30% of your budget to appliances, 40% to structure and materials, 20% to utilities and installation, and 10% to finishing touches. Include a 15-20% contingency for unexpected expenses.
Phased construction spreads costs across multiple budget cycles. Start with essential elements—grill, basic counter space, and minimal storage. Add refrigeration, sinks, and expanded storage in phase two. Incorporate luxury features like pizza ovens, warming drawers, and elaborate seating in later phases. This approach allows you to enjoy your outdoor kitchen sooner while managing cash flow effectively.
Cost-saving strategies maintain quality without breaking your budget. DIY-friendly tasks like painting, basic landscaping, and simple assembly reduce labor expenses. Purchase floor models or last-season inventory at significant discounts. Consider mid-range appliance brands that offer reliability without premium price tags. Focus spending on structural elements and weather-exposed components that directly impact longevity and performance.

- Get multiple contractor quotes before selecting installation professionals
- Shop end-of-season sales for appliances and furniture
- Handle simple tasks yourself while hiring pros for complex work
- Prioritize quality in weather-exposed components over hidden elements
- Research rebates and incentives for energy-efficient appliances
- Document all expenses for potential home value assessments
Conclusion
Building a functional backyard kitchen requires careful planning across multiple dimensions—from location selection to material choices, appliance integration, and utility connections. Each decision impacts your kitchen’s performance, durability, and enjoyment for years to come. The investment in thoughtful design pays dividends through enhanced property value and countless memorable gatherings with family and friends.
Start your project with realistic budget expectations and clear priority lists. Whether you build in phases or complete construction in one ambitious push, maintain focus on functionality over flashy features. A well-designed outdoor kitchen that matches your cooking style and entertaining needs will become the heart of your backyard, extending your living space and creating new opportunities for connection. Take time to plan properly, invest in quality where it matters most, and soon you’ll be creating culinary masterpieces under the open sky.
"As an Amazon Associate, I earn from qualifying purchases."